Solvemix

Suche Spickipedia

  • Home
  • Android Smartphones
  • iOS Smartphones
  • Blackberry Smartphones

Xiaomi Pocophone Hide Navigation Bar - Tip

Details
Manuel
Android Smartphones
Year 2019

You can hide the navigation bar on the Xiaomi Pocophone on which the Home button, Back button, Task Manager button, etc. is attached.

Then you can use gestures to perform the above mentioned functions.

Our article now describes how to hide the navigation bar on the Xiaomi Pocophone.

1. Open the Xiaomi Pocophone settings.

2. Navigate to "Full Screen Diplay".

3. Here you can now select the following options:

  • Buttons
  • Full Screen Gestures

4. Select "Full Screen Gestures" to hide the navigation bar.

After that they are no longer visible and you can navigate through gestures without the navigation bar.

Xiaomi Pocophone connection speed – How to activate

Details
Manuel
Android Smartphones
Year 2019

You can display the connection speed on the Xiaomi Pocophone within the status bar (When dragging down).

This way you can always see how fast data is sent or received via W-Lan or the mobile network.

Perhaps a very interesting feature if you're looking for technical information, so we'd like to explain how to enable it on the Xiaomi Pocophone:

Xiaomi Pocophone Activate the display of the connection speed

1. Open the settings of the Xiaomi Pocophone

2. Navigate here to "System & Device" and then to "Notifications & Status Bar"

3. Here you can now use the slider at "Show connection speed" to display this.

The connection speed will only be displayed if you drag the status bar from the top to the screen. Otherwise there is not enough space for this.

You now know how to activate or deactivate the connection speed in the status bar of the Xiaomi Pocophone.

Xiaomi Pocophone Disable Mobile Operator Name on lock screen

Details
Manuel
Android Smartphones
Year 2019

Your will display the mobile operator name on the lock screen at the factory. However, you can also hide the name of the mobile operator if you wish.

How this works in the Android settings of the Xiaomi Pocophone is explained here:

1. Open on the Xiaomi Pocophone the settings

2. Open here "notifications and status bar".

3. In the middle of the options you now see: Show mobile operator

4. Select the menu item and the following options will appear:

  • Never show provider name
  • Only show on lock screen

Selects now “Never show provider name” here, in order not to show the mobile provider on the lock screen anymore.

Samsung Galaxy A7 (2018) How do I take a screenshot? Solved!

Details
Manuel
Android Smartphones
Year 2019

If you would like to take a screenshot with the new Samsung Galaxy A7 (2018), then of course this works the same way as with many other smartphones:

If the Samsung Galaxy A7 (2018) is your first Android smartphone, then we would like to explain here how you can take such a screenshot.

Please proceed as follows:

Screenshot key combination Samsung Galaxy A7 (2018) - Simplest method

1. First, display what you want to save in the screenshot

2. Press and hold the following keys simultaneously for at least 2 seconds:

  • Power On-Off Button
  • Volume down key

3. This will now trigger the screenshot on the Samsung Galaxy A7 (2018).

You now know how to take a screenshot quickly and easily using a key combination.

Samsung Galaxy S8 OK Google no more sound – solved

Details
Manuel
Android Smartphones
Year 2019

If you use the language assistant "OK Google" on your Samsung Galaxy S8, then it can happen that you do not receive acoustic feedback by a sound or sound according to the statement of the command.

This can be annoying under certain circumstances and that's why we'll explain here how to work around the problem in most cases:

Samsung Galaxy S8

1. To do this, please open Settings

2. On your Samsung Galaxy S8. Navigate to Button Access

3. Activate the option "Button Access" Alternatively: enter Button Access in the search bar of the options.

This will cause the OK Google command to be acknowledged as usual with an acoustic sound on your Samsung Galaxy S8.

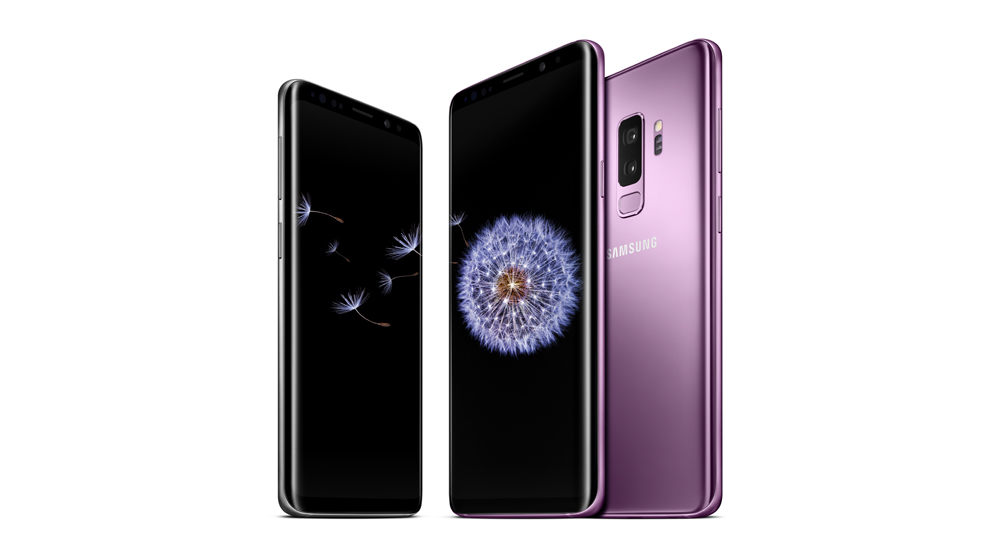
Samsung Galaxy S9 How to Activate Dual Audio - Bluetooth 5.0

Details
Manuel
Android Smartphones
Year 2019

The "Dual Audio" function allows you to send music or other audio files from your Samsung Galaxy S9 to two different Bluetooth devices at the same time and listen to them.

This means, for example, that you can use two pairs of headphones, such as the Bose Quiet Comfort II, at the same time, or control two speaker boxes.

Activating Dual Audio on the Samsung Galaxy S9

Samsung Galaxy S9

First, you need to connect both Bluetooth headphones or speakers to your Samsung Galaxy S9. Then proceed as follows:

1. Open the settings and navigate to "Connections"

2. Select Bluetooth and make sure that Bluetooth is switched on on the Samsung Galaxy S9.

3. Tap on the three-point icon at the top right

4. Select "Dual Audio" from the context menu

5. Activate the option using the slider. The music from your Samsung Galaxy S9 will then be transferred to both connected Bluetooth devices simultaneously.

You now know how to use the Dual Audio function of the Samsung Galaxy S9.

Samsung Galaxy S8 Dual Audio use with Bluetooth – Tip

Details
Manuel
Android Smartphones
Year 2019

The Samsung Galaxy S8 has the technology standard Bluetooth 5.0. One of the advantages of 5.0 is the ability to connect multiple speakers via Bluetooth.

For example, two Bluetooth headphones can be connected to the smartphone. Below we describe how you can activate and use Dual Audio on the Samsung Galaxy S8:

Samsung Galaxy S8

First you need to connect both Bluetooth headphones or speakers to the Samsung Galaxy S8.

Then proceed as follows:

1. Open the settings and navigate to "Connections".

2. Select Bluetooth and make sure that Bluetooth is turned on on the Samsung Galaxy S8.

3. Tap on the three-point icon at the top right.

4. Select "Dual Audio" from the context menu.

5. Activate the option using the slider.

You can now operate your headphones or speakers wirelessly from 10 meters away from the Samsung Galaxy S8.

You now know how to activate and use Bluetooth 5.0 or Dual Audio on the Samsung Galaxy S8.

Garmin Vivoactive HR Weather Widget does not work

Details
Manuel
Android Smartphones
Year 2019

On the Garmin Vivoactive HR a weather widget is already pre-installed. You may notice that this weather widget does not work, no weather data is displayed and the message "Waiting for data" is displayed.

If this is the case with your Garmin Vivoactive HR, please proceed as follows to correct the error:

Please check the following settings first:

The Garmin Vivoactive HR is connected to the smartphone via the Garmin Connect Mobile App. Bluetooth on the smartphone is switched on.

The GPS on your smartphone is activated If these requirements fit, then you can continue as follows:

iOS Smartphone Settings

1. Open "Settings" and navigate to "Privacy".

2. Go to "Location Services".

3. In the list of apps for Location Services select "Connect" (Garmin app).

4. Select "Connect" in the list of apps for "Location Services".

5. Make sure that the option "Access to Location Services" for this app is set to "Always".

6. You must now restart your Garmin Vivoactive HR.

The weather should then be displayed again on the Garmin Vivoactive HR.

Android Smartphone Settings

Depending on the Android Smartphone the procedure is different:

1. Open the settings

2. Navigate to "Apps"

3. Search the apps for the "Garmin Connect" app and tap

4. Go on to "permissions" in the app info

5. Set the permission for location sharing to active

6. You now have to restart your Garmin Vivoactive HR

Then the weather should be displayed on the Garmin Vivoactive HR again.

We hope that our tips have helped you to get the weather widget to display weather data on the Garmin Vivoactive HR.

Creating a screenshot within the BIOS – How it works

Details
Manuel
Android Smartphones
Year 2019

If you change options in the BIOS settings on your computer in order to adjust or optimize the system, it makes sense to create a screenshot first.

This way you always know which settings were present in the BIOS. But first you have to know how to make a screenshot in the BIOS.

We would like to describe this in more detail here:

Take a BIOS screenshot - Instructions

1. You need a USB memory stick formatted with the file system FAT32

2. Now connect the USB stick to your PC and restart the computer

3. Call up the BIOS during the boot process by pressing the corresponding button. These are often the keys:

  • Remove
  • F1
  • F2
  • F10

4. To make and take the screenshot, press the following key: F12

5. The attached USB stick will now be displayed, which you must now select as the storage location for the USB stick

6. Confirm the process with the Entre key.

The screenshot photo from the BIOS is now saved in the BMP file format on the USB stick. Now you know the procedure to make a screenshot in the BIOS of your PC´s.

Samsung Galaxy A7 (2018) Remove Widget from Home screen

Details
Manuel
Android Smartphones
Year 2019

With widgets, you can quickly display information on the home screen or use functions from apps.

If you have multiple widgets on your Home screen, you may want to remove some of them.

A widget can be removed quickly and easily on the Samsung Galaxy A7 (2018) as follows:

Note: Removal is not the same as uninstalling a widget!

1. On the Home screen of the Samsung Galaxy A7 (2018), display the widget you want to remove.

2. Press and hold the widget with your finger until it lifts and moves

3. At the same time, a recycle bin icon appears at the top - drag the widget onto it

4. When your fingertip touches the recycle bin, release the widget - it will be deleted

You have now successfully removed a widget from the home screen of your Samsung Galaxy A7 (2018).

You can now remove more widgets using the method described above.

More Articles ...

  1. Samsung Galaxy A7 (2018) How to add Widget to Home screen
  2. Samsung Galaxy S9 How to add an app to the home screen
  3. BlackBerry KEY One How to create Screenshot - Instructions
  4. Huawei P20 Pro Lock Screen How to delete Images – Tip
  5. Huawei P20 Pro always switches off automatically – Solved
  6. Setting up Huawei P20 Pro Call Barring – Instructions
  7. Xiaomi Pocophone Info on lock screen – Solved
  8. Samsung Galaxy A7 (2018) Open Secret Service Menu – Instructions
  9. Samsung Galaxy A7 (2018) Can the memory be extended? Info
  10. Samsung Galaxy A7 (2018) Which Sim card type is required? Solved
Page 37 of 317
  • Start
  • Prev
  • 32
  • 33
  • 34
  • 35
  • 36
  • 37
  • 38
  • 39
  • 40
  • 41
  • Next
  • End


  1. You are here:  
  2. Home

Imprint

Privacy Policy

Privacy and Terms of Google

Sitemap