Solvemix

Suche Spickipedia

  • Home
  • Android Smartphones
  • iOS Smartphones
  • Blackberry Smartphones

Xperia Ear Duo Reset to Factory Settings - Instructions

Details
Manuel
Android Smartphones
Year 2019

If you have problems with the Xperia Ear Duo and can no longer pair the headphones, for example, it makes sense to reset these to factory settings.

Note: All paired devices will be removed when you reset the Xperia Ear Duo!

Carry out factory reset Xperia Ear Duo

To do this, first remove the right earphone from the charger cradle. The LED display of the earphone will flash white twice when you switch on the earphones.

Now tap the earphone's touchpad three times quickly and hold your finger firmly on it the third time. Hold your finger on it until the LED lights up green four times.

This completes the reset to factory settings. The headphones will automatically restart and the blue LED should now flash.

This means that you can now pair the headphones again.

Xperia Ear Duo headset does not respond - solved

Details
Manuel
Android Smartphones
Year 2019

If you have an Xperia Ear Duo headset and it no longer responds correctly to control inputs or no longer plays music, you should restart it.

This can be done by means of a soft reset. Below we describe how to perform a soft reset on the Xperia Ear Duo:

Remove the right earphone from the charging cradle. The LED indicator should now flash white twice when the earphone is activated.

Press and hold the right earpiece touchpad with two thumbs and hold for a little more than 10 seconds.

The thumbs should be placed on both sides of the SONY logo, as this is the only way to detect the soft reset through the headphones.

The LED indicator on the earphone should now flash white twice again. The earphone will then restart and emit a sound.

This procedure must be performed for both earphones. Repeat the above steps for the left earphone of the Xperia Ear Duo Set.

iPhone Xs Max Sim card format

Details
Manuel
Android Smartphones
Year 2019

If you want to switch to the new iPhone Xs Max, then you may ask yourself whether your own Sim card can still be inserted into the new smartphone.

Many older models use a different Sim card format, such as the Standard or Micro Sim card. These do not fit into the iPhone Xs Max. For this reason we will tell you in the first step which Sim card the iPhone Xs Max needs and then in a second step what you can do to get such a Sim card:

Step 1: Sim card format of the iPhone Xs Max

The Sim card type needed in the iPhone Xs Max is the Nano Sim card. This is the smallest Sim card format currently available and used by most modern smartphones.

Step 2: How do I get a Nano Sim card?

Sim Card Punch

With a Sim Card Puncher and the matching template, you can easily create a Nano Sim card from an existing standard or Micro Sim card.

Sim Cards Perforation - Multi-Sim

Many Sim Cards are made in the form of a Multi-Sim. This means that you can easily extract a Nano Sim card from a standard or Micro Sim card. All you have to do is push out the Nano Sim card along the perforation.

A further alternative is to request the Sim card online from the respective service provider. Often this is however connected with costs in the range of 10 – 25$.

More information is usually available from the Online Service Center of your own mobile phone provider.

Now you know which Sim card iPhone Xs Max needs and what you can do yourself to get such a Sim card.

iPhone Xs Which SIM card do I need – Solution

Details
Manuel
Android Smartphones
Year 2019

If you want to switch to the new iPhone Xs, then you might ask yourself whether your own SIM card still fits into the new smartphone. Many older models use a different Sim card format. This might not fit into the iPhone Xs.

That's why in the first step we'll tell you which Sim card the iPhone Xs needs and in a second step what you can do to get such a Sim card:

Step 1: Sim card format of the iPhone Xs

The Sim card type needed in the iPhone Xs is the Nano Sim card

Step 2: How do I get a Nano Sim card?

Sim card punch

With a sim card punch and the matching template you can easily make a Nano sim card out of an existing standard or micro sim card. Such Sim card punchers are available for little money on Amazon.

Sim card perforation - Multi-Sim

Many Sim cards have been produced in the form of a Multi-Sim. This means that you can easily create a Nano Sim card from a standard or Micro Sim card. All you have to do is push out the Nano Sim card along the perforation.

A further alternative is to request the Sim card online from the respective service provider. Often this is however connected with costs in the range of 10 – 25$. More information is usually available from the Online Service Center.

Now you know which Sim card the iPhone Xs needs and what you can do yourself to get such a Sim card.

iPhone Xs Screenshot Methods Explained - Tip

Details
Manuel
Android Smartphones
Year 2019

The ability to take screenshots is probably one of the most important features of the iOS operating system.

The iPhone Xs offers you the possibility to take screenshots. A screenshot saves the display content of your iPhone Xs in a JPEG image file.

This allows you to quickly save information displayed on the iPhone Xs display and recall it later. The screenshot is known under the names screenshot, hardcopy, screen print, screen printing. The screenshot is mostly used for:

  • Problems and their description
  • Saving of address data
  • Phone numbers
  • Information etc. on websites
  • Documenting of high scores in games
  • And much more

On the iPhone Xs a screenshot can be taken as follows:

Screenshot Key combination iPhone Xs

1. On your iPhone Xs, display what is to be saved in a screenshot later

2. To trigger the screenshot, press the following keys simultaneously for at least two seconds: Power On/ Off button Volume Loud button

3. The screenshot is saved and briefly displayed. Here you can edit, share or save the screenshot for a short time.

Now you know the necessary steps to create a screenshot on iPhone Xs.

iPhone Xs Max How to create Screenshot - Instructions

Details
Manuel
Android Smartphones
Year 2019

The Screenshot function is one of the most important functions for many users. No wonder, because the screenshot is usually used several times a month to capture content on the screen.

Be it information, error messages or games high scores.

The screenshot is the means of choice. But how can you create such a screenshot on the iPhone Xs Max?

This is what we would like to show you here:

Screenshot key combination iPhone Xs Max

1. Display on your iPhone Xs Max what you want to save later in a screenshot

2. To trigger the screenshot, please press the following keys simultaneously for at least two seconds:

  • On / Off Button
  • Volume louder button

3. The screenshot is saved and briefly displayed.

Here you can now edit, share or save the screenshot for a short time.

Now you know how to create a screenshot with iPhone Xs Max by pressing a key combination.

Huawei Enable Call Waiting - Resolved

Details
Manuel
Android Smartphones
Year 2019

The Call Waiting function tells the user during a call whether another call is being received. A short tone sequence is played on a Huawei smartphone.

This will alert you that a new call is coming in.

You can then decide whether you want to hold the current call, end it or accept or reject the new call. However, call waiting is often not active and therefore we would like to explain how to activate this function on a Huawei smartphone:

Activating call waiting with the Huawei smartphone

From the Home screen, tap the phone icon. Scroll down or up until you see the menu box at the bottom of the screen.

Select "Settings" in this window. In the next submenu, tap on "Additional settings".

Press the "Call waiting" knob to switch the function on or off. You now know how to activate or deactivate call waiting on the Huawei smartphone.

From now on you will be notified about new incoming calls while you are on a phone call.

Blackberry Key2 LE Create Screenshot - Method

Details
Manuel
Android Smartphones
Year 2019

The BlackBerry KEY2 uses the same procedure to create a screenshot as other Android-based smartphones.

If the BlackBerry KEY2 is your first Android smartphone, we would like to show you how the screenshot is taken:

Screenshot key combination BlackBerry KEY2

Step 1: Display the content you would like to save in the screenshot

Step 2: Press these two keys simultaneously for about 2 seconds to take the screenshot.

  • Volume-Silent Button
  • Power On/ Off Button

The screenshot is now captured and can be viewed via the gallery app.

You know the screenshot key combination on the BlackBerry KEY2.

WhatsApp How to hide chats - Solved

Details
Manuel
Android Smartphones
Year 2019

Like many other users, you certainly use the messaging app WhatsApp on your smartphone. It's a great way to stay in touch with your friends and acquaintances.

If you don't want to be able to see at a glance who is sending you messages, you should hide them. But is that even possible? Can you hide chats in WhatsApp?

The answer is "yes". There's no special feature for that. However, you can use another function to do that. We would like to explain to you how this works:

Hide WhatsApp Chats - Tip

1. First open WhatsApp.

2. Navigate to the chat you want to hide.

3. Press and hold your finger on it, then select the "Archive" icon in the toolbar at the top.

4. The chat will be archived and appended to the bottom of the list of chats. The chat will no longer be visible, but only when you scroll down the chat list and tap on "Archived Chats".

But the whole thing has one disadvantage. As soon as the contact sends another message, the archived contact becomes active again and is at the top of your list!

Unfortunately, archiving chats is the only way to hide a chat in WhatsApp.

Samsung Galaxy S8 screen burn-in – Tip

Details
Manuel
Android Smartphones
Year 2019

If you have a Samsung Galaxy S8, then this is equipped with a so-called OLED display. These displays have a particularly good resolution and colour brilliance, but are also susceptible to "burning in".

The term "burn in" is used when a pixel of the display can no longer display certain colors as it did at the beginning because it has displayed a certain color for too long.

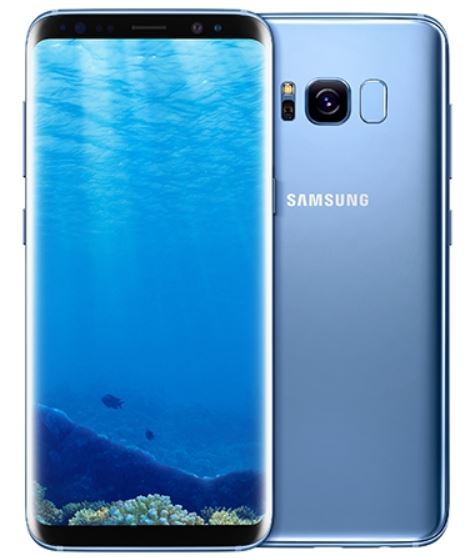
Samsung Galaxy S8

This is the case, for example, with bright colors in combination with a high display brightness.

To prevent this from happening with your Samsung Galaxy S8, follow these instructions to prevent pixels from burning into the display.

1. Don’t set display brightness to maximum permanently

2. Keep screen timeout as short as possible - we recommend a maximum of 2 minutes

3. Use dark colors, especially for background images. This also prevents the background image from burning in.

4. With apps, such as navigation apps, you should make sure that they do without bright static control elements.

This is the case with Google Maps, for example! If you take these tips to heart, you shouldn't have any problems with the Samsung Galaxy S8's burn-in display.

More Articles ...

  1. Apple Watch Screen Timeout Extend or Shorten
  2. iPhone: Disable screen activation on lift
  3. iPhone Change Display Order of Contacts - Last Name First Name
  4. iPhone How to sort contacts in order last name, first name? Solved
  5. Sony Xperia XZ3 No response to input - Resolved
  6. Creating Xiaomi Pocophone Screenshot – Tip
  7. Samsung Galaxy S9 Panorama Photo - Tip
  8. iPhone Xr waterproof? IP classification solved!
  9. Windows 10 Move Paging File - Instructions
  10. Garmin Fenix 5 Reset the device – Solved
Page 43 of 317
  • Start
  • Prev
  • 38
  • 39
  • 40
  • 41
  • 42
  • 43
  • 44
  • 45
  • 46
  • 47
  • Next
  • End


  1. You are here:  
  2. Home

Imprint

Privacy Policy

Privacy and Terms of Google

Sitemap