Solvemix

Suche Spickipedia

  • Home
  • Android Smartphones
  • iOS Smartphones
  • Blackberry Smartphones

Huawei Y5 & Y6 Wipe Cache Partition Perform - Solution

Details
Manuel
Solvemix

Sometimes over time, your Huawei Y5 & Y6 may not run as fast and smoothly as it did at the beginning. The battery may also become hot and quickly empty.

The Wipe Cache Partition usually offers a quick solution here. We will show you step by step how to perform a Wipe Cache partition on the Huawei Y5 & Y6:

Tutorial Wipe Cache Partition

1. Turn off the Huawei Y5 & Y6 completely

2. Then switch on the Huawei Y5 & Y6 again and keep the following key combination pressed simultaneously:

  • Power button
  • Volume Loud Button

3. Press and hold the buttons until the Huawei logo is no longer displayed on the screen and the screen is only black.

4. You can now release the buttons. This will now display the boot menu on your screen after a moment.

5. Now mark the entry "Wipe Cache Partition" with the volume keys of the Huawei Y5 & Y6.

Important!!! Do not accidentally go to "Wipe Cache Factory Reset" <-- This will erase all data on the internal memory.

6. The Wipe Cache partition, on the other hand, will not delete any private data from you.

7. If you have selected the correct entry, confirm this by pressing the Power key. The process will now be performed on your smartphone, which usually only takes about 1-2 seconds.

8. Then the boot menu appears again.

Select "Reboot system now" and confirm by pressing the Power key.

You have successfully run a Wipe Cache partition on the Huawei Y5 & Y6 and hopefully this will speed up the operating system and improve performance.

Huawei Y5 & Y6 MMS are not received - Tip

Details
Manuel
Solvemix

MMS are Multi Media SMS, as text messages to which a photo or video can be added. A very cool feature, but in the past it was strongly replaced by WhatsApp.

However, if you want to receive an MMS, you may not receive it, even though you know that the sender sent it.

If this is the case, please try the following trick to receive MMS.

Send an MMS from your Huawei Y5 & Y6. This step is necessary for some mobile providers in order to receive MMS.

Sounds strange, it is, but often this procedure helps to receive MMS on a smartphone like the Huawei Y5 & Y6.

Google Pixel 3 Which Sim card type do I Need - Solution

Details
Manuel
Solvemix

The question about the Sim card is one of the most important questions before thinking about or directly after buying a Google Pixel 3. What's the matter with you?

 There are currently three different types of Sim cards on the market.And only one of these three Sim Card sizes fits into Google Pixel 3.

This is currently the smallest format, the Nano Sim card.

This Sim card format is the most common variant for almost all smartphones. However, you may still have a Standard or Micro Sim card. If this is the case, then you now have the following options to get a Nano Sim map for Google Pixel 3:

Get Nano Sim Map for Google Pixel 3

Press out the perforation

You have a Sim card with nano perforation This is the simplest variant. Simply push the Nano Sim card out of the existing Sim card along the perforation.

Sim cards punching machine

you have a Sim Card without Nano-Perforation For this there are so called "Sim Cards Punchers". A Sim card punch, similar to a hole punch, cuts out the correct format from your Sim card when it is larger. Such Sim card punchers are already available for little money on Amazon.

Request from mobile phone provider

If the effort with the first two variants is too big for you, you can simply request a new Nano Sim card for Google Pixel 3 from your mobile phone operator. The hotline calls or orders a Sim card via the Online Service Center.

But keep in mind that this can also involve costs.

You now know the sim map type that your Google Pixel 3 needs and how to get it if you don't have the right format yet.

Huawei P20 Pro QR Code Scan – Tip

Details
Manuel
Solvemix

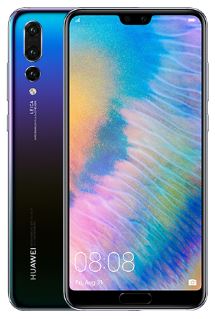
The Huawei P20 Pro has the possibility with the integrated camera QR codes to scan. QR stands for Quick-Reaction. Thus a web page, app or information can be transferred quickly via the QR code.

Such QR codes are usually printed on posters, packaging, postcards, invitations, visa cards, etc. Thus, information can be quickly transferred from paper to the Huawei P20 Pro.

The Huawei P20 Pro has fortunately integrated a QR Code Scanner ex works. We would like to explain where you can find and use this scanner.

Update:

If you are using the EMUI 9 or above the following instructions may not work anymore. Use Huawei Vision instead!

Using the QR Code Scanner from the locking screen of the Huawei P20 Pro

Huawei P20 Pro

Drag the function bar from the lower edge of the display upwards into the screen. Now tap on the Huawei Vision symbol.

Then you can scan a QR code with the camera.

Activate QR Code Scanner via the camera app of the Huawei P20 Pro

 Alternatively, the QR Code Scanner can also be opened directly via the camera app. Select the camera app and tap the eye symbol in the upper left corner of the live screen.

Then tap the following icon below to switch to the QR Code Scanner: You now know how to scan a QR Code on the Huawei P20 Pro.

OnePlus 6 Activate Camera Beauty Mode - Tip

Details
Manuel
Solvemix

The OnePlus 6 has several camera modes and setting options installed to help you take even more beautiful and colorful photos with your smartphone. One of them is called "Beauty Mode".

In Beauty Mode, the face of the person being photographed is beautified. This means that the exposure and the area are optimized so that it looks as photogenic as possible.

The mode can be activated as follows on the OnePlus 6:

1. Open the camera

2. Wipe up from the bottom of the display to access the individual camera modes

3. You will now see a gear symbol in the upper right corner - select this to open the settings

4. In the settings please scroll down until you can see this option: "Back Camera Beauty Mode"

5. Activate the option with the slider

You have now successfully activated the Beauty Mode, so that photos taken with the OnePlus 6 are automatically reworked if faces can be seen on them.

We advise you to test this mode extensively and check if you like the quality of the photos.

Using the Huawei P20 Pro as a flashlight

Details
Manuel
Solvemix

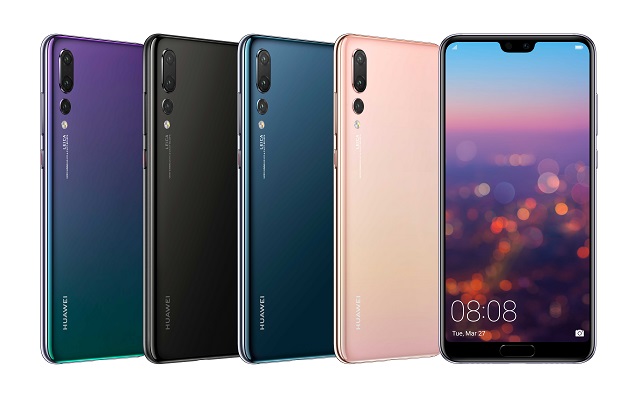
The Huawei P20 Pro has a powerful camera LED flash, with which you can illuminate beautiful photos as well as your surroundings. In this case the LED light is used as a flashlight, which can be very useful at night.

If you are wondering where the flashlight function is hidden on the Huawei P20 Pro, then this article will help you to find it:

Call up the flashlight directly from the locking screen

Huawei P20 Pro

If the locking screen is displayed on the Huawei P20 Pro, then once stroke your finger up from the lower edge of the display to reveal a small menu. In this menu you will now find a symbol with a flashlight. Touch this to activate the flashlight function of the Huawei P20 Pro.

If your device is unlocked, you can also open the flashlight directly from the status bar. Drag it from top to bottom into the screen with two fingers. Tap the flashlight icon here as well.

The camera LED flash will now light up permanently and illuminate your surroundings.

  • Download alternative app for flashlight from the Google Play Store

There are several apps in the Google Play Store that convert your Huawei P20 Pro into a flashlight. Just enter "Flashlight" into the search field and you will get several hits.

Whether an additional app is necessary is up to you. We are very satisfied with the standard flashlight of the Huawei P20 Pro.

You now know how to use the Huawei P20 Pro as a flashlight


Instagram Unfortunately, an error occurred while creating your account

Details
Manuel
Solvemix

If you want to create an Instagram account, you can choose between the following registration options: Login directly via Facebook (if available) or via a new e-mail address:

If you have now chosen the option registration via e-mail address, then the following error message can be displayed on the screen:

"Unfortunately an error occurred while creating your account"

The cause of this error message can be of different origin, but these occur most frequently:

  • A "disposable email address" was used
  • An email address of an unknown free provider was used

Often such free email addresses are blocked by Instagram, because a lot of spam registrations without real users take place. If you have a GMail email address, use it to log in to Instagram and avoid the above mentioned error message.

Should the error message still appear, please proceed as follows on Android smartphones:

1. Open the Android system settings

2. Navigate to "Apps & Applications"

3. Scroll down the list until you can see "Instagram" --> Select the entry from

4. You now see the App info - Select the entry "Memory" here

5. Now tap the following buttons: Clear data Clear cache

6. Now restart the smartphone and try to log in to Instagram. The login to Instagram should now appear without the message "Unfortunately an error occurred while creating your account".

If you did, it may be that there is an error or a malfunction in Instagram at the moment. Just wait a few hours and then try to log in again.

Hopefully the bug will be fixed.

Playstation 4 Firmware Update - Instructions

Details
Manuel
Solvemix

If you have an older firmware installed on your Playstation 4 than currently available, then you should definitely perform an update. The easiest way to update the firmware is via the Playstation itself in combination with an Internet connection.

First, the Playstation 4 must be connected to the Internet. The network settings must be set up correctly for this.

If this has been done and an Internet connection is available, then the update can already begin:

  1. Navigate to the function screen and then select:
  • Settings --> System software update
  1. Your Playstation 4 now checks via the Internet whether you have the latest version of the firmware.
  2. If an update file is available for a newer firmware version, it will be downloaded to Playstation 4.
  3. After downloading the firmware, a notification will appear in the top left corner.
  4. Select on the function screen now:
  • Messages --> Downloads
  1. Then follow the on-screen instructions to complete the installation. The new firmware will now be installed on your Playstation 4 and can then be applied after a reboot.

You should install the latest firmware to use the latest features on your Playstation 4. Even more hard disk space of up to 8 GB is supported by the latest firmware of the PS 4.

Samsung Galaxy A6 Which Sim card is required – solved

Details
Manuel
Solvemix

To use the Samsung Galaxy A6 with the mobile Internet connection and the phone, a special Sim card must be inserted into the smartphone. Since there are currently three different Sim card sizes on the market (Standard Sim, Micro Sim, Nano Sim) the question is justified which Sim card size is needed for the Samsung Galaxy A6.

The Sim card format that fits into the Samsung Galaxy A6 is the Nano Sim card. So that you can use your Samsung Galaxy A 6 to the full extent immediately after the purchase, you should check therefore whether your current Smartphone already possesses a Nano Sim card or another, older Sim card format is available.

If you have a standard Sim card or a Micro Sim card, you now have the following options to get a Nano Sim card: Possibility

  1. Perforation

If your Sim card is perforated, then you can simply press out the Nano Sim card Possibility

  1. Sim card punch

With a Sim card punch you can easily create a Nano Sim card from a standard or Micro Sim card. Such a Sim card punch can be found for little money on Amazon.

  1. Order a new Nano Sim card

If both options are not comfortable enough for you, you can of course also order a new Nano Sim card from your mobile phone provider for a contribution towards expenses of 10-25$.

Processing time is usually 3 working days. You now know which Sim card the Samsung Galaxy A6 requires and how best to get one for your smartphone.


Connect BOSE Quiet Comfort 35 to TV – Instructions

Details
Manuel
Solvemix

If you've ever enjoyed the BOSE Quiet Comfort 35, you're sure to want to connect it to your TV at home via Bluetooth. However, searching for compatible Bluetooth devices on the TV will most likely not display the BOSE Quiet Comfort 35 as a result.

This is not bad, because the connection is only possible via the BOSE Connect App. If you haven't already done so, download the BOSE Connect app to your BOSE Connect+ app via Google Play Store

Once you've installed the app on your smartphone, you're ready to go. Now open Bose App and turn on the headphones. Select the cogwheel icon in the upper right corner and then in the next submenu "Connections". Navigate go to "Connect new device" and look for new Bluetooth devices on your TV.

If the BOSE headphones are found, select them with the remote control - done!

Your BOSE Quiet Comfort 35 is now connected to the TV and you will also receive information about it in the BOSE Connect app.


More Articles ...

  1. advertising technology provider
  2. Huawei P20 Wipe Cache Partition - Instruction
  3. Samsung Galaxy S9 How to perform a Wipe Cache partition - Soved
  4. Samsung Galaxy S8 Save URL of web pages in screenshot
  5. Samsung Galaxy S7 problems after Android Nougat update
  6. Samsung Galaxy S7 Change Profile image WhatsApp
  7. Samsung Galaxy S7 vibrates when lifting off from a table - Solved
  8. Samsung Galaxy S7 How to create collage of photos
  9. Samsung Galaxy S6 How to use "Advanced Screenshots" in Android 6
  10. Samsung Galaxy S7 Deactivate pedometer in S Health
Page 1 of 317
  • Start
  • Prev
  • 1
  • 2
  • 3
  • 4
  • 5
  • 6
  • 7
  • 8
  • 9
  • 10
  • Next
  • End


  1. You are here:  
  2. Home

Imprint

Privacy Policy

Privacy and Terms of Google

Sitemap