Solvemix

Suche Spickipedia

  • Home
  • Android Smartphones
  • iOS Smartphones
  • Blackberry Smartphones

Samsung Galaxy S7 Disable Mailbox – solution

Details
Manuel
Solvemix
Android Smartphones

Have you bought the new Samsung Galaxy S7 with a new mobile phone contract, then usually the mailbox is pre-activated. Now it may be that you do not want to use the Mailbox feature on the Samsung Galaxy S7.

If so, then we will tell you here how the mailbox on the Samsung Galaxy S7 can be disabled. For this, please open from the Start screen the phone app. Tap in the top right at "More" and then choose "Settings". Continue on "More Settings".

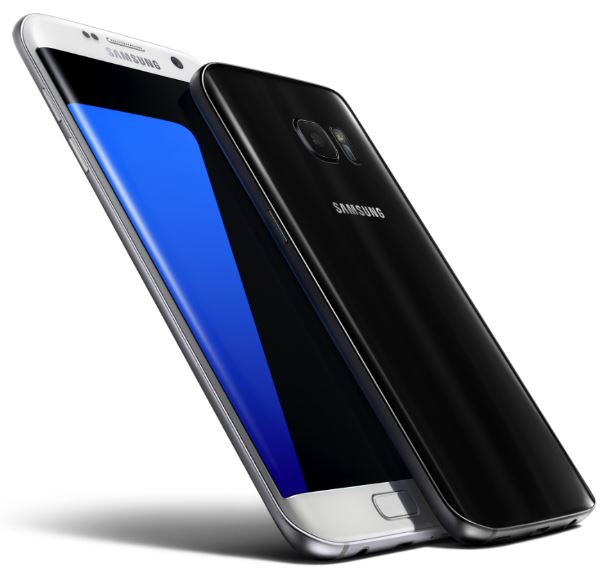
Samsung Galaxy S7

The data from your mobile operator will now be accessed on these settings. Now tap "Call forwarding" -> "Voice Call“.

Here you have to disable the following redirects to disable the mailbox on the Samsung Galaxy S7:

1.  Forward when busy  

2.  Forward on No Answer  

3.  Forward when unreachable

Tap each entry to and then select "Disable". Subsequently, the mailbox is off on your Samsung Galaxy S7.

Should the method not work then proceed as follows:

Open the Phone app and then the keypad. Enter the following code in to cancel all redirections:

  •     ## 002 #

The network code is sent and all forwarding disabled by pressing the green handset button. You know now how to turn off the Samsung Galaxy S7 mailbox.

Samsung Galaxy S7 How to delete Browsing History

Details
Manuel
Solvemix
Android Smartphones

The Android browser on the Samsung Galaxy S7 stores all visited web pages in a history so you can quickly regain access to these sites. Usually this is a very useful thing, but there are circumstances in which you want to delete this browsing history.

Should you want to empty the browser history on the Samsung Galaxy S7, please perform the following instructions:

Samsung Galaxy S7

1. Open as first thing on the Samsung Galaxy S7 the Android browser

2. Tap then in the top right on "More" and then choose "settings“

3. Now select the menu item" Privacy "here you will find in the next sub-menu the option to delete the browsing history: “Clear Personal data”. Tap on the entry

The hook is automatically set in the check boxes for the following options:

  •     browser history
  •     cache
  •     cookies
  •     site data

If you want to delete additional data on your browser which is collected over time, set also a hook at the other checkboxes.

4. With the "Delete" button only selected data of the browser on the Samsung Galaxy S7 will be deleted.

You now know the procedure to delete the history of visited websites in the Android browser of the Samsung Galaxy S7.

Samsung Galaxy S7 don’t show own caller ID - Resolved

Details
Manuel
Solvemix
Android Smartphones

Sometimes you want to make use of the possibility to make a call with "Unknown Caller ID". If a call is performed with suppressed telephone number, then the called contact can´t see your telephone number on the display.

Instead, "private number" or "unknown" appears on the screen of the contact. If you want to do a call on Samsung Galaxy S7 with caller ID blocked, please proceed as follows:

Samsung Galaxy S7

Open the Phone app and then tap in the top right on "More". This opens a pop-up menu, in which now the entry "Settings „needs to be selected. In the next menu, select "Other Settings". There you can now find the entry "Your Phone Number".

Tap on this. You have the following choice:

  •     Hide Number
  •     Network Standard
  •     Show Number

Select here now "hide number". The setting will be sent in connection directly to the mobile operator. If you now make a call in the future, your phone number will not be sent, which means that you are calling withheld number.

Samsung Galaxy S7 Wipe Cache Partition

Details
Manuel
Solvemix
Android Smartphones

You can often resolve problems and errors on your Samsung Galaxy S7 by a simple workaround, the so-called "Wipe Cache partition". The Wipe Cache partition deletes temporary and unneeded system files that accumulate over time on your smartphone.

The advantage of this method is that it does not delete any personal data like pictures, messages etc. That is why we recommend everyone to use this method when errors and problems with the Samsung Galaxy S7 and the Android operating system occur.

Instructions for performing Wipe cache partition on the Samsung Galaxy S7

Samsung Galaxy S7

1. Turn the Samsung Galaxy S7 entirely off

2. Then, turn the power back with the following key combination to:

  • Power On / Off
  • Volume +
  • Home button

When the Samsung Galaxy S7 vibrate briefly once, then let the Power on/ off button go, but keep the other two keys from the key combination pressed until a small Android figure appears on the screen.

3. Now wait about 30 seconds until a menu appears on the display.

4. Now select "Wipe cache partition" by using the volume-down key. With the Power On/ Off button, the entry is selected and the process is started.

5. This usually takes only a few seconds. Then the previously displayed menu reappears. Now choose the first entry with "Reboot system now" and execute the command again by pressing the Power button.

Your Samsung Galaxy S7 will now reboot. The Wipe Cache was thus successfully carried out on the smartphone. The Samsung Galaxy S7 should now run more smoothly and more quickly in any case, as it was previously the case. Also errors that have occurred in the Android software, usually no longer appear now.

Samsung Galaxy S7 Clear Cached data - Solved

Details
Manuel
Solvemix
Android Smartphones

If you want to create a little space on the internal memory on the Samsung Galaxy S7, then you can do this quickly perform by erasing the "Cached data". This is data that is accumulated over time on the device and can be deleted safely.

In Android you can find the option to delete the cached data here:

Samsung Galaxy S7

1. Open on the Samsung Galaxy S7 the menu and then the settings

2. In the settings scroll down and then tap "storage"

3. Choose “Internal storage” and then you see an info displayed about the memory usage. Among them the "Cached data"

4. To delete them, tap once on the entry and confirm the deletion. Usually you can get quickly a lot of space free on your Samsung Galaxy S7.

Samsung Galaxy S7 Calculator Percentage - Resolved

Details
Manuel
Solvemix
Android Smartphones

Who uses on the new Samsung Galaxy S7 the preinstalled calculator might have problems with the calculation in percent. In the calculator version which was installed on smartphones like the S4, S5, S6, one could calculate the following calculation:

  • 400-10% = 360

Samsung Galaxy S7

Mathematically, this input is absolutely not correct, but you could quickly do percent calculation. Typing the same "formula" in the calculator on the Samsung Galaxy S7, so you will gain:

  • 400-10% = 399.9

The solution in the Samsung galaxy S7 is mathematically correct, because 10% is equal to 0.1. However, most users want to use this simple way of calculating % . This is not possible on the Samsung Galaxy S7. Here the percent calculation must be carried out according to good old school.

10% of 400 is calculated then as follows:

  • 400 * 0.9 = 360

Those who prefer the old "simple" formula, we recommend the ASUS calculator. This is similar to the original calculator of your Samsung Galaxy S7 and can calculate the percentage by using the simple method.

Here is the link for the Asus calculator in Google Play Store.

You know now that the calculator of the Samsung Galaxy S7 counted correctly, but also how to use the easy percent calculation again.

Samsung Galaxy S7 How to record an Advanced Screenshot

Details
Manuel
Solvemix
Android Smartphones

A very beautiful and important function was donated the Samsung Galaxy S7: The "Advanced screenshot". With this screenshot you can extend the range of screenshots by pressing the required key combination.

So it is possible to save in one screenshot more than it is shown on the display. We tell you here how you can record on the Samsung Galaxy S7 an Advanced screenshot.

Samsung Galaxy S7

For this display the content on your smartphones screen that should be included in the screenshot. The area should be larger than can be displayed by the screen of your smartphone!

1. Press and hold now the Screenshot hotkeys for at least two seconds:

  • Power On / OFF
  • Home button

2. Subsequently, the screenshot is triggered. Immediately afterwards a bar appears at the bottom of the display. Tap here now quickly on "Capture more"

3. Now a display length is scrolled down and this area is also included within the screenshot

4. If more content is available then tap again quickly at the bottom left on "Capture more"

5. Press so long on "Capture more" until you have acquired all necessary details in your screenshot.

Subsequently, the screenshot will be saved automatically. Wonderful! You have just learned how to record with the Samsung Galaxy S7 an extended Screenshot.


iPhone SE How to do Screenshot – Tip

Details
Manuel
Solvemix
Android Smartphones

The iPhone SE is equipped with the latest iOS and can of course also create screenshots. A screenshot, also called screen print or hard copy allows you to freeze the screen image currently displayed and save it as an image file.

A very useful feature that you often require in order to quickly store information. Should you not know how you can create on the iPhone SE a screenshot, then we will tell you that here:

How to perform a screenshot with the iPhone SE:

1. Display on the screen what you want like to save as screenshot

2. Now press the key combination and keep it pressed for about 2 seconds:

  • power on / off button
  • Home button

3. Then the screenshot is triggered and the snapshot created. The captured screenshot can now be found under "Screenshots" within the gallery of the iPhone SE.

You know now how to take a screenshot on the iPhone SE quickly and easily by pressing a key combination.

iPhone SE Which Sim card do I need? Solved

Details
Manuel
Solvemix
Android Smartphones

The iPhone SE was unveiled at the Apple Keynote and convinced certainly the one or the other with the small size and the performance therein. Would you like to buy the iPhone SE and now inform you about the correct Sim card size for it, then you will find this info here.

The iPhone SE requires a Nano Sim card format. The Nano Sim card is currently the smallest Sim card format and is used in almost all new smartphones due to the small size. Should you upgrade from an older model, then you have most likely a micro or standard Sim card.

How you can change for the iPhone SE this Sim card format to the Nano Sim, we tell you here:

1. You have a Sim card with Nano-perforation

This is the easiest option. Just push the Nano Sim card along the perforation out from the existing SIM card.

2. You have a Sim card without Nano-perforation

For this purpose there are so called "Sim Card Punches" available. A Sim Card punch cuts the correct format from your older and bigger Sim card. Such Sim Card Punching are sold for small money on Amazon: "Good Sim Card Punching"

Is the effort too large for you, then you can also easily order a new Sim card for the iPhone SE from your mobile operator. This usually costs between 10$ and 25$. You know now what Sim card type the new iPhone SE requires and how you gain such a Nano sim card.

Have fun with Apple´s new smartphone.

Samsung Galaxy S7 How to clear file history preview in “My documents”

Details
Manuel
Solvemix
Android Smartphones

If you open on the Samsung Galaxy S7 the File Explorer "My Documents", then you can very easily navigate with this in the directories of your smartphone to open, copy, move and delete files.

If your files are images, videos or documents, they will be stored in a file history and are seen in the overview in a small preview. This file history is displayed to you on the Samsung Galaxy S7 when opening the "My Documents".

Samsung Galaxy S7

Under the title "Recent files" you can as quickly regain access to the opened images, videos, etc. If you don’t like that you can see which files you have opened with the app "My Documents", then you can clear the file history.

This works as follows:

1. Open the App "My Documents"

2. Typing top right of "More"

3. Select "Delete the current file history" Done!

The file history no longer appears until you open a file again. This preview feature in itself unfortunately cannot be disabled. Bother you the file history massively, we recommend you to switch to a different file explorer such as the "ES File Explorer". You know now how to clear the file history in the app "My Documents".

More Articles ...

  1. Samsung Galaxy S7 How to disable LTE – Solved
  2. Samsung Galaxy S7 Which function has the Safe mode - Solved
  3. Samsung Galaxy S7 How to quit Safe Mode - Resolved
  4. Samsung Galaxy S7 Edge Force Reboot – solution
  5. Samsung Galaxy S7 Chromecast screen mirror does not work
  6. Mallorca traffic rules - speed and parking
  7. Samsung Galaxy S7 How to add contact image - Resolved
  8. Samsung Galaxy S7 Edge How to activate compass in side bar
  9. Samsung Galaxy S7 How to view pedometer on home screen
  10. Samsung Galaxy S7 Browser – How to use Anonymous Mode
Page 206 of 317
  • Start
  • Prev
  • 201
  • 202
  • 203
  • 204
  • 205
  • 206
  • 207
  • 208
  • 209
  • 210
  • Next
  • End


  1. You are here:  
  2. Home

Imprint

Privacy Policy

Privacy and Terms of Google

Sitemap