Solvemix

Suche Spickipedia

  • Home
  • Android Smartphones
  • iOS Smartphones
  • Blackberry Smartphones

Samsung Galaxy S7 How to deactivate vibration - Solved

Details
Manuel
Solvemix
Android Smartphones

Whenever you tap or press a button on the Samsung Galaxy S7, then the smartphone vibrates briefly. This is the so-called haptic feedback. There should be taught that you have touched a button at the time of vibration.

For many, the haptic feedback is not too useful and thats why we tell you here how you can disable the haptic feedback and the keyboard vibration on the Samsung Galaxy S7.

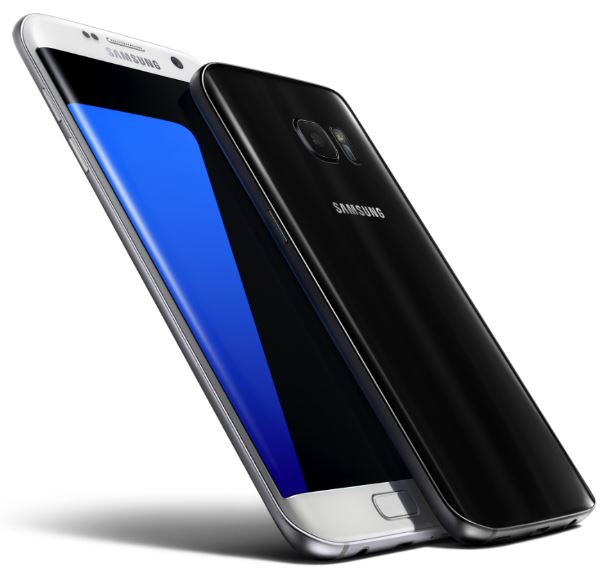
Samsung Galaxy S7

Open from the home screen of the Samsung Galaxy S7 the following menu:

App-Menu --> Settings --> Sounds & vibration

Here you must now set at the options below the regulator to "inactive":

  • vibration feedback
  • keyboard vibration

If you turn the knob under the two options and disabled them, then your Samsung Galaxy S7 does no longer vibrate when typing on the touch screen and the keyboard.

You have thus successfully turned off the vibration of your Samsung Galaxy S7.

Samsung Galaxy S7 GPS stopped working - Resolved

Details
Manuel
Solvemix
Android Smartphones

With the new Samsung Galaxy S7 you can determine the position via GPS like with all new smartphones. Most the combination with the mobile data connection or Wi-Fi network is used in to support this process and to determine your position more quickly.

Unfortunately, it can still happen that if you use only the GPS, your own position simply cannot be determined. So if the GPS system of your Samsung Galaxy S7 is no longer correct, please try the following trick:

Samsung Galaxy S7

Manually update the AGPS data on the Samsung Galaxy S7:

1. Download the free app "GPS Test" from the Google Play Store

2. If you have installed the app, please open it and turn now, if not already done, the GPS of your Samsung Galaxy S7 on "active".

3. Open within the "App GPS Test " the menu. Select "Settings". This takes you to the menu for the settings of the app.

4. There you will find two buttons. Now press successively:

  • Clear AGPS
  • Update AGPS

Now you have just reset the A-GPS data successfully on the Samsung Galaxy S7. It can now be a delay of up to 5 minutes in the first position determination after the update of the AGPS data.

If you want then to determine your own position, for example by means of Google Maps or Navigon with the smartphone, this should now be no longer a problem.

Samsung Galaxy S7 How to calibrate compass - Instructions

Details
Manuel
Solvemix
Android Smartphones

In addition to many other sensors, the Samsung Galaxy S7 again has a magnetic sensor integrated, which can be used as a compass. In the Samsung Galaxy S7 Edge version this is even attachable to the sidebar, so that it can be accessed more quickly.

However, it can happen now that the compass of your Samsung Galaxy S7 indicates the wrong direction. If this is the case, the magnetic sensor is not broken, but needs to be calibrated.

Samsung Galaxy S7

We tell you in this article how to recalibrate the magnetic sensor / Compass of the Samsung Galaxy S7. For this, please open the Samsung Service menu on the Samsung Galaxy S7.

1. Open the phone app and switch to the keypad

2. Enter the following code: *#0*#

3. The service menu opens. Tap on the "sensor" tile

4. Scroll down until you see "Magnetic Sensor". You see a black circle that shows you a line to the magnetic north. Is this red, this means that the compass of the Samsung Galaxy S7 must be calibrated.

5. Pivot now the Samsung Galaxy S7 once completely around each axis

6. The compass needle in the service is "blue" and is a "3". This means that the compass sensor of the Samsung Galaxy S7 is calibrated correctly.

7. Now exit the service menu by repeatedly tap the Back button (soft key on the right).

Now you have successfully calibrated the compass on your Samsung Galaxy S7 or Samsung Galaxy S7 Edge.

Samsung Galaxy S7 Which virus scanner should I install? Solved

Details
Manuel
Solvemix
Android Smartphones

There are currently many virus scanners on the market and many of them work very well. However, we would like to introduce today a virus scanner for the Samsung Galaxy S7, which is very useful and secure.

Samsung Galaxy S7

It is the Avast Mobile Security antivirus app. This virus scanner provides the following options for your Samsung Galaxy S7:

  • Virus and Malware Scanner
  • locates Trojans in files and apps
  • Reviewing app permissions
  • Call block
  • Finds system vulnerabilities
  • Wireless networks security check
  • Automatic scan can be programmed

The Avast virus scanner is the ideal tool to protect your Samsung Galaxy S7 sufficient. In addition, this virus scanner is also free and can be downloaded from the Google Play Store:

  • Download Avast Mobile Security

Another advantage is the low energy consumption of the virus scanner. This affects the battery consumption in the lowest possible amount. We hope you enjoy the Avast virus scanner.

Samsung Galaxy S7 Notification LED on board? Solved!

Details
Manuel
Solvemix
Android Smartphones

With the Samsung Galaxy S7 the manufacturer has managed a successful continuation of the Samsung Galaxy family. Many features that users have asked for, such as the micro SD card slot or IP 68 certification against barrier against water are again implemented in the new Samsung Galaxy S7.

You you now might wonder:

Does the Samsung Galaxy S7 again has a notification LED?

Samsung Galaxy S7

Again, we can present you only positive. Of course, the Samsung Galaxy S7 has a LED indicator which indicates you by light color, what kind of notification you have received on your smartphone. However, the Always On display of the Samsung Galaxy S7 will automatically take over many functions of the LED. Fortunately, Samsung has not reduced this technical feature on the device.

You know now that the Samsung Galaxy S7 is equipped with a notification LED.

Samsung Galaxy S7 How to uninstall apps - Simplest variant

Details
Manuel
Solvemix
Android Smartphones

If you bought the Samsung Galaxy S7, then you will install with safety a lots of apps on the smartphone. However, you will after a relatively short time want to uninstall these apps and applications on your Samsung Galaxy S7, because they do not meet the requirements or are simply not needed.

If you do not know how to remove apps in Android Marshmallow then our instructions help you further.

We explain the easiest way to delete apps on the Samsung Galaxy S7

Samsung Galaxy S7

1. From the home screen of the Samsung Galaxy S7 open the app menu

2. Now tap in the top right on the "Edit" Button

3. In addition to all newly installed apps, except system apps, now a small minus sign appears. 4. To uninstall an app on the Samsung Galaxy S7, just tap on an app now

5. Confirm the prompt for the uninstall with "YES" and then the app will be deleted on your Samsung Galaxy S7.

Proceed with any app in this way, which you'd like to remove on your device.

Samsung Galaxy S7 SD card notification does not go away

Details
Manuel
Solvemix
Android Smartphones

The Samsung Galaxy S7 has again the option to use a Micro SD memory card. With this it is possible to outsource images, videos and other media files and so relieve the internal memory.

Now it can happen after inserting the memory card that the following message continually appears in the status bar of your smartphone:

"SD card For transferring photos and media"

Samsung Galaxy S7

If this message appears in the status bar of your Samsung Galaxy S7 and do not disappear even after the "Out wipe" of this, then your Samsung Galaxy S7 assumes that the memory card is always and always inserted and connected. If this is the case, then please try the following tip:

Open on the Samsung Galaxy S7 the menu and then the System settings. Navigate from here to:

Memory -> SD Card

Select in this submenu now please "Formatting". Attention! All data on the memory card will be deleted. Create a backup if data is already available. Your memory card will be formatted by the Samsung Galaxy S7 and Android marshmallow. This results in that the memory card is recorded with the correct file system.

Then, the memory card is re-connected and can be used. If you now look and wipe in the status bar of the Samsung Galaxy S7 the notification "SD card For transferring photos and media", then it should not reappear again. We hope this has helped you also on the Samsung Galaxy S7.

Samsung Galaxy S7 Open Recovery menu - Solved

Details
Manuel
Solvemix
Android Smartphones

The Samsung Galaxy S7 has implemented a recovery menu from which various actions can be made. Mainly the "Wipe cache partition" and the "Wipe date / factory reset". Both functions can be used without the Android system on the Samsung Galaxy S7 is booted.

In this guide, we show you how you can easily open on the Samsung Galaxy S7 the Recovery menu:

Samsung Galaxy S7

1. Turn the Samsung Galaxy S7 completely off

2. Start the instrument with the following key combination:

  • Power On / OFF
  • volume up
  • home button

3. If the device is started and an Android figure appears on the display, release the power on / off button, but keep the other two keys from the key combination pressed. After about 15 seconds the Recovery menu of your Samsung Galaxy S7 will appear.

This is similar to the old DOS on a PC. By using the volume buttons you can scroll up or down in the menu. With the Power On/ Off button (Enter key) you can use functions.

You know now how to boot on the new Samsung Galaxy S7 in the Recovery menu and navigate in it.

Samsung Galaxy S7 Perform factory reset – delete all data without Android

Details
Manuel
Solvemix
Android Smartphones

If you have problems with your Samsung Galaxy S7 and the result that you can no longer enter the Android system, then you can reset the smartphone via the recovery menu to factory settings.

We show you how to perform a hard reset on the Samsung Galaxy S7 via the Recovery Menu:

Samsung Galaxy S7

1. For this, the Samsung Galaxy S7 must be turned off first.

2. Start the device with the following key combination (press simultaneously and hold):

  • Power On / Off
  • Volume up
  • home button

3. If the device is started and an Android figure appears on the display, let the the power on / off button go, but keep the other two keys from the key combination pressed for a while. After about 15 seconds the Recovery menu of your Samsung Galaxy S7 is then displayed.

4. Use the volume buttons to scroll up or down. With the Power On / Off button perform your actions. Now mark the entry "Wipe data / factory reset". This corresponds to reset the Samsung Galaxy S7 to factory settings. All your data will be lost irretrievably!

5. Confirm the action by pressing the power button and then confirm the security question again with the power button. Your Samsung Galaxy S7 will now be reset to factory settings. The greatest problems should be done with that procedure.

You know now how to perform a hard reset on the Samsung Galaxy S7, if you cannot get into the Android system, because this is not booted.

Samsung Galaxy S7 How to enable developer options

Details
Manuel
Solvemix
Android Smartphones

The Developer options on the Samsung Galaxy S7 are not enabled in Android marshmallow by factory, which means that you have to activate this option group first. If you do not know how to activate the developer mode on the Samsung Galaxy S7, then we would like explain that here more precisely:

Samsung Galaxy S7

From the home screen of the Samsung Galaxy S7 navigate to:

Menu --> Settings --> device information

In this Android Marshmallow submenu you can now see various information about your Samsung Galaxy S7. In order to enable the developer options, tap several times in rapid succession on the "build number" entry.

After about the seventh time tap, a message appears with "developer options enabled". The just unlocked developer options are now also findable in the settings. They can now be opened and activated via the controller.

You have just learned how you can activate the developer options on the new Samsung Galaxy S7 within Android Marshmallow.

More Articles ...

  1. Samsung Galaxy S7 How to add home screen page - Solved
  2. Samsung Galaxy S7 How to do a Factory Reset - Solved
  3. Samsung Galaxy S7 Which memory card is recommended - solved
  4. Samsung Galaxy S7 How to place widgets on the home screen
  5. Samsung Galaxy S7 How to open Service menu - Solved
  6. Samsung Galaxy S7 Import contacts from a very old phone
  7. Samsung Galaxy S7 Import contacts from your Android smartphone
  8. Samsung Galaxy S7 Transfer contact details from iPhone
  9. Samsung Galaxy S7 How to enable Developer Options - Solved
  10. Samsung Galaxy S7 How to open Recovery menu - Solved
Page 214 of 317
  • Start
  • Prev
  • 209
  • 210
  • 211
  • 212
  • 213
  • 214
  • 215
  • 216
  • 217
  • 218
  • Next
  • End


  1. You are here:  
  2. Home

Imprint

Privacy Policy

Privacy and Terms of Google

Sitemap