Solvemix

Suche Spickipedia

  • Home
  • Android Smartphones
  • iOS Smartphones
  • Blackberry Smartphones

HTC One How to enable USB Debugging– Solution

Details
Manuel
Solvemix
Android Smartphones

The USB Debugging allows you on the HTC One an optimized connection to the computer. This mode allows to get a better connection to the smartphone for testing as a developer. Most of you will probably never use the USB debugging, but we will show why the function is not only interesting for developers.

The USB debugging optimized namely the connection between your Windows PC and the HTC One. So it may be that if your HTC One is not recognized by your PC, it works after enabling USB debugging.

That is why we tell you now, how you can activate on the HTC One the USB debugging and therefore to optimize the USB connection. For this purpose, however, the developer menu must be unlocked first.

Opens from the home screen the menu and then the Settings. Scroll down to the entry "Info" and then select "Software Information" --> "More". Now you see various information on your HTC One. Among other things, you will find here the entry "build number". On this you must now tap very quickly several times.

This will then enable the developer options on the HTC One, which can then be found in the settings. Now you have the developer options enabled on the HTC One open it via Menu --> Settings.

The developer options must now be activated via the master controller. Scroll down until you can see "USB debugging". Enable the function by using the slider. Now, if you connect a USB cable to the HTC One and to the PC, then USB Debugging is automatically activated. Your PC should now recognize the device without any problems and you can access your files on your smartphone.

HTC One How to disable mailbox - Resolved

Details
Manuel
Solvemix
Android Smartphones

With most mobile phone contracts the voice mail is automatically activated. Would you not like to use it, then you must disable the mailbox. We would like to show you here how you can disable the mailbox and all cal-forwarding with the HTC One.

This usually works with so-called GSM codes. This means that you can disable your mailbox, etc. with these GSM codes, whether T-Mobile, Sprint, AT&T. With the following GSM code you can deactivate the mailbox on your HTC One:

1. Open the phone app, and then the keypad. Type now this code: ##002#

2. Now press the "Call button" (green receiver).

3. The GSM code is sent to the network and the setting is activated.

In this case, all call-forwarding to the mailbox are deleted.

Sony Xperia Z5 Compact unresponsive - Solved!

Details
Manuel
Solvemix
Android Smartphones

It can happen to you at the Sony Xperia Z5 Compact that this does no longer react to button presses on the touch screen or hardware buttons. Usually a software error within an app or the Android system is the reason of the crash. Consequence is that the Sony Xperia Z5 Compact can no longer operate properly.

Since the battery is permanently installed, this unfortunately cannot be removed from the Smartphone. So what can you do when the Sony Xperia Z5 Compact is unresponsive and the screen is frozen?

We tell you here the solution for the above case:

1. Take the Sony Xperia Z5 Compact the Sim card cover off.

2. You will find in the slot a small mini-switch, the OFF button. With this key you can interrupt the power in your Sony Xperia Z5 Compact.

3. Now you need a pointed object such as a ballpoint pen to press the off button on the Sony Xperia Z5 Compact. Hold the button until the unit turns off.

4. Restart the smartphone.

With this tip you have now revived your Sony Xperia Z5 Compact despite a frozen display.

We recommend you to check out what was the cause of the crash. If in doubt you should uninstall the app, which has led to the crash of your Sony Xperia Z5 Compact.

Samsung Galaxy S6 Hide WhatsApp folder in Gallery

Details
Manuel
Solvemix
Android Smartphones

If you use the Messenger app WhatsApp on the Samsung Galaxy S6, then all the pictures that you have received in the WhatsApp messages automatically appear in the gallery.

Should you get pictures of your friends or acquaintances, you want to hide when you open the gallery on your Samsung Galaxy S6, then we would like to show you here how to hide the WhatsApp imagesfolder from the Gallery app.

Samsung Galaxy S6

This works with a so-called .nomedia files. Folder with such files are automatically excluded from the Android Media Scanner from the display. For this purpose please proceed as shown below:

Download first the free 'ES File Explorer "from the Google Play Store to your Samsung Galaxy S6. This file browser has a function integrated to create files, which is perfect for our project with the ".nomedia" file.

Have you downloaded the ES File Explorer, then open it. Navigate to the path where your WhatsApp images are stored. In general, this is below:

Phone \ WhatsApp \ Media \ WhatsApp Images

In this folder you must now create a file with the following name: .nomedia

Tap at the bottom left on "New" and then select File. Type now ".nomedia" and then click "OK" to create the file. Do not forget the dot before ".nomedia"! Restart your Samsung Galaxy S6, so that the media scanner of new Android scans the files and detects the .nomedia file.

If you now open the Gallery, the WhatsApp folder incl. pictures will no longer appear on your Samsung Galaxy S6.

BlackBerry Priv - Which Sim Card is needed? Solved!

Details
Manuel
Solvemix
Android Smartphones

The BlackBerry Priv is a chic smartphone and one of the first after a long time, which was offered as a slider phone. Thus, it could be an interesting affair among smartphone users again. Should you wish to buy the BlackBerry Priv, then please consider the theme Sim card.

Only with the correct Sim card size the device can be used to make phone calls and surf the Internet.

So what sim card requires the BlackBerry Priv?

The BlackBerry Priv uses a nano sim card.

The Nano Sim Card is the smallest format and used in almost all new smartphones in 2016. If your old smartphone, however uses another Sim Card size for example as Micro Sim Card or Standard then you have the following ways to come to a Nano Sim Card:

Option 1: Nano Sim Card Punching

With a Sim card punch you can easily punch from a standard or micro-SIM card a Nano SIM card. The templates are included. Such Sim Card Punching ca be bought for little money, for example on Amazon

Variant 2: Order Nano Sim Card at Mobile operator

Your mobile service provider sends you of course on demand also a Nano Sim card. This comes at a cost of about10-25 $ (depending on your network provider). Delivery is usually within 2- 5 working days.

You know now that Sim card format the new BlackBerry Priv needs and how you will receive a Nano Sim card for your phone so that it can be used.

Samsung Galaxy S6 Wireless Charging does not work

Details
Manuel
Solvemix
Android Smartphones

If you have bought a wireless charger for your Samsung Galaxy S6, then it can happen that this does not charge the device properly. Is the charger by Samsung itself, then it may be that the smartphone is charged only until the lock screen is activated.

Samsung Galaxy S6

This of course is not useful, because under that circumstances the Samsung Galaxy S6 is never charged. Should you also have the problem with your wireless Qi Charger, then we here show you a trick, with that your Samsung Galaxy S6 still can be charged without interruption.

For this you have to exchange the USB charger that was supplied with the QUI Charger, through the charger of your Samsung Galaxy S6. Pay attention here, whether the induction charging station is built for charger with higher performance.

If so, charging station has more power and thereby the induction charging is improved. For many induction chargers the Power cable is not strong enough to charge the Samsung Galaxy S6 by induction. Has this tip worked for you? Tells us in the comments.

Samsung Galaxy S6 Edge Plus - take pictures via voice control

Details
Manuel
Solvemix

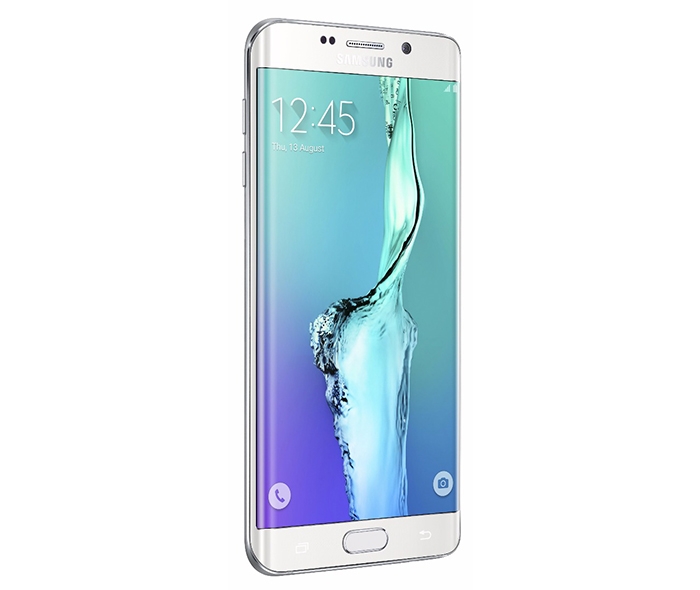
If you have not yet discovered, the Samsung Galaxy S6 Edge Plus has the cool feature to trigger the camera by using voice control. With that function you can shoot perfectly Selfies of yourself and your friends. The voice control must however first be activated in the settings of the camera app.

Samsung Galaxy S6

How to do this, we will tell you here:

Open on your Samsung Galaxy S6 Edge Plus the Camera app and tap in this the gear icon in order to open the settings. Scroll down until you see voice control. Here you can now select this option by using the slider.

Then you can take your photos with the following voice commands:

  • Cheese
  • Smile
  • Capture
  • Shoot”
  • Record  video

The voice commands function works for both the front camera, as well as for the main camera of the Samsung Galaxy S6 Edge Plus. We hope you enjoy this nice feature and that you create better Selfies with it. Have fun with it.

OnePlus One How to create Screenshot - solution

Details
Manuel
Solvemix
Android Smartphones

Information that is displayed on your OnePlus One screen, you can back up the fastest with a screenshot. The screenshot is a function of the operating system that saves the currently displayed content in an image file. That's why the screenshot is also known under the name "Screen Print" or “Hard Copy”.

Here in this article we will tell you now, how you can create a screenshot on the OnePlus One. For this purpose, display as first thing the content on the screen you want to save.

In order to trigger the screenshot press and hold for about 2 seconds the following buttons:

  • Power On-Off button
  • Volume Down button

This will now trigger the screenshot when you press the key combination long enough. You will hear a clicking sound and see a light white border around the screen. The screenshot was successful.

You will find the screenshot then on the OnePlus One in the Gallery application. Here a new folder named "Screenshot" was created. You now know how to save information which are displayed on the screen quickly and easily.

Samsung Galaxy S6 How to forward call to landline - Solved

Details
Manuel
Solvemix
Android Smartphones

Sometimes it may be necessary that calls that you receive on your Samsung Galaxy S6, must be forwarded to a landline number. The function to forward calls is provided by your mobile carrier.It may be that it creates additional costs.

Samsung Galaxy S6

We would now like to explain how you can automatically forward a call to a landline number or mobile number that you receive on your Samsung Galaxy S6. This works as follows:

1. On the Samsung Galaxy S6 open the phone app

2. Tap in the top right now on the button "More" and then in the menu on "Settings"

3. You are now in the call settings of the Samsung Galaxy S6. Scroll down a bit to "More Settings" and tap on the entry.

4. Your provider data is now retrieved. Tap on the "Call forwarding" --> "Voice call"

5. Now activate "Always forward". A window opens in which you can now define a phone number. Enter this and tap on "Enable". Done!

From now on all calls that you receive on the Samsung Galaxy S6 are automatically forwarded to the specified number. You have now successfully set up a call forwardingon the Samsung Galaxy S6.

Samsung Galaxy S6 [RPC: S-5: AEC 0] error message

Details
Manuel
Solvemix
Android Smartphones

If you want to download with your Samsung Galaxy S6 an app from the Google Play Store and want to install it, then it may be that the following error message appears on the display:

"Error retrieving information from server- error code: [RPC: S-5: AEC-0] "

Samsung Galaxy S6

This error usually appears suddenly and is the reason why you can´t download an app from the Google Play Store. In this article we show you a tip on how to resolve the error RPC: S-5: AEC-0 and then re-install apps from the Google Play store with the Samsung Galaxy S6:

Tip #1: Reset Google Play Store app

Open the menu and then the Settings of the Samsung Galaxy S6. Navigate from there to:

Menu --> Settings --> Applications --> Application Manager --> tab "All"

Search here for "Google Play Store" and then open the app-info. Now press the button:

  • "Uninstall updates"

This ensures that all Google Play Store updates (resets the application) is deleted. That's not a big problem, because the Play Store is updated again even after a short time. But the error [RPC: S-5: AEC 0] now should no longer appear on your Samsung Galaxy S6. If so, then please use our second tip:

Tip #2: Connect and disconnect Google Account

Start from the home screen and click on:

Menu --> Settings --> Accounts.

Select in the list your Google Account (email address), with whom the Google Play Store is used. If it is open click in the upper right corner on "More" and tap within the pop-up menu "Remove Account". Now follow the wizard to remove the Google account.

Only the link between your smartphone and the Google account is deleted. It will not lose any emails or other data on the Samsung Galaxy S6. If the Google account is deleted, you have to pair it again with your phone. Now navigate to "Account" and tap on "Add Account" (plus sign) and select there as the new account type "Google".

Follow the wizard again and connect your Google Account again. Is the Google Account associated with your Samsung Galaxy S6, reopen the Google Play Store. By now, the error message with "Failed to retrieve information" and the error code “[AEC 0 rpc: S-5]” should be gone.

We hope that one of the two mentioned tips has helped and you can easily install apps again with the Samsung Galaxy S6 from the Google Play Store.

More Articles ...

  1. Android Marshmallow - Check for New Updates
  2. Samsung Galaxy S6 Apps appear very big – Solution
  3. Samsung Galaxy S6 Daylight Saving Time and wintertime
  4. How to disable sidebar on the Samsung Galaxy S6 Edge? Solved
  5. Samsung Galaxy S6 Display defective - Backing up your data
  6. Samsung Galaxy S6 Smart Manager Disable Anti Virus software - Solved
  7. Samsung Galaxy S6 Recording failed - Camera app
  8. Images cannot be rotated in Windows - Resolved
  9. Samsung Galaxy S6 Red-eye Correction – Tip
  10. Samsung Galaxy S6 app optimization in status bar - Solved
Page 217 of 317
  • Start
  • Prev
  • 212
  • 213
  • 214
  • 215
  • 216
  • 217
  • 218
  • 219
  • 220
  • 221
  • Next
  • End


  1. You are here:  
  2. Home

Imprint

Privacy Policy

Privacy and Terms of Google

Sitemap