Solvemix

Suche Spickipedia

  • Home
  • Android Smartphones
  • iOS Smartphones
  • Blackberry Smartphones

Samsung Galaxy S6 Camera how to focus manually – Resolved

Details
Manuel
Solvemix
Android Smartphones

If you like to take pictures and videos with the Samsung Galaxy S6, then you might want to focus on a specific object. Now it may be that the automatic focus of the Samsung Galaxy S6 cannot manage this as desired which is why it would be good to be able to manually adjust the focus. No problem!
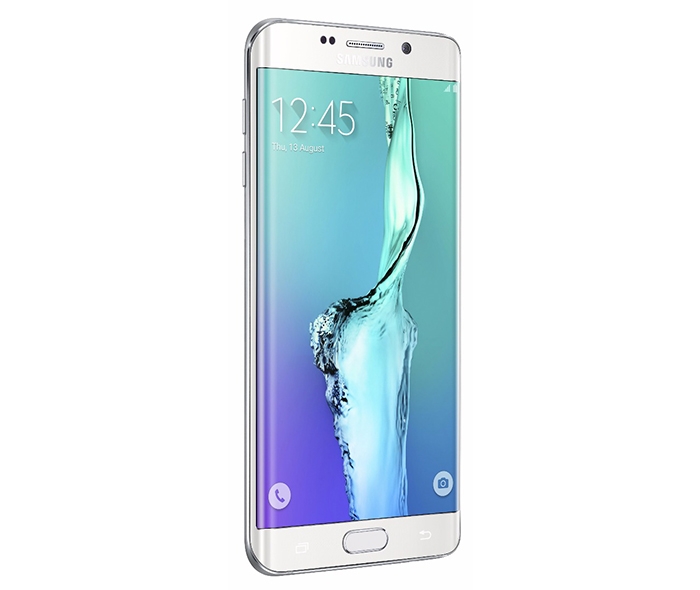
Samsung Galaxy S6

Because in the camera settings, you can manually focus the camera. How this works, we tell you now:

1. Open on the Samsung Galaxy S6 the camera app.

2. Tap here now on "Mode" and then change to the "Pro-mode"

3. If you are in the Pro mode, then you have several new configuration options. One of them is the manual focusing. Typing on the icon with "Automatic"

4. You can now move the bar to adjust the focus of the camera manually. The focus is no longer adjusted automatically but remains focused on the object to which you have set. That was all about it. Adjusting the focus manually is in some shooting situations necessary and also when filming very helpful. Especially when the "automatic mode" starts to “pump” for example while filming a tree, then it makes sense to switch to manual.

Have fun taking photos and filming with your Samsung Galaxy S6!

Samsung Galaxy S6 This app is causing your device to run slowly

Details
Manuel
Solvemix
Android Smartphones

On the Samsung Galaxy S6 it can happen to you that you will receive the following message in the notification bar:

"This app is causing your device to run slowly. To improve your device´s performance, disable auto open for this app”.

Samsung Galaxy S6

Should this message appear on your Samsung Galaxy S6 in the status bar, then this has the following reason: On the smartphone, the app “Smart Manager” is installed, which monitors certain system processes. If the Smart Manager notice that an app creates high resource load, then you will see the message "This app slows your device" on the display.

You should now check on the Samsung Galaxy S6 which app could potentially arise because an increased battery consumption or heat generation of the smartphone may occur for example.

Open therefore on the Samsung Galaxy S6 the menu and then the app "Smart Manager". Here you will now find the detailed information about which app slows down the device. Usually it helps to press the button "Clear All".

If then after a while the message is still displayed, then the app should be uninstalled from your Samsung Galaxy S6. You know now where the message: "This app is causing your device to run slowly. To improve your device´s performance, disable auto open for this app” comes from.

Sony Xperia Z5 How to perform diagnostic test – Tip

Details
Manuel
Solvemix
Android Smartphones

Similar to the Samsung smartphones the Sony Xperia Z5 has a diagnostic test, which allows you to check the smartphone through its paces. For that the application "Xperia ™ Diagnostics" is installed on the Sony Xperia Z5. With this nice tool you can perform the following tests:

  •     Hardware or software errors on your Sony Xperia Z5
  •     Analyzing how well apps and system applications run on your device
  •     List of interrupted calls during the last ten days.
  •     Check Installed Apps and provide useful information about your device.

The diagnostic tool on the Sony Xperia Z5 can be found and executed as follows.

Open from the Start screen the menu, then Settings. Tap on the menu item: "About the phone". Here you will now find the entry "Diagnostics". Should this not be the case, the diagnostic tool must first be installed from the Google Play Store.

If you have opened on the Sony Xperia have Z5 "Diagnostics", please tap "test". You now have the option of various tests to choose. This includes, for example, the camera, the vibration of the proximity sensor and many more. You now know how to run on the Sony Xperia Z5 the diagnostic tool to identify hardware and software problems.

Enable or disable Sony Xperia Z5 X-Reality – Tip

Details
Manuel
Solvemix
Android Smartphones

The function X-Reality for your Sony Xperia Z5 improves the image quality of pictures and videos that you've taken with the camera. The Sony algorithm of that function improves the pictures the picture quality in terms of clarity and naturalness. The mode X-Reality is enabled by default on the Sony Xperia Z5.

If you do not like to use that feature, for example, because it increases the battery consumption of the smartphone, then we'll show you now how to disable X-Reality on the Sony Xperia Z5.

Open the following submenu:

Menu --> Settings --> Display --> Image Optimization

In this submenu you can now deactivate the X-Reality option for your Sony Xperia Z5. This takes effect immediate and the images remain as they were recorded and are not subsequently improved by this mode.

Moreover, the battery consumption is lower, since this option requires a lot of CPU resources. You know now how to turn off on the Sony Xperia Z5 the option X-Reality in the settings of Android.

Sony Xperia Z5 Enable Super Vivid Mode for images – Resolved

Details
Manuel
Solvemix
Android Smartphones

The Sony Xperia Z5 has the possibility to use a so-called "Super Vivid mode". With this mode, you can view photos in an improved color brightness and color saturation. The Super Vivid-Mode parameter has to be activated, because it does not work from factory.

This works very simply as follows:

1. Open on the Sony Xperia Z5 from the home screen the menu and then the Settings.

2. Select "Display" and then the submenu item "image enhancement".

3. You can now activate the Super Vivid mode on the Sony Xperia Z5 by selecting the appropriate entry

When you now watch a video or photo on the Sony Xperia Z5, then you will be shown this in a fresher color, as it would normally be the case.

Sony Xperia Z5 Change Display Timeout - Solution

Details
Manuel
Solvemix
Android Smartphones

The display timeout on the Sony Xperia Z5 determines the time after which the display is dimmed automatically. This is a useful feature to save energy, as a lighted screen always requires a lot of battery power. However, a too short screen timeout is also offense, since you have to get the Sony Xperia Z5 very often out of the stand-by.

Anyway, we want to show you here how on the Sony Xperia Z5 the timeout can be lengthened or shortened the display turns off. This works as follows:

1. Navigate into the menu and then the system settings. Tap here on "Display" and further on "Sleep".

2. You can now set in this submenu the display timeout time.

You now know how to extend or shorten on the Sony Xperia Z5 the waiting time for turning off the display.

Samsung Galaxy S5 PeakFinder does not work properly - you should calibrate the Compass

Details
Manuel
Solvemix
Android Smartphones

If PeakFinder is installed on your Samsung Galaxy S5 or another Samsung smartphone, then it may be that the app does not work properly. This means that the mountains do not appear where they are in reality. If this is the case, then the reason usually is not the App "PeakFinder" but a setting of your Samsung Galaxy S5.

Because PeakFinder sometimes uses the magnetic compass of the Samsung Galaxy S5. If this is not properly calibrated and indicates the wrong direction, then this should definitely be recalibrated. In this guide we want to show you now, how to calibrate the compass of the Samsung Galaxy S5 and thus gets the app PeakFinder running again:

1. Open on your smartphone, the phone app and then the tab "keypad". Now enter the following code for the service menu: *#0*#

2. You will see the Service Menu with various tiles. Tap in the middle of the tile with the “sensor”.

3. Scroll now all the way down to the entry "Magnetic Sensor" which displays sensor data of the Samsung Galaxy S5.

4. A red compass needle means that the compass needs to be calibrated. Now turn the Samsung Galaxy S5 once about all three axes.

5. If the calibration of the Samsung Galaxy S5 was successful, then you see this on a blue compass needle and a number "3". The number three is the correct calibration for all three axes.

If you use the app PeakFinder on your Samsung Galaxy S5, then this should now show you all the mountains in the correct area.

Samsung Galaxy S6 How to print via WiFi – Tip

Details
Manuel
Solvemix
Android Smartphones

If you have not yet known: There is the possibility to print documents and photos directly from your Samsung Galaxy S6 by sending them directly to the printer. The transmission takes place via WiFi. Printing from your smartphone is very useful, but it requires a bit of preparation beforehand, which is why we now show you here how to print to the Samsung Galaxy S6 via WiFi:

Samsung Galaxy S6

1. Open from your home screen the main menu and then the Settings.

2. In the section "Connections" you will find the menu item "Additional connection settings". Tap on this and you access a submenu, where you will find the advanced "Print" menu.

3. In the Print submenu, you now find already several preinstalled "printer driver". These are:

  • Samsung HP Printers
  • Epson Printers
  • Additional printer plugins can be installed on the Samsung Galaxy S6 by tapping the corresponding button.

4. The plugins correspond to the printer driver in Windows. This means that the plugin searches for printers that are available via Wi-Fi. Via the "more" button within the printer plugins the print settings can be changed.

This includes, for example:

  • two-sided printing
  • level control
  • Note Quality
  • Layout

Depending on the printer plug-in the above printer settings can change. That was all about it. You know now how to print on the Samsung Galaxy S6 via WiFi.

BMW M135i Where can I find the torque indicator? Solved!

Details
Manuel
Solvemix
Multimedia and technology

The BMW M135i F20 is an extremely sporty small car that can delight you with 320 hp and up to 450nm torque. With these performance values, the BMW M135i can easily accommodate with Porsche and Co., which is of course great fun. For those who want something more from your BMW M135i, there are some technical gimmicks. One of these is the digital torque indicator.

This is displayed on the navigation display of the BMW M135i. If you accelerate, then this indicator shows the HP and also how much torque rest again. Should you now ask:

Where can I find the torque display in my BMW M135i, then we want you to answer this here briefly.

1. It is important that you have the BMW Professional navigation display. As this function is neccessary to make it possible that the torque and the retrieved PS can be viewed digitally.

2. You have to set the Sports Plus mode

If you have these settings or conditions in your BMW M135i, then the torque and HP indicatior is shown on the display of the navigation system. Have fun with this cool feature of the BMW M135i.

Update: At the current facelifted BMW M135i F20 2015 there is the torque indicator and PS display even available with the small business navigation system. See the following video (minute 2:20):

Samsung Galaxy S6 How to print Double-sided – Solved

Details
Manuel
Solvemix
Android Smartphones

Should you use on the Samsung Galaxy S6 the possibility to print documents via Wi-Fi, then you might want sometimes, if your printer offers this ability, to print multi-page documents on both sides.

In this article we tell you how to print two-sided pages via Wi-Fi printer with the Samsung Galaxy S6. This works as follows:

Samsung Galaxy S6

We want to explain to you the procedure using an HP printer. However, this works the same for almost all prints:

1. Open Menu --> Settings --> section "Connections" --> More Settings

2. Select Connection "Print", and then the printer driver or the plug of your printer. In our case this is the HP-Plugin

3. Enable, if not already done, the plugin.

4. Now tap at the top right on "More". In the opening pop-up menu, tap on "Printer Settings"

5. Here you will now find an option with "2-Sided". Activate the slider to enable this feature on your Samsung Galaxy S6.

Now, if you print a multi-page document with the Samsung Galaxy S6, then this will be printed on two sides.

More Articles ...

  1. See mountains names in the alps via smartphone – Tips
  2. Free offline Navi for Android smartphones
  3. Delete .nomedia Files in Android – Solution
  4. Huawei Honor 6 How to Screenshot – Resolved
  5. Sony Xperia Z5 How to disable Vibrate on touch
  6. Android Marshmallow Problems after update - Solved
  7. Samsung Galaxy S6 Disable animation effects - Performance boost
  8. Samsung Galaxy S6 How to adjust keyboard size - Solution
  9. Samsung Galaxy S6 fingerprint sensor does not detect my finger - Solved
  10. Samsung Galaxy S6 no longer detects Sim card - Tip
Page 221 of 317
  • Start
  • Prev
  • 216
  • 217
  • 218
  • 219
  • 220
  • 221
  • 222
  • 223
  • 224
  • 225
  • Next
  • End


  1. You are here:  
  2. Home

Imprint

Privacy Policy

Privacy and Terms of Google

Sitemap