Solvemix

Suche Spickipedia

  • Home
  • Android Smartphones
  • iOS Smartphones
  • Blackberry Smartphones

Samsung Galaxy S6 Edge Plus How to add new home screen page

Details
Manuel
Solvemix
Android Smartphones

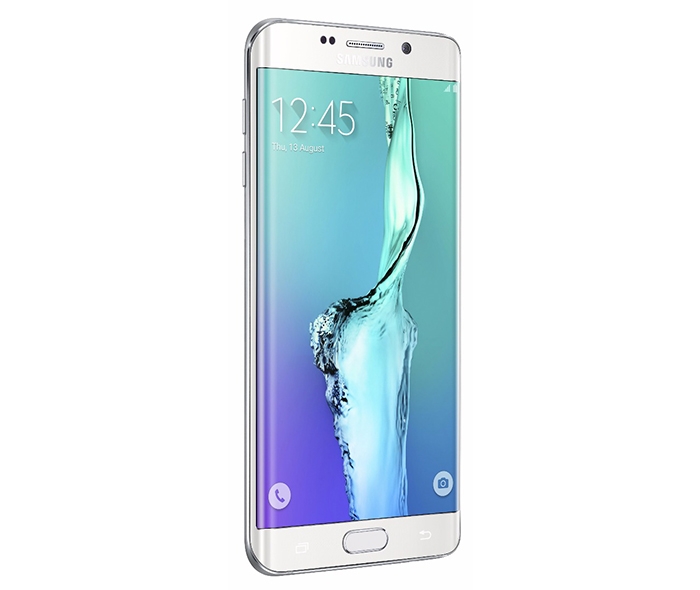
The home screen of the Samsung Galaxy S6 Edge Plus can be extended by additional pages. With new pages you can create space for new apps and widgets. But how can I create a new page on the home screen within Android on my smartphone?

Should you ask this question, then we would like to provide the answer. Please proceed as follows on the Samsung Galaxy S6 Edge Plus:

Samsung Galaxy S6

1. Tap long on an empty space of the home screen

2. You will see a small menu, with all active sites of the home screen listed

3. Scroll now completely to the right until you can see a page with a plus symbol. Tap on the plus symbol to add a page to the home screen. Finished!

You can create and use up to eight home screen pages.

You now know how to add a new page for widgets and apps on the Samsung Galaxy S6 Edge Plus to the home screen.

iPhone 6 – How to disable In-App Purchases

Details
Manuel
Solvemix
iOS Smartphones

In many apps that are available for the iPhone 6 via the App Store, so-called in-app purchases can be made. In-app purchases are a popular variation for developers to monetize the app. For example, in a game app new Avatar-life’s, better features and characteristics of a character or vehicle can be purchased. Mostly a few dollars are due for. However, you tend to make in-app purchases more often. Especially young people and children use the Purchase button in games more often because the lack of awareness of spending money in this moment is low.

That's why you can disable on the iPhone 6 such in-app purchases in apps. This can be done via a master switch in the Settings. We show you where you can find this switch to disable in-app purchases.

  1. Open the settings on the iPhone 6
  2. Navigate to the "General" section --> Restrictions "
  3. Select "Enable Restrictions"
  4. Enter a four-digit code to secure these limitations
  5. You can now set restrictions on your iPhone 6
  6. Use the slider at "In-App Purchases" to disable them on the iPhone 6

Now you can’t make any in-app purchases with the iPhone 6.

Process com.android.phone was stopped – Android

Details
Manuel
Solvemix
Android Smartphones

The error message "com.android.phone was terminated" may appear on any Android smartphone. Ths component belongs to a system component of Android. If the error message com.android.phone was terminated appears you can usually no longer proceed with the action, with which one has just begun. The error message can appear anywhere. Some examples:

  • Change your ringtone
  • Calling a contact
  • Open the call log
  • and much more.

The error message "com.android.phone was terminated" can have many causes. We would therefore like to give you different tips that can lead to a successful remedy to this error message.

1. Perform Wipe cache partition

How to perform a wipe cache, we explain to you here: Wipe Cache Partition

2. Clear the cache of "phone app"

Open from the home screen the menu and then the Settings. Navigate here to "Applications" --> Application Manager --> tab "All". Search there for the app "phone" and open it. Tap in that App Information on "Clear Cache". Finished!

3. Delete Cached data

By deleting the cached data of your Android smartphone files can be deleted, which may lead to the above mentioned error. You can delete the cached data by clicking on Menu --> Settings --> Storage Tap there at the appropriate entry. More information about the cached data can be found here.

4. Enable / disable Airplane mode
Turn your smartphone in airplane mode to finish all the connections. After a while deactivate Airplane Mode again. This can fix the problem with "com.android.phone was terminated".

5. Reset to factory settings

The last option is always the reset to factory settings. But this option we really recomend as a last consequence, since it is connected with a lot of effort. How you can reset your smartphone to factory settings we explain here.

We hope that one of our 5 tips helped you to solve the problem "com.android.phone was terminated" on your Android smartphone.
AT&T APN access point data

Details
Manuel
Solvemix
Android Smartphones

Should you use an AT & T Sim card within the USA, then you certainly want to use the mobile Internet. For that, you have to enter the APN access point on your smartphone.

We want to inform you about the APN login information from AT & T here. These are as follows:

  • Name: ATT Phone
    • APN: Phone
    • Proxy: Not set
    • Port: Not set
    • User Name: Not Set
    • Password: Not set
    • Server: Not set
    • MMSC: https://mmsc.mobile.att.net
    • MMS proxy: proxy.mobile.att.net
    • MMS port: 80
    • MCC: 310
    • MNC: 410
    • Authentication Type: None
    • APN type: default, MMS, SUPL,
    • APN protocol: IPv4
    • Bearer: Unspecified

In a Android smartphone like the Samsung Galaxy S6 you can create an access point with APN data manually as follows: Instructions

You now know the APN login information from AT & T and thus can use the mobile Internet with your smartphone.

Samsung Galaxy S5 Disable "Wi-Fi Power Safe Mode"

Details
Manuel
Solvemix
Android Smartphones

On the Samsung Galaxy S5, there is the possibility to disable the so-called Wi-Fi Power Saving Mode. This means that the Samsung Galaxy S5 is always working with the highest wireless transmitting and receiving power.

With that setting, a poor Wi-Fi connection can be maintained, which can prevent disconnections.
To turn off Wi-Fi power saving mode, you have to navigate in the service mode. This, however, is only accessible by a special code. We reveal this code and, where it has to be entered.

To activate the service mode on the Samsung Galaxy S5, please proceed as follows:

  1. Open from the home screen the phone app
  2. Change here on tab "keypad"
  3. Type the following code via the numeric keypad: *#0011#
  4. Now the service mode on the Samsung Galaxy S5 will be opened
  5. Tap in the top right on "More" (three points), and then click "WiFi"
  6. Now select "WiFi Power Safe Mode"
  7. Switch this mode from "On" to "Off"

Your Samsung Galaxy S5 will from now on always wireless transmit and receive data with the full power. This hopefully be eliminates disconnections to the Wi-Fi network on your smartphone.


Samsung Galaxy S5 NEO Change LED color for WhatsApp

Details
Manuel
Solvemix
Android Smartphones

The Samsung Galaxy S5 Neo has integrated a status LED in the upper part of the housing with which you can easily be notificated via light about new notifications. This light, which is emitted by the notification LED can be changed by the color.

That is why we tell you now, how you can change the light color of the Samsung Galaxy S5 Neo Notification LED for new WhatsApp messages.

  1. Navigate from the Home screen of the Samsung Galaxy S5 Neo to: Menu --> WhatsApp
  2. Tap in the chat summary on "More" (Three dots)
  3. A pop-up opens, in which now "Settings" must be selected
  4. Navigate now at "Notifications".
  5. In the section "Notifications" you can now see the entry "light". Tap on this and you can choose from seven different light color, which should light upon receipt of WhatsApp messages on the Samsung Galaxy S5 Neo.

We recommend you for WhatsApp messages to choose the color "green" (green WhatsApp icon). Whenever now a new WhatsApp message comes in on the Samsung Galaxy S5 Neo, then you will be notified about it with a green pulsating glow of the status LED.

Is the Sony Xperia M5 waterproof – Solved

Details
Manuel
Solvemix
Android Smartphones

The Sony Xperia M5 is a small, compact smartphone with a very good camera, which has a resolution with up to 21.5 megapixel. For many a reason to opt for this smartphone. Now next to the camera the resistance to water is maybe for many an important purchasing criterion. Unfortunately, this information is not always apparent from the descriptions on the Internet or is hidden behind certifications.

Therefore, here's the answer:

Yes, the Sony Xperia M5 is waterproof - but only in the following range:

  • Maximum depth: 1.5m
  • Maximum duration: 30 minutes
  • Type of water: only with fresh tap water (no salt water, for example)

We hope that thus the question of the water resistance of the Sony Xperia M5 is cleared and you can now take a decision on whether the smartphone is the right one for you.

The Sony Xperia M5 can be purchased for example here

iPhone 6S Import data of Samsung Galaxy smartphone

Details
Manuel
Solvemix
iOS Smartphones

If you decide to switch from your Samsung Galaxy smartphone to the new Apple iPhone 6S, then you certainly would like to transfer as much data as possible from your old phone to to the new device.

Apple is, in terms to the transfer of data not so practical as Android, although there is the possibility to move several files. We want to show you here how this works with the new iPhone 6S:
Download for your Samsung Galaxy Smartphone and the iPhone 6S the following app: "Copy My Data"

  • Download "Copy My Data" for Android
  • Download "Copy My Data" for iOS

If the app is installed on your smartphone open it. You must now activate Wi-Fi. Then follow the wizard to transfer the data. You can now very easily choose within the app which data should be transferred. The choices are:

  • Contacts
  • Calendar
  • Photo
  • Video

Set a hook at the data which you want to transfer from the Android smartphone to the iPhone 6S. Then start the transfer via WiFi. Depending on the size of the photos etc. this process may take longer.

You know now how your data can be transferred from a Android smartphone like the Samsung Galaxy series to the iPhone 6S.

Samsung Galaxy S6 Edge Plus How to create folder on the home screen

Details
Manuel
Solvemix
Android Smartphones

On the Samsung Galaxy S6 Edge Plus you can create folder on the home screen (home screen) to move Apps therein. So it is possible to organize and sort apps by categories on the home screen.
We show you how to create a folder on the home screen of the Samsung Galaxy S6 Edge Plus:

Samsung Galaxy S6

If you are on the home screen drag an app onto another app to create a folder. Use the apps that you want like to tuck into a folder. Once the two apps hover on one another, a folder frame appears. You can now release the app and it will open a box where you can enter a folder name for the folder you just created.

After renaming you can see the folder (with the two apps in it) now on the home screen of the Samsung Galaxy S6 Edge Plus.

You know now how to create a folder for apps on the home screen of the Samsung Galaxy S6 Edge Plus.

Clear History of the Chrome browser

Details
Manuel
Solvemix
Android Smartphones
  1. To do this, open on your Samsung Galaxy S6 Edge Plus the Chrome browser
  2. As next step, tap at the top right on "More" and scroll in the new appearing window down to "Settings".
  3. Tap the "Privacy" entry. This opens a submenu in which you now see a gray button with "Clear browsing data" at the bottom of the page.
  4. Tap on the button and it opens a window where you can select further options. Select "Delete Browsing History" to delete the history of the Chrome browser. Tap the "Delete" button to confirm the procedure.
  5. You have now deleted the history log of the Chrome browser on your Samsung Galaxy S6 Edge Plus.

You now know how you can delete the browsing history on the Samsung Galaxy S6 Edge Plus within the Chrome browser. So it can no longer be traced, which web pages you have accessed using the smartphone.

More Articles ...

  1. Samsung Galaxy S6 Edge Plus Clear browsing history – Tips
  2. Samsung Galaxy S6 Edge Plus Disable key vibration
  3. Samsung Galaxy S6 - "Downloading ... Do not turn off the target!"
  4. Samsung Galaxy S6 Change Google account – Tips
  5. Samsung Galaxy Note 5 How to unlock Developer Options – solved
  6. Samsung Galaxy Note 5 Set MP3 as ringtone - Solved
  7. Samsung Galaxy Note 5 expandable via Micro SD card?
  8. Samsung Galaxy S6 Edge+ Storage expandable by micro SD card?
  9. Which Sim Card for Samsung Galaxy S6 Edge +
  10. Samsung Galaxy Tab 4 How to perform a Wipe Cache Partition
Page 233 of 317
  • Start
  • Prev
  • 228
  • 229
  • 230
  • 231
  • 232
  • 233
  • 234
  • 235
  • 236
  • 237
  • Next
  • End


  1. You are here:  
  2. Home

Imprint

Privacy Policy

Privacy and Terms of Google

Sitemap