Solvemix

Suche Spickipedia

  • Home
  • Android Smartphones
  • iOS Smartphones
  • Blackberry Smartphones

Huawei P20 Pro Forgot Password, Pattern or PIN? Instructions and tips

Details
Manuel
Android Smartphones
Year 2019

The Huawei P20 Pro is usually protected by a lock screen, which is designed to prevent unauthorized persons from accessing data stored on the phone.

The lock screen is usually secured by a pin, password, pattern, or fingerprint. However, apart from the fingerprint, you can also forget the unlocking method.

This can be quite annoying, because you can no longer access your data and have been bypassed by the protection mechanism.

So what can you do if you have forgotten the Lock Screen unlocking method on the Huawei P20 Pro? Below we have listed the available options and explained them in detail.

Depending on how your Huawei P20 Pro is configured, there may be problems with your data.

Use Android Device Manager to unlock the Huawei P20 Pro - no data loss
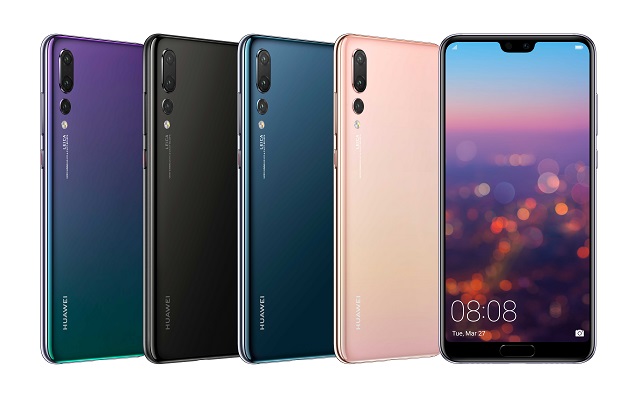
Huawei P20 Pro

To do this, please open the following website on a PC, Smartphone or Tablet:

  • Android Device Manager

You will now need to enter your Gmail account password, with which your Huawei P20 Pro is synchronized.

Your smartphone will now be localized by the Android Device Manager. The prerequisite for this is that the Huawei P20 Pro has an Internet connection via W-Lan or mobile Internet.

Localization may take a few minutes now. Then select "Lock" in the Android device manager. You will now need to set a new password to lock the Huawei P20 Pro screen. After you have performed this procedure, you can now enter the password you have just set on your Huawei P20 Pro.

The device is unlocked. A new lock type can then be assigned.

Samsung Smart Switch Backup or backups from the cloud - data loss possible

Another possibility is to import a backup via the HiCare software. However, this usually only works if you regularly create backups using this software, for example on your computer, and at this point you are still familiar with the specified unlock method.

To restore the backup, simply use the HiCare software on your PC to restore the backup. Depending on how old the backup is, data may be lost!

Reset to factory settings - Factory reset - Data loss very high

The last option you have is to reset the Huawei P20 Pro to factory settings. When a factory reset is performed, all data on the Huawei P20 Pro is deleted and the Huawei P20 Pro or Android system can then be set up again.

This method should be used as a last resort, because the loss of data is considerable if you have not made any backups of the memory.

Proceed as follows to reset the factory on the Huawei P20 pro:

1. To do this, first switch off the smartphone and then follow these steps:

2. To switch on the device, press the following keys simultaneously:

  • power button
  • volume up

3. Hold the keys until the Huawei logo appears and then the EMUI symbol.

4. You will see the Recovery menu where you can navigate as follows:

  • Volume keys --> scroll up or down
  • Power On/Off --> Confirm an entry

Now select "Wipe Data/Factory Reset" and confirm the selection with the Power button.

Then select "Restart now". Your Huawei P20 Pro will now reset to factory settings.

As with variant 2, you can then try to import backup data from the Huawei Cloud or via HiCare. This variant, too, is usually associated with data loss.

If possible, we recommend you to choose variant no. 1, because you can unlock the Huawei P20 Pro very easily without losing any data.

Samsung Galaxy S9 Pin for Locking Screen Forgotten - Tips

Details
Manuel
Android Smartphones
Year 2019

The Samsung Galaxy S9 is usually protected by a locking screen, which is designed to prevent unauthorized persons from gaining access to data stored on the smartphone.

The lock screen is usually secured by a pin, password, pattern, or fingerprint. However, apart from the fingerprint, you can also forget the blocking method. This can be quite annoying, because you don't have access to your data anymore.

So what can you do if you have forgotten the unlocking method of the lock screen? Below we have listed the available options and explained them in detail:

Use Android Device Manager to unlock devices

To do this, please open the following website on a PC, Smartphone or Tablet:

  • Android Device Manager

You will now need to enter your Gmail account password, with which your Samsung Galaxy S9 is synchronized.

Your smartphone will now be localized by the Android device manager. This requires an Internet connection via W-Lan or mobile Internet on the smartphone.

Localization may take a few minutes. Then please select "Lock". You now need to set a password to lock the smartphone screen. Now enter the password you just set on your Galaxy S9. You can now unlock it and then assign a new lock type.

Samsung Smart Switch Backup or Backup from the Cloud

Another possibility is to install a Samsung Backup via Smart Switch. However, this usually only works if you regularly create backups and know the unlock method you have defined at this point.

To import it backups simply use the Samsung Smart Switch software to import the backup again. Depending on how old the backup is, data may be lost!

Reset to factory settings - Factory reset

The last option is to reset the device to factory settings. All data on the Samsung Galaxy S9 will be deleted and you can set up the device again. This method should be used as a last resort.

For the factory reset, proceed as follows on the Samsung Galaxy S9:

First the smartphone must be switched off. If this is not possible because the pin or pattern is also queried here, then proceed as follows:

Push and hold at the same time:

  • Power On/Off
  • Bixby
  • Volume Quieter

The device will now restart. As soon as the restart begins, you must press the following keys simultaneously:

  • Power On/Off
  • Bixby
  • Volume Loud

This will now conjure up the recovery menu on your Samsung Galaxy S9 screen.

The navigation in the Recovery menu works as follows:

  • Volume down --> Scroll down
  • Volume Loud --> Scroll Up
  • Power On/Off --> Select entry or confirm selection
  • Now selects "Wipe Cache/ Factory Reset".

Follow the instructions on the screen and perform the process. All data will now be deleted on the Samsung Galaxy S9 and Android reloaded.

As with variant 2, you can then try to import backup data from the Samsung Cloud or via Smart Switch. Of course, this variant also involves a loss of data.

If possible, we recommend you to choose variant no. 1, because you can unlock the Samsung Galaxy S9 very easily without losing any data.

Huawei P20 Pro Loudspeaker dull and quiet - Tip

Details
Manuel
Android Smartphones
Year 2019

When you listen to music or sounds through the Huawei P20 Pro's speaker, the music may be quiet, dull, or muffled. Often the following cause can be cited:

The speaker outputs of the Huawei P20 Pro are clogged with dirt, dust or dirt.

If you often carry the Huawei P20 Pro in your trouser or handbag, dust particles or dirt can clog the speaker output.

You must therefore clean the speaker output.

Huawei P20 Pro

The best way to do this is as follows:

Tip 1: Take a vacuum cleaner and try to remove the dust with it.

Tip 2: Use a pointed object such as a toothpick and try to remove the dust on the edge.

Tip 3: The Huawei P20 Pro is IP67 protected against water ingress. Place the smartphone in a low water basin and leave it there for about 30 seconds. Dry the appliance and then use the vacuum cleaner again.

These cleaning processes will result in the loudspeaker being free again and the sound being able to escape unhindered.

The sound experience should then be much better with your Huawei P20 Pro.

Nokia 7.1 Recovery Menu Boot - How to use

Details
Manuel
Android Smartphones
Year 2019

Using the Recovery menu on Nokia 7.1, you can make various settings, such as a Wipe Cache partition or reset the device to factory settings.

However, the Recovery menu cannot be opened from the Android interface. This is only possible during the boot process of Android.

The following instructions will show you step by step how to proceed:

Boot procedure - Recovery menu

1. Turn the Nokia smartphone off completely once by pressing and holding the power button

2. Press and hold the following buttons for 30 seconds to turn the phone back on:

  • Power On/ Off Button
  • Volume Loud Button

The Recovery menu will now appear, where you can navigate as follows:

Use the Volume button to navigate up and down:

  • Volume down button --> scroll down
  • Volume loud button --> scroll up

3. Use the Power key to select items within the Recovery menu.

You now know how to open and navigate the Recovery on Nokia 7.1.

Samsung Galaxy Note 9 Change device name for Bluetooth - Tip

Details
Manuel
Android Smartphones
Year 2019

The Samsung Galaxy Note 9 has been given a factory name that corresponds to the model number. This is displayed whenever you connect your smartphone via Bluetooth or WiFi Direct, for example.

Usually you will see the device name most often when connecting to a Bluetooth handsfree in a car or a Bluetooth speaker, as well as a voice assistant.

If you want to change the device name of your Note 9 to, for example, your first name, this works within the Android settings as follows:

Change Samsung Galaxy Note 9 device name - step-by-step instructions

1. Open the app menu from the start screen

2. Now select the "Telephone info" menu item at the end of the menu.

3. Tap on "Device name" and you can assign a new name afterwards.

4. click "Ok" to confirm the new name for your Samsung Galaxy Note 9

If you now share the Samsung Galaxy Note 9 via WiFi Direct or connect it to a speakerphone via Bluetooth, the device will be displayed with the name you gave it.

This allows you to see immediately which device you want to connect to your Samsung Galaxy Note 9.

Nokia How to Reset Smartphone to factory defaults - Resolved

Details
Manuel
Android Smartphones
Year 2019

Sometimes it is necessary to reset a smartphone to factory defaults in order to eliminate serious system errors or to delete all data contained on it so that the smartphone can be sold afterwards, for example.

This is called a factory reset and can be performed on the Nokia smartphone as follows.

Note: All data will be deleted during this process! Android is then automatically reinstalled.

Reset Nokia Smartphone to factory defaults - Android System

Open the settings in Android from the start screen and then select the following submenu of the Android system.

  • Backup & Reset

From there, navigate to "Reset to factory settings" and then to:

  • Reset phone

Confirm the operation by tapping "Delete all".

This variant of the workset should always be used when the Android system is working properly and booting is possible.

If you can't get into the Android system anymore, for example because you forgot the locking screen Pin, please use the second way to reset the Nokia Smartphone to factory settings:

Reset Nokia Smartphone to factory settings - Recovery menu

1. Turn the Nokia smartphone off completely once by pressing and holding the power button.

2. Press and hold the following buttons for 30 seconds to turn the phone back on:

  • Power On/ Off Button
  • Volume Loud Button

3. The Recovery menu will now appear, where you can navigate with the Volume key and select entries with the Power key.

4. Select "Delete Data / Factory Reset".

5. Your Nokia smartphone will now be completely formatted and the Android system will be reloaded.

You now know two ways to reset the Nokia smartphone to factory defaults using a factory reset.

In both variants, you should make a backup of your data beforehand if possible, as these will be completely deleted.

Nokia 7.1 Resetting to factory defaults - How to do it

Details
Manuel
Android Smartphones
Year 2019

Sometimes it is necessary to reset a smartphone to factory settings in order to eliminate serious system errors or to delete all data so that the smartphone can be sold afterwards.

Such operation is called factory reset and can be performed on Nokia 7.1 as follows.

Reset Nokia 7.1 to factory defaults - Android System

To do this, open the settings in Android from the Homescreen and then select the following submenu.

  • Backup & Reset

Continue to "Reset to factory settings" and then to open:

  • Reset phone

Confirm the operation by typing "Delete all".

This variant should always be used if the Android system works and can be started. If you are no longer in Android, please go the second way to reset Nokia 7.1 to factory defaults:

Reset Nokia 7.1 to factory defaults - Recovery menu

1. Turn off the Nokia 7.1 completely once. Press and hold the following buttons for 30 seconds to turn the phone back on:

  • Power On/ off button
  • Volume up button

2. The Recovery menu will now appear, where you can navigate with the Volume key and select entries with the Power key.

  • Recovery Menu

3. Now select "Delete data / Factory reset".

4. Your Nokia 7.1 will now be completely formatted and the Android system will be reloaded.

These are the two ways to reset Nokia 7.1 to factory defaults.

In both variants, you should make a backup of your data beforehand if possible, as these will be completely deleted.

iPad What model do I own? Solved!

Details
Manuel
Android Smartphones
Year 2019

Sometimes it is necessary to find out the exact model name of your Apple iPad. This can be the case, for example, if you want to make a request to support or sell the iPad.

However, the following is a simple explanation of how to find the exact model for your iPad:

How To find out which iPad you own

Apple does not simply label iPads with the appropriate model on the back of the device, but it does include the model number.

1. Therefore pay attention to the small print on the back of the device.

2. Search for the model number beginning with "A".

3. Search the following model list for the number you just found:

  • iPad model list

If no model number can be found, you can also look it up within the iOS system.

Proceed as follows:

Go to Settings --> General --> About

You will also find the model number here, which is formatted as follows: MH2M2LL/A. Tap it once to get the model number such as "A1701".

Then search for the model number in the list above to find out which model it is.

Nokia 7.1 Wipe Cache Perform Partition - Solved

Details
Manuel
Android Smartphones
Year 2019

The Wipe Cache partition is a process you can use to optimize the performance of Nokia 7.1. If the performance should not be as you imagine it, the battery or the device gets hot, then you can optimize the performance again with the Wipe Cache partition.

However, this cannot be done from the Android menu, but only from the boot menu.

That's why we've written a special guide for you here that describes the exact process of doing a Wipe Cache partition. Please proceed as follows:

Nokia 7.1 Wipe Cache Partition Guide

1. Turn off your Nokia 7.1 completely

2. Press and hold the following buttons simultaneously to turn it on again:

  • Power On/ Off button
  • Volume Loud Button

3. Press and hold both buttons until the recovery mode of Nokia 7.1 is booted.

4. You can now see a menu. Navigate down in this by using the Volume button. Go ahead:

  • Wipe Cache Partition

5. Press the Power button to select this entry. Confirm the selection again and the process is executed.

6. The display will then jump to "Reboot System now" - confirm the restart by pressing the Power key.

Your Nokia 7.1 should now run much faster again and the battery life may be improved. This process can help with many problems, the cause of which is not visible at first glance.

You now know how to make Nokia 7.1 perform better again.

Nokia 7.1 Open Secret Service Menu - Tip

Details
Manuel
Android Smartphones
Year 2019

The Nokia 7.1 has various hardware components, such as display, cameras, speakers, vibration and much more. Nokia has implemented a service menu so that you can check if the hardware is working correctly. You can put functions to the acid test with it.

However, the service menu on Nokia 7.1 is not so easy to open via the Android system. This is why people often speak of a secret test menu. Below we describe in our instructions how to open this service menu on Nokia 7.1 and which tests can be performed in it.

Show Secret Test Menu on Nokia 7.1

1. Start from the Home screen and then navigate to the phone app

2. Change here to the number field where you can enter telephone numbers

3. Enter the following code using the numeric keypad:

  • *#*#372733#*#*

Once you have entered the code, the Service menu appears automatically.

Run tests within the Service menu on Nokia 7.1

You can then find and apply the following tests within the Test menu on Nokia 7.1:

  • HW Version Test
  • main camera
  • Front Camera
  • flash light
  • Test Brightness
  • Test Pixel Color
  • Test Vibrator
  • Test Receiver
  • Test Speaker L
  • Test Speaker R
  • Test Analog
  • Headset Loopback
  • Test Mid
  • Analog Headset test
  • and others

Select a test and it will start automatically.

The advantage of the test menu is that the hardware is addressed with the standard drivers. Errors caused by an app or an error in the Android operating system will not be considered.

So you can use this test menu to test if the hardware on Nokia 7.1 works correctly.

More Articles ...

  1. Nokia 7.1 Manual Search for Firmware Update - Tip
  2. Nokia 7.1 Which Sim card do I need? Solved
  3. Instagram Send GIF Animations via Messenger
  4. Apple Watch How to uninstall apps? Solution
  5. Which Apple Mac model do I have? How to find out!
  6. Apple Watch Add or Remove Watch Face – Dissolved
  7. Apple Watch How to add third-party applications? Solved
  8. Which iPhone model do I own? How to find out!
  9. iPhone How to Delete contacts – How it works
  10. Nokia How to Create Screenvideo - Solved
Page 29 of 317
  • Start
  • Prev
  • 24
  • 25
  • 26
  • 27
  • 28
  • 29
  • 30
  • 31
  • 32
  • 33
  • Next
  • End


  1. You are here:  
  2. Home

Imprint

Privacy Policy

Privacy and Terms of Google

Sitemap