Solvemix

Suche Spickipedia

  • Home
  • Android Smartphones
  • iOS Smartphones
  • Blackberry Smartphones

Huawei P20 Pro W-Lan and mobile data simultaneously active - Disable

Details
Manuel
Android Smartphones
Year 2018

In the status bar of your Huawei P20 Pro, see that the W-Lan and mobile data are active simultaneously, then you may wonder why this is so.

The reason you can see the W-Lan and mobile data icons in the status bar at the same time is as follows:

In the Android system settings of the Huawei P20 Pro there is the option "Mobile data always on". If this option is active, the mobile data connection remains active even if the smartphone is connected via W-Lan.

If you want to deactivate this double Internet connection on the Huawei P20 Pro, for example for the simple reason that more battery power is used, you can do this as follows:

Deactivate mobile data "Always on" on the Huawei P20 Pro
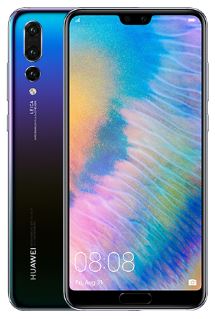
Huawei P20 Pro

Open the settings of your Huawei P20 Pro

Go to "Wireless & Networks" and then to "Mobile Network"

Scroll down to "Advanced" and select the entry

Now deactivate the option "Mobile data always activated" If you are now in a W-Lan network, the mobile data will be deactivated automatically.

If you switch off the W-Lan on the Huawei P20 Pro, the mobile data will be activated again.

Activate Huawei P20 Pro safe mode - Solved

Details
Manuel
Android Smartphones
Year 2018

You can start the Huawei P20 Pro in a so-called safe mode. This mode allows booting only apps and applications that are integrated in the firmware.

The safe mode will therefore be used whenever an additionally installed app causes errors and problems.

How to activate the Safe Mode on the Huawei P20 Pro

Huawei P20 Pro

1. Turn off the Huawei P20 completely

2. Press and hold the Power button “On” to restart it

3. When the "Huawei" logo is displayed, release the Power button.

4. Immediately after releasing the Power button, press and hold the Volume Quieter button.

5. Press and hold the Volume key until the phone finishes rebooting.

6. Release the Volume key softly when Safe Mode appears in the lower left corner of the screen.

You now know how to activate Safe Mode on the Huawei P20 Pro.

Exiting Safe Mode on the Huawei P20 Pro

The Safe Mode can be easily exited by simply restarting the phone. After that Android will be booted normally again.

You now know how to activate and deactivate the safe mode on the Huawei P20 Pro.

Samsung Galaxy Note 9 How to deactivate fast charging? Solved!

Details
Manuel
Android Smartphones
Year 2018

The Samsung Galaxy Note 9 has a rechargeable battery and an appropriate charging technology built in, which makes it possible to charge the smartphone quickly within the shortest time.

This means that the device can be used again within a very short time. Especially if you only have a short time available, the quick charging of the battery is very useful.

Due to the faster charging current, the battery of the Samsung Galaxy Note 9 is also loaded more and this can affect the performance of the battery in the long run.

In addition, the Samsung Galaxy Note 9 warms up faster due to the fast charging process than when it is deactivated.

So if you want to deactivate fast charging on your Samsung Galaxy Note 9, we'll tell you here where the corresponding setting is in Android:

 Switch off fast charging of the Samsung Galaxy Note 9 battery under Android

1. Opens the menu from the Home screen and then the following submenu:

  • Settings --> Device Maintenance --> Battery

2. In this submenu you have to tap on the symbol with the three dots in the upper right corner and then select "Advanced Settings".

In the section "Recharge" you will now find the desired option.

If you now connect the Samsung Galaxy Note 9 to the quick charger, it will be charged with a lower charging current, which is gentler on the battery.

Activate Samsung Galaxy Note 9 Easter Egg - Tip

Details
Manuel
Android Smartphones
Year 2018

You will find a hidden Easter Egg on the Samsung Galaxy Note 9 within the Android system. This is a kind of "gimmick" by the Android developers and can only be opened and displayed if you know what to do.

In the following we would like to show you these steps step by step and lead you to the hiding place of the Easter Eggs:

1. Open the menu and there the Android system settings

2. Scroll down to "Phone info" and open the entry

3. Next it goes to "Software information"

4. Now quickly tap on "Android version"

5. A yellow circle appears - then tap this circle once more for a longer time.

Now the Easter Egg appears. In Android 8 Oreo this is an octopus. In Android 9 there is currently no special Easter Egg integrated, but it will be available with the final version.

You now know how to open and find the Easter Egg in Android on the Samsung Galaxy Note 9.

Samsung Galaxy Note 9 Camera Error - This is what you can do now

Details
Manuel
Android Smartphones
Year 2018

The camera of the Samsung Galaxy Note 9 is great for taking great photos and videos. Nevertheless, it can happen that the camera suddenly issues the following error message after opening the camera app: "Warning Camera Error"

If this message also appears on your Samsung Galaxy Note 9 in the camera app, then you will not be able to take a photo or video with the camera.

The cause may be a technical defect, but often it is only the software that is to blame. Therefore, we have put together some tips that you should follow if the camera of the Samsung Galaxy Note 9 no longer functions correctly.

Restarting the Samsung Galaxy Note 9

The solution is often simple. Therefore, please restart your Samsung Galaxy Note 9 once and check if this has fixed the camera error. If yes, then background processes caused the camera to not be addressed correctly.

Reset camera app of the Samsung Galaxy Note 9

If the restart didn't help, you now have to reset the camera app of your Samsung Galaxy Note 9. This works via the Android application manager. To open it on your device, start it from your Home screen and tap:

Menu --> Settings --> Apps --> Now search this list for the following entry:

  • Camera

If you have found the entry, tap it and the app information will open. Under "Save" you will find several buttons, which you have to tap in the following order:

If you have touched the buttons one after the other, your Samsung Galaxy Note 9 will restart. After rebooting, open the Android camera app again.

The camera error should now have disappeared and the camera should be fully functional again.

Test Samsung Galaxy Note 9 camera module for technical defect

You have to open the service menu of your Samsung Galaxy Note 9. This is done as described in the following instructions. Open Service Menu Here you will find the button "Mega Cam".

Tap this button and you will hopefully see a camera picture. If not, your camera module is defective. If the camera works correctly in this service test menu, everything is fine and there is a more serious problem with the Android camera app.

A Wipe Cache partition or a factory reset can help. We hope that one of the above tips has helped to fix the camera error on the Samsung Galaxy Note 9.

Android Instant Apps install and update themselves independently - Solved

Details
Manuel
Android Smartphones
Year 2018

With Android you can use special apps, the so-called Instant Apps. Instant apps do not have to be installed before use and are often offered to take a first look at a paid app.

If you open an instant app, only the part of the app that is needed to run the app is downloaded to the smartphone's internal temporary memory.

Often, to be able to use instant apps, basic system file end Google Play Stores are updated on your Android smartphone and therefore you will see a message in the status bar:

"Instant apps are updated" If you don't use this option on your smartphone, you can deactivate instant apps as follows:

Enable or disable instant apps

1. On your smartphone, open settings

2. Go to "Google Search" and then open "Instant Apps"

3. Under "Instant Apps Account", navigate to the account for which you want to disable instant apps. Deactivate Instant Apps using the "Switch"

4. If you want to deactivate Instant Apps for all logged in accounts, tap "None"

You now know how to deactivate Instant Apps on an Android smartphone.

Samsung Galaxy S9 Delete saved games and start over

Details
Manuel
Android Smartphones
Year 2018

If you have installed a game from the Google Play Store on your Samsung Galaxy S9 and after a while played through it completely, you may want to delete the saved save games and start over again.

Now the question is how to reset a score on an Android smartphone. Here we would like to help you:

Resetting saved games on the Samsung Galaxy S9 - Instructions

Samsung Galaxy S9

Variant 1: Reset saved game with “Delete App data“

1. To do this, navigate to the settings and then to "Apps & notifications".

2. Continue with "Apps" and then to the app you want to delete.

3. Once you have found it, select it to display the app data.

4. Here you will find the button "Save".

5. Tap on it and you will see the following two buttons:

  • Clear data
  • Clear cache

6. Select the two buttons and the game score should be cleared so that you can start the game again.

If this doesn't help, then your game data may also be backed up by the app in a cloud. Usually this is the service "Google Play Games".

In the following, we will explain how you can also delete the game states here:

Variant 2: Reset score via Google Play games

1. Please open the "Play Games" app on the Samsung Galaxy S9.

2. Continue by clicking on the three-point symbol in the upper right corner and then on "Settings".

3. Select "Delete Play Games data" and then tap "Delete" next to the corresponding game.

This will reset the corresponding score to the beginning and you can start the game again.

There are now two ways to reset your score on the Samsung Galaxy S9 and start the game from the beginning.

Email Send Failed - Authentication methods are not supported by the server

Details
Manuel
Android Smartphones
Year 2018

If you want to send a new e-mail with the e-mail app on the Huawei P20 Pro, you may receive the following message in the status bar after sending:

Email Send Failed - Authentication methods are not supported by the server.

As a result, you will no longer be able to send emails. Often the background for this is as follows: Your email provider has changed a setting that allows the email app to authenticate with the outgoing email server.

So how can you solve the problem?

To do this, you first have to go to the e-mail provider's website. The provider usually specifies the settings that are required to communicate with the e-mail server.

Search there for the options for the outgoing e-mail server. Especially the "port" for the outgoing server is an important key component in connection with the above mentioned error:

Once you have found the data, please check if it is exactly the same as in your account within the e-mail app.

On the Huawei P20 Pro, proceed as follows:

1. Open the email app

2. Tap on "More" in the menu box at the bottom, then tap on "Settings"

3. In the "Accounts" section, go to your email account

4. Scroll down to "Outgoing messages" and select the entry

5. Now check the following settings:

  • SMTP Server
  • Port
  • Security type
  • Login required
  • User name
  • Password

6. Once all data has been entered as required by the e-mail provider, press the "Done" button.

It should now be possible for your Huawei P20 Pro to send your e-mails as usual, without the message "Send e-mail failed" appearing on the screen or status bar.

Huawei P20 Pro Camera Enable Auto HDR - Solved

Details
Manuel
Android Smartphones
Year 2018

The Huawei P20 Pro can automatically take HDR photos. There are two different settings that can be used.

What these are and where you can find them, we want to describe them to you below:

Activate Master AI

Huawei P20 Pro

If you have activated the Master AI on the Huawei P20 Pro, the HDR mode will be activated automatically.

The Master AI has been reworked since one of the last firmware updates and now takes nice pictures in many situations. (Except plants)

HDR camera mode

There is an HDR camera mode that you can activate on the Huawei P20 Pro. Just change to "More" and select the mode "HDR".

If you now take a photo with the Huawei P20 Pro, then this has been taken with the HDR technology.

Alternative: Strong colors

Alternatively, you can also activate the "Strong colors" mode, which works similar to the HDR mode on the Huawei P20 Pro.

This can be activated directly on the live screen. Tap the second icon in the upper right corner of the bar and select "Strong colors".

Our recommendation: If you want it to be an automatic HDR mode, we recommend that you select the Master AI.

It usually takes the best photos, especially now that the firmware update has improved it. In addition, you don't always have to change the camera mode, but can remain in the standard automatic mode.

You now know several ways to activate the automatic HDR mode on the Huawei P20 Pro.

LG G7 Display battery in percent - Solution

Details
Manuel
Android Smartphones
Year 2018

You can display the current charge status of the battery in the status bar next to the battery icon also in percent. A corresponding setting must be activated in Android.

The following step-by-step instructions will show you exactly how this works:

Battery status in percent on the LG G7 - how it works

1. Start from the Home screen and then open the settings

2. Open "General" and then navigate to "Battery"

3. Activate the option "Battery charge in percent in the status bar"

You have now successfully activated the percentage display for the battery in the status bar and can now see very quickly how much battery charge is left in your LG G7 and whether it needs to be recharged.

More Articles ...

  1. Samsung Galaxy Note 9 Enable Call Waiting for Calls - Instructions
  2. Samsung Galaxy S8 Call waiting during phone call - Tip
  3. Huawei P20 Pro Camera Self-Timer Activation - Tip
  4. Huawei VLC Media Player cannot be installed - Solved
  5. Android temperature sensors - Read data
  6. Android WhatsApp How to Record Video Calls - Tip
  7. Samsung Galaxy Note 9 N icon in status bar - Reason
  8. Samsung Galaxy Note 9 Add Weather Widget - Solved
  9. Samsung Galaxy Note 9 Check IMEI number
  10. Samsung Galaxy Note 9 Wipe Cache Partition - Guide
Page 61 of 317
  • Start
  • Prev
  • 56
  • 57
  • 58
  • 59
  • 60
  • 61
  • 62
  • 63
  • 64
  • 65
  • Next
  • End


  1. You are here:  
  2. Home

Imprint

Privacy Policy

Privacy and Terms of Google

Sitemap