Solvemix

Suche Spickipedia

  • Home
  • Android Smartphones
  • iOS Smartphones
  • Blackberry Smartphones

Samsung Galaxy Note 9 Open Service Menu - Secret Code

Details
Manuel
Android Smartphones
Year 2018

Each Samsung smartphone has a small service menu integrated, which cannot be opened via the Android interface, but only via a special code.

That's why this is often called a "secret menu". What is so special about this secret menu on the Samsung Galaxy Note 9?

In this service menu you can run tests and check the hardware for technical functionality. This is very useful, for example, if you think the camera has a defect, the display has a pixel error, or the touch sensors no longer function correctly.

 In this menu you can simply check the hardware with a test, because only standard drivers are loaded in this menu.

In the following we will explain how to call the service menu on the Samsung Galaxy Note 9:

1. First open the phone app from the start screen and change to the keypad (number pad)

2. Now enter the following code: When you have entered the last hash, the service menu will also appear on your Note 9 display.

You can now select the individual fields and perform tests or read out sensor data.

Here we recommend you to have a look at "Sensor" because it shows a lot of interesting data that the sensors of the Samsung Galaxy Note 9 collect.

Samsung Galaxy Note 9 Mailbox - Disable

Details
Manuel
Android Smartphones
Year 2018

The Samsung Galaxy Note 9 is very often purchased with a new contract or a contract renewal. Here it can be that a call diversion to the mailbox is set up automatically.

This means that all calls that are not answered by you will be forwarded to the voicemail. If you do not want this, you can of course deactivate the mailbox.

How this works in detail is explained step by step in the following instructions. This works for all common mobile phone providers.

Switch off the mailbox on the Samsung Galaxy Note 9

1. To do this, first open the telephone app on the Samsung Galaxy Note 9

2. Now switch to the keypad and enter the following code using the numeric keypad:

  • ##002#

3. Afterwards you only have to tap the call button (green handset) once to send the code.

This will send the GSM network code. This will disable all call forwarding on the Samsung Galaxy Note 9, including call forwarding to mailbox.

You now know a very simple and fast method to deactivate call forwarding to the mailbox on the Samsung Galaxy Note 9.

Call - immediately forwarded to the mailbox - Reason

Details
Manuel
Android Smartphones
Year 2018

If you call a contact, then it can happen that you will be forwarded to the mailbox immediately.

If you wonder why this is the case, there are different reasons for this. In the following we want to show you when you are immediately forwarded to the mailbox when you make a call.

Reasons for immediate forwarding to the mailbox:

Reason 1: Your mobile phone number was blocked by the called contact (blacklist/lock list)

Reason 2: Your contact has no reception with his smartphone and is not logged into a network cell

Reason 3: Your contact has switched off his smartphone or the battery is empty

Reason 4: Your contact has configured a direct forwarding to the mailbox

Other greens for an immediate forwarding to an answering machine do not exist at the moment.

You now know why you are forwarded directly to the mailbox when you call a contact.

Huawei P20 Pro New Tag Captured Message - Solved

Details
Manuel
Android Smartphones
Year 2018

On the Huawei P20 Pro, the following message may suddenly appear on your display: New Tag Captured - Empty Tag.

If you encounter this message for the first time, you will want to know for sure what it is all about and how to avoid it.

Cause for the message: New Tag Captured

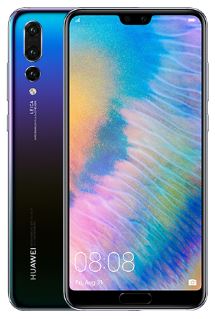
Huawei P20 Pro

This message is caused by the connection method NFC and a tag recognized for it. Often such a tag is hidden in the credit card, which users of the Huawei P20 Pro put into a case (protective case, leather case etc.) of the smartphone.

If NFC is now activated on the Huawei P20 Pro, this tag is recognized in the credit card and the message "New tag entered" appears.

"Empty tag" because your Huawei P20 Pro cannot evaluate the credit card NFC tag ;-)

Avoid message "New tag detected"

To do this, you simply have to deactivate NFC on the Huawei P20 Pro. To do this, pull down the status bar and tap the corresponding toggle with NFC to switch this mode off.

Alternatively, you can remove the NFC tag, i.e. the credit card etc. from the vicinity of the Huawei P20 Pro.

Now you know what the message on your Huawei P20 Pro is all about and how to avoid this message in the future.

Huawei P20 Pro Disable App Notification - Individual Apps

Details
Manuel
Android Smartphones
Year 2018

Many apps that you have installed on the Huawei P20 Pro inform you via notifications. For example, a new notification about an incoming message, an action in a game or a reminder can inform you about it.

However, if you want to deactivate the notification for a specific app, you may not yet know where to find the corresponding option.

No problem, we'll explain!

Huawei P20 Pro

We will explain step by step where you can deactivate the App Notification for each app:

1. Open the settings on the Huawei P20 Pro

2. Tap on "Apps & Notifications"

3. Select Notification management and then the app where you want to deactivate the notification

4. Now deactivate the slider at "Allow notifications" Done!

You have now deactivated the notifications on the Huawei P20 Pro for a single app. This will no longer inform you if a new action or information is contained in the app.

HTC U12 Plus WLAN Hotspot Activation - How to do

Details
Manuel
Android Smartphones
Year 2018

The HTC U12 Plus can be ideally transformed into a mobile WLAN hotspot on the go. This means that other devices can access the mobile data connection via W-Lan.

So you can also make the mobile Internet available for other devices quickly and easily. We have summarized how this works in detail for you in the following:

1. Please start it on your HTC U12 Plus from the start screen and then open the "Settings"

2. Then navigate to "Network and Internet"

3. Here you will now find "Hotspot and Connection"

4. You can now activate the "Mobile W-Lan Hotspot" option

If you are using this for the first time on your HTC U12, you must now enter a W-Lan Hot Spot name and password.

Samsung Galaxy A6 Plus Disable automatic space on keyboard

Details
Manuel
Android Smartphones
Year 2018

If you bought the Samsung Galaxy A6 Plus for the first time and wrote your first emails, WhatsApp messages and so on with the keyboard, you may have noticed that often a space is inserted automatically after a word.

Most of the time this is quite useful, often unfortunately not, so you have to delete the space again while writing a coherent word.

If you might want to uninstall it on your Samsung Galaxy A6 Plus for this reason, the following instructions will show you how to switch off the auto spaces:

1. Start from the Home screen and then navigate to "Settings".

2. Navigate to "Language and Input"

3. Then open:

  • On-screen keyboard --> Samsung keyboard --> Intelligent Typing

4. In this submenu you can now select "automatic spaces" and then disable the option.

To do this, simply move the slider from "On" to "Off". This means that texts should no longer automatically begin with a space.

You have successfully deactivated the keyboard option on the Samsung Galaxy A6 Plus.

Honor 10 Change Homescreen and Lock Screen Wallpaper - Solution

Details
Manuel
Android Smartphones
Year 2018

With a wallpaper, you can personalize the Honor 10 and thus personalize it even more for yourself.

If you don't yet know where to change a background image for the Home screen or the lock screen on Honor 10, this tutorial will show you exactly how to do this.

Change Homescreen Background

To do this, open the settings and then navigate to:

  • Display --> Background

You can now set an image as the home screen background by touching "Set Background". You can now select a photo from the gallery or one of the pre-installed images.

You will then need to make the following selection:

  • Both Screen (Home screen and Lock screen)
  • Lock screen
  • Change background

You have now changed your background image either for the Home Screen or the Lock Screen, or perhaps for both at the same time on the Honor 10.

Samsung Galaxy Note 9 How to Delete apps

Details
Manuel
Android Smartphones
Year 2018

Apps are often tried out and installed from the Google Play Store on the Samsung Galaxy Note 9. However, it is often the case that you want to uninstall or delete them after a certain time.

If you have never uninstalled an app under Android before, we would like to explain two of the most common methods here:

Uninstalling Apps via the App Menu

1. Open the menu from the start screen and then search for the app you would like to uninstall.

2. Now press and hold the App you want to remove with your finger.

3. A small pop-up menu appears, in which you have to select "Uninstall"

4. Info: Uninstall application appears

5. Touch the button "Uninstall" to start the deletion process. Done!

Delete Apps via the Google Play Store

1. Open the Google Play Store - Open the menu on the top left and then select "My Apps and Games"

2. Search for the app you want to remove

3. Select the "Uninstall App" button in the App Info. The app will now be deleted or uninstalled from your Samsung Galaxy Note 9 and will then no longer exist.

The memory previously blocked by the app is now available again for other files and applications on the Samsung Galaxy Note 9.

Samsung Galaxy Note 9 How to add widget to the start screen

Details
Manuel
Android Smartphones
Year 2018

With a widget you can display additional interesting information on the Samsung Galaxy Note 9 Homescreen or call functions directly from apps.

This is very useful because you don't have to call the app first. How to add such a widget to the start screen on the Samsung Galaxy Note 9 is explained in more detail here.

1. Find a free space on the start screen of the Samsung Galaxy Note 9

2. Press and hold your finger on the free space until the screen shrinks

3. A menu appears in which you can now select "Widget"

4. Now search the list of the widget for one which you want to add to the start screen

5. Press and hold the widget until you can place it on the home screen

6. Release the widget when it is in the correct position

Proceed as follows for each widget to add it to the Samsung Galaxy Note 9 homescreen.

More Articles ...

  1. Samsung Galaxy Note 9 Waterproof? Solved!
  2. Huawei "New Tag Captured" message appears - Solution
  3. Huawei P20 Pro Camera Insert Watermark into Photos - Time and Weather
  4. Samsung Galaxy S8 App does not show badges and numbers - Tip
  5. Samsung Galaxy S9 App icon shows no indicator and no numbers? Solved!
  6. Nova Launcher App Badges do not display numbers - Solved
  7. Samsung Galaxy S9 Deactivate App Notifications - Solution
  8. Samsung Galaxy S9 Disable Samsung account info in status bar
  9. Samsung Galaxy S9 Google Maps Arrow shows wrong direction - Compass
  10. Huawei P20 Pro Cannot connect to Garmin Fenix
Page 65 of 317
  • Start
  • Prev
  • 60
  • 61
  • 62
  • 63
  • 64
  • 65
  • 66
  • 67
  • 68
  • 69
  • Next
  • End


  1. You are here:  
  2. Home

Imprint

Privacy Policy

Privacy and Terms of Google

Sitemap