Solvemix

Suche Spickipedia

  • Home
  • Android Smartphones
  • iOS Smartphones
  • Blackberry Smartphones

LG G7 Reset to factory defaults - Instructions

Details
Manuel
Android Smartphones
Year 2018

Sometimes it makes sense to reset the LG G7 to factory defaults. All data on the device will be deleted and Android will be reloaded.

This is similar to formatting your PC and then reinstalling the operating system.

In order to reset the LG G7 to factory settings, it is best to proceed as follows:

1. Open the settings

2. Navigate to "General" and then to "Save & Reset"

3. Here you will already find the menu item "Reset to factory settings".

Please note that this will delete all data, including private pictures, videos and messages.

It makes sense to make a backup before doing this.

Turning off HTC U12 Plus data roaming - tip for travelling abroad

Details
Manuel
Android Smartphones
Year 2018

If you are travelling abroad outside the EU, it makes sense to deactivate data roaming, as otherwise very expensive charges for the mobile Internet connection can arise.

We'd like to explain how you can turn off data roaming on the HTC U12 Plus.

To do this, navigate to the following submenu:

1. Start from the Home screen and open Settings

2. From here, go to "Mobile data", where you will find the "Data roaming" submenu item

3. You can now switch this function off using the slider

This now blocks the mobile data connection to networks outside your home network. You have successfully deactivated roaming on the HTC U12 Plus.

Reinstalling Instagram - Do I need to make a backup?

Details
Manuel
Android Smartphones
Year 2018

Sometimes you may need to reinstall Instagram because, for example, you are switching to a new smartphone or Android or iOS smartphones are not working properly and you need to reset them to factory defaults.

The question you ask yourself as an Instagram user is, can I simply uninstall and reinstall Instagram without losing data like pictures and videos?

Or do I need to create a backup?

The answer is:

No, there is no need to create a backup when reinstalling Instagram. Because your data such as images and videos are all stored in the Instagram cloud or its servers.

This means you can easily uninstall and reinstall Instagram without losing any of your data.

Huawei P20 Pro files via Wi-Fi Direct are not received - Solved

Details
Manuel
Android Smartphones
Year 2018

One of the fastest ways to transfer data between two smartphones is Wi-Fi Direct. This method uses the W-Lan connection to exchange data between your Huawei P20 Pro and another smartphone such as a Samsung Galaxy.

Now you may want to send data from a Samsung Galaxy or another Android smartphone via Wi-Fi Direct to the Huawei P20 Pro, but it has problems receiving the data.

Huawei P20 Pro

If your Huawei P20 Pro also has problems receiving data such as pictures, videos, etc. via Wi-Fi Direct, please use the following tip to fix the problem:

1. Before you can send a file to the Huawei P20 Pro from another smartphone, you must first send a file from your Huawei P20 Pro to the device. Sounds strange, but that's how it sounds.

2. Simply send a photo of your Huawei P20 Pro to the device, which would like to send you a file afterwards. Open the gallery and then the photo you want to send. Then select "Share" and "Wifi Direct". Done!

The other smartphone, for example a Samsung Galaxy must accept now only this file. Done!

3. This has now caused that your Huawei P20 Pro can finally receive files from this other smartphone.

Now send the data from your Samsung Galaxy via Wi-Fi Direct to the Huawei P20 Pro.

Note: It can take up to 20 seconds for the Wi-Fi Direct acceptance message to appear on your Huawei P20 Pro.

Now you know what to do if your Huawei P20 Pro cannot receive files via Wi-Fi Direct.

Huawei P20 Pro Remove W-Lan networks from list

Details
Manuel
Android Smartphones
Year 2018

On the Huawei P20 Pro you can connect to a W-Lan network via W-Lan and then surf the Internet. Each HotSpot is stored in a network list, so you can quickly log back in without having to re-enter your credentials.

Over time, however, a lot of W-Lan networks will accumulate in this network list, which you will never use again.

Huawei P20 Pro

Especially if you often dial in to different W-Lan hotspots during your holidays, then these are useless for a further permanent use in the list of networks.

If you would like to delete individual networks from the W-Lan network list, please proceed as follows:

1. Open the settings on the Huawei P20 Pro

2. Open "Wireless & Networks"

3. Open "WLAN" and activate it if not already done

4. At the bottom of the menu box, please select "Configure"

5. You will now see the entry "Saved networks" - Tap on the entry

6. You will now see all networks you have ever connected to with the Huawei P20 Pro - Press and hold the finger on an entry you want to remove

7. Then select the "Remove" button.

Now proceed as follows with all W-Lan networks that you want to delete from the list.

You now know how to remove individual W-Lan networks from the list of stored Wi-Fi networks of the Huawei P20 Pro.

Samsung Galaxy A6 Plus Turn around and mute - gesture control

Details
Manuel
Android Smartphones
Year 2018

By means of various gestures, the Samsung Galaxy A6 Plus can control functions that you need frequently or very quickly in everyday life.

This includes, for example, muting the smartphone when you make a call so that it no longer rings.

For this there is the option "Mute by turning around". This gesture is golden on the Samsung Galaxy A6 Plus, especially when you are sitting in a meeting or in a very quiet environment.

Below we will show you how to activate them:

1. Start from the Home screen and then open the App menu

2. Navigate to Settings and then select the "Advanced features" entry

3. Here you will find the "Simple mute" option - Select it and then activate the switch. That's it.

If you receive a call that you want to mute as quickly as possible, all you have to do is turn the Galaxy A6 Plus once, as if you were replacing the handset on an old phone.

Samsung Galaxy S8 Hide developer options in settings - Solved

Details
Manuel
Android Smartphones
Year 2018

You can activate the developer options within the Android operating system of the Samsung Galaxy S8 and thus access additional options within the Android system.

Often you activate these options for testing purposes, but then have no concrete use for them, unless you are working intensively as a programmer on new apps.

Maybe you want to hide or disable the developer options on the Samsung Galaxy S8 in the settings. If this is so, then you won't find a switch for it. Because this is so simple and simply not intended.

Samsung Galaxy S8

But with this little trick you can remove the developer options from the Android menu. And this is how it works:

1. Opens the App menu from the Home screen and then the Settings

2. Then navigates up: Apps

3. Now you see a list with all apps installed on your Samsung Galaxy S8. Scroll down in this list to "Settings"

4. Select the entry and then go to "Memory"

5. Now select the following buttons one after the other:

  • Clear Cache

This will remove the developer options from the settings menu and if you want to use them again, you will have to reactivate them in the usual way.

Now you know the procedure to hide or deactivate the developer options, which have to be unlocked separately, from the Android settings menu.

Huawei P20 Pro Sim Card Slot cannot be opened - jammed

Details
Manuel
Android Smartphones
Year 2018

Sometimes it can happen that the carriage of the Huawei P20 Pro, which is inserted into the Sim Card Slot, jams or cannot be opened.

If this is the case, then you can usually remove the Sim card sled using a simple trick.

In the following we would like to tell you two important and often working tips:

Tip 1: Put a smartphone in the fridge for 10 minutes

Huawei P20 Pro

Often the reason for a stuck sled are the sealing rubbers that ensure the waterproofness of the device. When heated, they can be "sticky". Put the Huawei P20 Pro in the fridge and wait about 10 minutes. Then try to remove the sim card slot again.

Tip 2: Use paper clip instead of Sim Tool

The Sim Tool, which is included with the Huawei P20 Pro, is badly suited to exert more pressure. That's why you should try a paper clip. This is often more stable and you can exert more pressure on the sim sled.

Note: Pay attention to the correct one!

Take care to use the correct Sim card unlock "hole" The Sim card slot is well recognizable at a closer look. Please do not confuse it with the microphone.

Samsung Galaxy S9 Camera Warning Errors - Tips and Advice

Details
Manuel
Android Smartphones
Year 2018

The Samsung Galaxy S9's camera usually runs without problems and takes beautiful photos and videos. However, it can also happen that suddenly and without notice these errors are shown on the display when you open the camera app: "Warning Camera Error"

The cause of this error can be very different.

From a software error to a technical defect, anything is possible. That's why we want to go into more detail about various causes and their solutions here.

We will also show you how to test whether the camera module of the Samsung Galaxy S9 has a technical defect.

Tip 1: Restart Samsung Galaxy S9
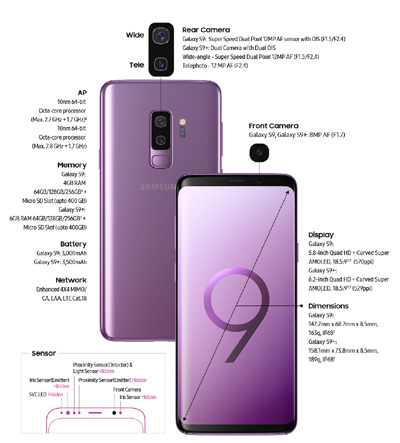
Samsung Galaxy S9 Hardware

The solution is often quite simple. Therefore, please restart your Samsung Galaxy S9 once and test if this has fixed the camera error. If so, then background processes caused the camera to not respond properly anymore.

Tip 2: Reset camera app of Samsung Galaxy S9

If the restart didn't help, you have to reset the Android camera app of your Samsung Galaxy S9 now. This works with the Android application manager. To open it on your device, start from your Home screen and tap :

  • Menu --> Settings --> Apps --> Now search this list for the following entry: Camera

If you have found the entry, tap it and the app information will open. Under "Memory" you will find several buttons which you have to tap in the following order:

Delete empty cache

Note: No photos or videos will be deleted!

If you have touched the buttons one after the other, your Samsung Galaxy S9 will restart. After restarting the Samsung Galaxy S9 opens the camera app of Android again.

The camera error should now have disappeared and the camera should be fully functional again.

Tip 3: Test Samsung Galaxy S9 camera module for technical defect

To do this you have to open the service menu of your Samsung Galaxy S9. This can be done as described in the following instructions.

  • Open Service Menu

Here you will find the button "Mega Cam".

Tap this button and you will hopefully see a camera picture. If not, your camera module is defective. If the camera works correctly in this service test menu, everything is fine and there is a more serious problem with the Android camera app.

A Wipe Cache Partition or a factory reset can help if your camera is defective, take the return guarantee or warranty from your dealer or Samsung.

You now know what to do if the error "Camera error!" appears when opening the Samsung Galaxy S9 Camera App. Warning" appears.

Samsung Galaxy S9 Sim Card Slot cannot be opened

Details
Manuel
Android Smartphones
Year 2018

Modern smartphones like the Samsung Galaxy S9 have a so-called Sim Card and SD Card sled. This is integrated into the housing so that it is flush.

Once the sled has been "sunk" into the housing, it has to be reopened when selling the smartphone or changing Sim Cards. Here it can come however then partly already once to problems.

After such a long time, the Sim Card sled usually sits very firmly in the Sim Card slot. So what to do if the Sim Card slot is not available in the Samsung Galaxy S9 housing?

Tip 1: Put your smartphone in the fridge for 10 minutes

Samsung Galaxy S9 Hardware

The reason for a stuck sled is often the rubber seals that ensure the waterproofness of the device. When heated, they can be "sticky". Put the Samsung Galaxy S9 briefly in the fridge and wait about 10 minutes.

Then try to remove the Sim card slot again.

Tip 2: Use paper clip instead of Sim Tool

The Sim Tool, which is included with the Samsung Galaxy S9, is badly suited to exert more pressure.

That's why you should try a paper clip. This is often more stable and you can exert more pressure on the Sim sled.

Tip 3: Take care to use the correct "hole"

The Sim card slot is easily recognizable when looking closely. Please don't confuse it with the microphone!

We hope that these tips have helped you to remove the Sim Card sled from the slot of the Samsung Galaxy S9.

More Articles ...

  1. Huawei P20 Pro Charger Housing gets hot - Tip
  2. LG G7 no response to inputs - Solution
  3. HTC U12 Plus Activate blue light filter - Solved
  4. Samsung Galaxy A6 Plus How to Activate Mobile Hotspot - Tethering
  5. Samsung Galaxy A6 Plus Dictionary Disable Autocorrect - Tip
  6. Samsung Galaxy S9 Display Overlay detected - Solved
  7. Samsung Galaxy S8 Switch network mode - Instructions
  8. Samsung Galaxy A6 Plus Set GSM network mode manually
  9. Huawei P10 Sort contacts by last name - Tip
  10. Huawei P20 Pro Camera Autofocus does not focus - Solved
Page 69 of 317
  • Start
  • Prev
  • 64
  • 65
  • 66
  • 67
  • 68
  • 69
  • 70
  • 71
  • 72
  • 73
  • Next
  • End


  1. You are here:  
  2. Home

Imprint

Privacy Policy

Privacy and Terms of Google

Sitemap