Solvemix

Suche Spickipedia

  • Home
  • Android Smartphones
  • iOS Smartphones
  • Blackberry Smartphones

Playstation 4 Firmware Update - Instructions

Details
Manuel
Solvemix

If you have an older firmware installed on your Playstation 4 than currently available, then you should definitely perform an update. The easiest way to update the firmware is via the Playstation itself in combination with an Internet connection.

First, the Playstation 4 must be connected to the Internet. The network settings must be set up correctly for this.

If this has been done and an Internet connection is available, then the update can already begin:

  1. Navigate to the function screen and then select:
  • Settings --> System software update
  1. Your Playstation 4 now checks via the Internet whether you have the latest version of the firmware.
  2. If an update file is available for a newer firmware version, it will be downloaded to Playstation 4.
  3. After downloading the firmware, a notification will appear in the top left corner.
  4. Select on the function screen now:
  • Messages --> Downloads
  1. Then follow the on-screen instructions to complete the installation. The new firmware will now be installed on your Playstation 4 and can then be applied after a reboot.

You should install the latest firmware to use the latest features on your Playstation 4. Even more hard disk space of up to 8 GB is supported by the latest firmware of the PS 4.

Playstation 4 controller does not react after a short time - Solution

Details
Manuel
Android Smartphones
Year 2018

If you have a problem with your Playstation 4 controller that it no longer works correctly and for example no longer connects to the PS4, the cause can usually be corrected as follows:

Resetting the Playstation 4 Controller - Instructions

First switch on the Playstation 4 completely. To reset the controller now, you need a needle, toothpick or narrow paper clip.

With this you must now press the reset button on the Playstation 4 Controller. The reset button is located in a small hole on the back of the controller, near the L2 button. Now press this reset button for approx. 2 seconds.

Connect the Playstation 4 Controller to your console with a USB cable. Switch on the PS4 afterwards. Now just press the PS button on the PS4 controller.

The controller should now establish a connection with the Playstation 4 and function as usual. If this is not the case, it is possible that your controller is defective and the warranty will be claimed.


PlayStation 4 How to activate Parental Control? Solved!

Details
Manuel
Android Smartphones
Year 2018

If you allow your children to play with a PlayStation 4, you may want to limit the time the child can spend in front of the console for educational reasons.

With PlayStation 4 this is possible and this article should help you to set the time in the settings:

To activate the PlayStation 4's navigate within the main menu to:

  1. Settings ---> Parental Control/Family Management
  2. Family management ---> Main account
  3. Here the subaccounts of your child or children should be created

Important! The time can only be set for subaccounts!

Select a subaccount and you will see the following option:

Time frames, limits and certain actions at the end of a session can be defined using three simple settings:

Set up play time restrictions

This activates the parental control for the play time. The options that are available are: In this section you can set a time frame for using the console. You can set an individual playing time for different days. In this way, a setting can be made for each day:

  • Playing time
  • start time
  • end time

This function is useful because parents can set a longer time for playing on Playstation 4 for the children on the WE than is permitted during the week.

Action after the end of the game time

There are two options here:

  • Only tell (soft variant)
  • Log out from PS4 (strict variant)

If only "Tell" is selected, then only an info appears that the game time is over, but the child can still use the console. With the option "Log out from PS4" the player is logged out directly regardless of a memory point.

If you select "Tell only", your children will be informed by a message that the game time has elapsed. This message will be displayed every five minutes.

If this option is activated, the session can be continued until it is manually interrupted. The option "Log out from PS4" logs your children off the console so that they can no longer use them.

A warning will be displayed 30 minutes, 15 minutes, 10 minutes and 5 minutes before the end of the game.

You now know how to limit Playstation 4's play time for children and what options are available.

Remove Alexa App Existing Device - Tip

Details
Manuel
Android Smartphones
Year 2018

Use the Alexa App to control Smart Home devices, such as the Echo Dot, and you may want to remove a device at some point. But how to remove an existing Smart Home device with the Alexa App?

This is explained step by step in the following instructions:

Manage smart home devices in the Alexa app:

  1. Open the Amazon Alexa website
  2. Select Devices from the menu. Select your Smart Home device to delete and select Edit.

To delete the device, tap the trashcan icon to permanently remove the device from the list.

You now know how to remove or delete a device that was previously set up in Amazon Alexa.

Facebook How to Clear App Cache - Resolved

Details
Manuel
Android Smartphones
Year 2018

If you use Facebook as an app on your Android smartphone, it may sometimes be necessary to clear the cache of the app. If you don't know how this works in Android yet, then this article should help you:

Clear cache from Facebook App

Please note that the steps below may vary slightly depending on model and Android version.

  1. Open the Android settings from your home screen and select "Apps"
  2. All apps will now be listed - search for "Facebook"
  3. Select the entry and you will see the app info
  4. Select "Save" and you will see in the next submenu:
  • Clear data
  • Clear cache
  1. Select Clear cache.

You have now successfully deleted the Facebook cache. Alternatively, you can also delete the data from the Facebook app. However, this means that you will have to reset your personal settings in the app, as they will be deleted.

Deleting the data may also help to solve major problems with the app.

WhatsApp - When your contacts see you as online

Details
Manuel
Android Smartphones
Year 2018

In WhatsApp there is the field "Online" or also "Last Online". When is this field displayed or when is one displayed online with one's contacts? We would like to discuss this in more detail in the following article:

Both displays are indicators that you or a contact is or had been online.

When is "onlineā€ displayed in WhatsApp?

This timestamp is displayed every time you open WhatsApp in the foreground on your smartphone (Android or iPhone).

The last online timestamp refers to the time when the contact left WhatsApp on their smartphone, i.e. when it no longer runs in the foreground.

You now know when your contacts are shown the status "Online" or "Last Online".

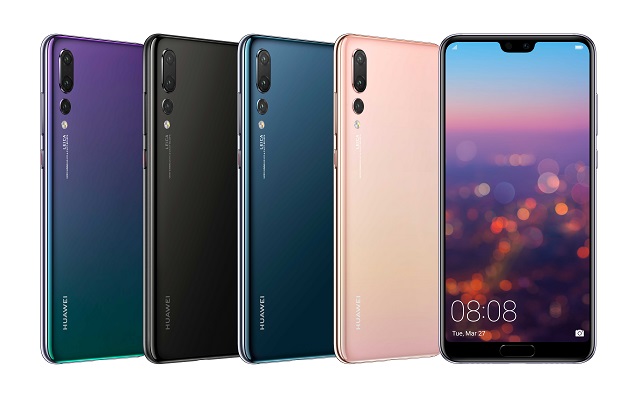
Huawei P20 Pro How to enable Tresor for sensitive files

Details
Manuel
Android Smartphones
Year 2018

There is some data stored on the Huawei P20 Pro that you would prefer to keep more securely. This often includes photos and videos.

If this data is to be explicitly protected again, there is a "Tresor", a kind of secure folder, which is again protected by a password. We would like to describe how you can use this safe here:

Set up a safe for files on the Huawei P20 Pro

Huawei P20 Pro

Open the app "Files" from the start screen. You will now see a button with "Tresor" - select it. A setup wizard will now follow to help you set up the new vault. If this was added and secured with a password, you can now start to move files into it. Here is an example with photos for you:

Move files to Tresor - Example

Open the files app of the Huawei P20 Pro and then selects "Pictures". Select the photo you want to move to the vault and select it in the list by holding down the finger once. As soon as this is marked, a bar appears at the bottom of the display.

Now select "More" and in the opening context menu "Move to Tresor". This will move the selected image to the vault. It is no longer visible via the gallery app, but only practice the Tresor within the "Files app".

Samsung Galaxy S9 Cloud Backup - Don't lose data

Details
Manuel
Android Smartphones
Year 2018

It makes sense to back up the data stored on the Samsung Galaxy S9 from time to time. In addition to the solution via PC and Smart Switch, there is also the option of backing up data in the Samsung Cloud.

If you want to use this option for the Samsung Galaxy S9 but do not yet know how to set up a cloud backup, the following instructions will help you:

Creating a backup of the Samsung Galaxy S9 data and saving it in the cloud

Samsung Galaxy S9

1. Open the App menu on your Samsung Galaxy S9

2. Navigate to "Cloud and Accounts" and then to "Samsung Cloud"

3. Select "Backup Settings" and you will see an overview of the data to be backed up

4. Activate the slider at "Automatic Backup" - Attention! Internet must be active.

5. Select the data to be saved automatically. It is best to set the option to "active" everywhere.

The backup of your Samsung Galaxy S9 data now takes place automatically with an existing W-Lan connection into the cloud. This backup is performed at regular intervals.

You can also set the exact times in this submenu.

Samsung Galaxy S9 WhatsApp Empty Cache

Details
Manuel
Android Smartphones
Year 2018

If you use the WhatsApp messenger on the Samsung Galaxy S9, you may be able to clear the cache once. This may be the case, for example, if WhatsApp crashes or other problems occur that have no apparent cause.

If you don't yet know how to clear the cache of an app, in this case of WhatsApp, on the Samsung Galaxy S9, then we would like to show you this in detail.

Samsung Galaxy S9

1. Open the app menu from the Samsung Galaxy S9 home screen and then the settings of Android

2. Navigate to apps and search for "WhatsApp" in the list

3. Once you have found the entry, please open it to get more app information.

4. Press the "Save" button and then the "Clear cache" button

The cache of the WhatsApp application on which Samsung Galaxy S9 is stored is now cleared.

This will be created the next time the app is opened, which hopefully will lead to the app working correctly again.

Samsung Galaxy S9 Android temperature reading of battery and CPU

Details
Manuel
Android Smartphones
Year 2018

The Samsung Galaxy S9 has various sensors, which are not directly visible in everyday life or can be addressed. This includes, for example, the temperature sensor for the battery and the CPU or processor.

This data can be interesting under certain circumstances, especially if you have the feeling that your smartphone is getting very hot. For this reason we would like to explain here how to read the temperature of the battery and CPU of the Samsung Galaxy S9.

Samsung Galaxy S9

We recommend that you download the "Phone Info" app to your smartphone. This is a diagnostic software for Samsung smartphones:

  • Download Phone Info from the Google Play Store

If you have installed the app on the Samsung Galaxy S9, then it switches to the "Monitor" tab.

Here you can see the current battery temperature and the processor temperature.  Note: If the battery temperature is significantly higher than the processor temperature for a longer period of time, this means that something is wrong.

Turn off your Samsung Galaxy S9 and wait about 10 minutes. Place the unit in a cool place (no refrigerator or similar). Then restart the smartphone and check how the temperatures are behaving.

In case of doubt the following article will hopefully help you to solve the error with the temperature.

More Articles ...

  1. Samsung Galaxy S9 Can you use two Bluetooth devices at the same time? Solution
  2. Samsung Galaxy S9 Create Collage in Gallery
  3. Samsung Galaxy S9 music transfer - How to do it
  4. Samsung Galaxy S9 Malfunction after Android Firmware Update - Tip
  5. Honor 10 Deactivate the mobile phone provider's mailbox - How to
  6. Nokia 8 gets Pro Mode for Camera App
  7. Samsung Galaxy A3 problems after update to Android 8.0 Oreo - Tip
  8. Request WhatsApp Account Information - Tip
  9. Samsung Galaxy S9 Use Google Photos instead of Gallery as default
  10. Huawei P20 Pro Using USB stick via the OTG function - Instruction
Page 87 of 317
  • Start
  • Prev
  • 82
  • 83
  • 84
  • 85
  • 86
  • 87
  • 88
  • 89
  • 90
  • 91
  • Next
  • End


  1. You are here:  
  2. Home

Imprint

Privacy Policy

Privacy and Terms of Google

Sitemap