Solvemix

Suche Spickipedia

  • Home
  • Android Smartphones
  • iOS Smartphones
  • Blackberry Smartphones

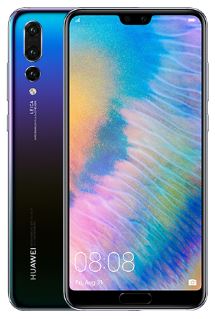
Huawei P20 Pro Photos in RAW - Tip

Details
Manuel
Android Smartphones
Year 2018

The powerful camera of the Huawei P20 Pro offers you many possibilities that were previously only available with expensive cameras. This is the option to take photos in RAW format.

The RAW format corresponds to the uncompressed version of an image. In contrast, a JPEG is the compressed version of a photo. During the compression of photos, details are always lost, which can have a detrimental effect, especially in post-processing.

That's why there is the RAW format, where the photo stays exactly the same as it was taken by the camera. Therefore, the image size is many times larger than JPEGs. In the following we would like to show you how to activate the RAW mode in the camera app of the Huawei P20 Pro.

To do this, proceed as follows:

Take RAW photos with the Huawei P20 Pro

Huawei P20 Pro

1. Open the camera app on the Huawei P20 Pro

2. Now switches to camera mode Pro

3. Now touch the gear icon in the top right corner of the live viewfinder 4. now activates the slider at "Raw Format" This will create RAW files in addition to the JPEG photo and save them to the internal memory.

You can now perfectly edit these photos to get the most out of your Huawei P20 Pro camera. Have fun with it!


Samsung Galaxy S9 How to activate the data roaming – How it works

Details
Manuel
Android Smartphones
Year 2018

By means of activated data roaming you can use for example in the EU foreign countries your mobile Internet to the home tariff. To do this, however, data roaming must first be activated in the settings of the Samsung Galaxy S9.

The submenu to which you must navigate is shown below:

Activate data roaming on the Samsung Galaxy S9

Samsung Galaxy S9

1. Open the app menu from your start screen and then:

  • Settings --> Connections --> Mobile networks

2.Activate "Data roaming" here. (This is only possible with an activated data connection!) Attention when travelling outside the EU!

You can now use your contract conditions in your mobile phone contract in your home country and the EU, but it is now dangerous from a cost point of view if you travel to a non-EU country, for example the USA.

Here you must absolutely remember to deactivate the mobile data roaming again, since otherwise extremely high costs can result.

Now you know where to activate data roaming on the Samsung Galaxy S9 and use the mobile Internet abroad via other mobile networks.

Huawei P20 Lite Screenshot - Manual

Details
Manuel
Android Smartphones
Year 2018

The Huawei P20 Lite, which is a slimmed down and smaller version of the Huawei P20, of course also has the function to take a screenshot. The screenshot function integrated in Android can be used to take pictures of displayed content on the Huawei P20 Lite screen.

Thus, error messages, scores, websites and much more can be quickly saved in an image file. To take a screenshot with the Huawei P20 Lite, press a key combination on your smartphone.

Huawei P20 Pro

Navigate with your Huawei P20 Lite until the content you want to capture is shown on the display. Press and hold the following buttons at the same time for about two seconds.

  • Power button used to turn on the Huawei P20 Lite
  • Volume down button

If you press and hold these two buttons exactly simultaneously, the contents of the display are saved in a screenshot.

If the screenshot was successful, you will hear a short "click", which is similar to a camera and at the same time a short flashing white frame around the complete display content.

The screenshot just taken with the Huawei P20 Lite can be found in the "Gallery" in the newly created folder "Screenshots".

You have now learned how to take a screenshot with the Huawei P20 Lite and where to save it.

Couple Huawei P20 Pro with BOSE Quiet Comfort 35

Details
Manuel
Android Smartphones
Year 2018

If you are one of the lucky pre-orderers of the Huawei P20 Pro, you will have received the BOSE Quiet Comfort 35. Once the headphones have arrived at home, you will want to pair them with your smartphone.

First: The sound of the headphones is great and pre-ordering has definitely paid off =)

Huawei P20 Pro

To connect the BOSE headphones, download the following app to your Huawei P20 Pro:

  • Bose Connect+ App - Download via Google Play Store

Once you have installed the app on your Huawei P20 Pro, you're ready to go. Opens the app and follows the instructions on the screen. Here, various options must now be allowed, such as the "location information".

Unfortunately, the app cannot work without this information. Once everything is settled, you can get started. The app will now search for your BOSE headphones. If not already done, set the switch on the headset for Bluetooth to "On".

The Huawei P20 Pro is then played back with the BOSE Quiet Comfort 35 and music or all audio files above it.

You now know how to connect and pair the BOSE Quiet Comfort 35 headphones to the Huawei P20 Pro.


Nokia Enable Android developer options – Tip

Details
Manuel
Android Smartphones
Year 2018

The cult brand Nokia now also uses the Android operating system for its smartphones, which means that many functions known from other Android smartphones also work on a Nokia smartphone.

This also includes enabling or activating the developer options. Where to activate them within the Android system on your Nokia can be found out here:

How to activate developer options on all Nokia smartphones with Android,

  1. Open the menu from the start screen and then the settings
  2. Scroll down to "About the phone" or "Device information" and select the entry from
  3. Then click on "Software" and then on "Build number" (depending on the Android version, this entry may also appear a menu before)
  4. Tap "Build number" several times - the developer options will now become active! You can now activate various functions in the developer options of your Nokia smartphone.

The most important option here is probably USB debugging, which often helps with connection problems with the PC.

Samsung Galaxy S9 Smart Lock - How to Use

Details
Manuel
Android Smartphones
Year 2018

The Samsung Galaxy S9 offers you a very cool feature: Smart Lock. This will automatically unlock your phone when it is paired with a Bluetooth device from you. For example, the hands-free car kit can be coupled with Smart Lock.

This means that you no longer have to unlock your Samsung Galaxy S9 in the car. That's great, but it needs to be set up first. That's exactly what we want to help you with. And this is how it works:

Set up the Smart Lock function on the Samsung Galaxy S9

Samsung Galaxy S9

1. Start screen --> Settings --> Device Security --> Smart Lock

2. Enter the pin to access the options.

3. You will now see four different Smart Lock methods:

  • Wear Recognition
  • Trusted Places
  • Trusted devices ( Bluetooth )
  • Voice Recognition

4. Tap Trusted devices ( Bluetooth )on

5. Add a new device by selecting "Add Trusted Device"

6. Your Samsung Galaxy S9 will now search for connected paired Bluetooth devices - select one - done!

If you are now connected to the Samsung Galaxy S9 and the Bluetooth device, the lock screen will automatically unlock or unlock. You should only enable this feature in a trusted environment.

You now know the function of Smart Lock on the Samsung Galaxy S9.

Samsung Galaxy S9 Set Flashlight to Highest Level - Brightness

Details
Manuel
Android Smartphones
Year 2018

The Samsung Galaxy S9 offers the ability to use the built-in camera LED flash as a flashlight. The LED is permanently illuminated, which can then be used as a light cone like a flashlight. This light cone has a standard brightness setting.

But you can increase the brightness even more. If you want the flashlight of the Samsung Galaxy S9 to shine in full brightness, proceed as follows:

Samsung Galaxy S9

1. Open the Edge menu of the Samsung Galaxy S9

2. Change to "Quick Tools" and then to "Flashlight"

3. Activate the flashlight

4. Use the plus button to increase the brightness until you reach level

5. This is the brightest level of the flashlight and it should only be used for a short time to avoid damaging the LED.

In some situations, however, such a bright light is needed.


Sony Xperia XZ2 Get IMEI in Android - Code

Details
Manuel
Android Smartphones
Year 2018

If you want to know what IMEI number the Sony Xperia XZ2 smartphone has, you have several options. Besides the packaging and a submenu in Android, there is also a code variant.

This is simply entered via the telephone app. You will then receive your IMEI number. This article will show you exactly what the code is and how the procedure works:

Find out your IMEI number - Sony Xperia XZ2

  1. By opening the Sony Xperia XZ2 phone app and entering this code via the keypad:
  • *#06# 
  1. Now the IMEI will appear on your display and you should make a note of this number as your smartphone will identify you uniquely.

Now you know a very simple method to display the IMEi on the Sony Xperia XZ2.


Search for Sony Xperia XZ2 firmware update manually – Tip

Details
Manuel
Android Smartphones
Year 2018

Usually new firmware updates are automatically installed on the Sony Xperia XZ2 when an Internet connection via W-Lan or the mobile data is available. However, if you want to be at the top, it is recommended to check for new software updates manually from time to time.

This is how it works with the Sony Xperia XZ2:

Search for new firmware manually - Sony Xperia XZ2

  1. Start from the home screen and then navigate to "Preferences"
  2. Now select the menu item "System" from
  3. This will open another submenu which now contains "Software Update" - select the entry from
  4. You can now search for new firmware by pressing the corresponding button on the display

If a newer firmware version for your Sony Xperia XZ2 is available, you can download and install it now. If this is not the case, it says here that you have already installed the latest version.

You now know where to manually search for new firmware for your Sony Xperia XZ2


Samsung Galaxy S9 How to Rotate Photo - Tip

Details
Manuel
Android Smartphones
Year 2018

If you have taken a photo with your Samsung Galaxy S9, it may be upside down or tilted to either side. However, you will want to rotate the photo so that it appears correctly on the Samsung Galaxy S9 display.

If you do not yet know how to do this, the following article should show you how to do this:

Rotate images on the Samsung Galaxy S9 afterwards

Samsung Galaxy S9

1. Open the gallery app on the Samsung Galaxy S9

2. Touch the photo you want to rotate

3. Touch the square with the arrow at the bottom left of the row of icons - this will open the editor

4. Touch the rotated arrow icon again - each time you touch the icon, the photo will rotate 90° clockwise

You now just need to save the rotated photo. To do this, press the "Save" button in the upper right corner. You now know how to rotate a photo 90° with the Samsung Galaxy S9. However, you can also rotate the photo by individual degrees.

To do this, use the slider in the middle. Move it to the right or left to set an exact degree of inclination.


More Articles ...

  1. Nokia 6.1 Which Sim card do I need? Solved!
  2. Huawei P20 Pro Open Quick Start Menu from Lock Screen - Tip
  3. Huawei P20 Pro How to quick shot photos – Extra Tip
  4. Huawei P20 Pro View date and location of photos in gallery
  5. Nokia 6.1 This is how the screenshot works
  6. Samsung Galaxy S9 W-Lan always turns on automatically - Tip
  7. Huawei P20 Pro GMail Notification LED does not light up - Tip
  8. Activate Huawei P20 Pro Windowed Sleeve - Smart Cover
  9. Instagram - Download All Photos and Data
  10. Nokia 8 Screenshot with shortcut keys – Instructions
Page 97 of 317
  • Start
  • Prev
  • 92
  • 93
  • 94
  • 95
  • 96
  • 97
  • 98
  • 99
  • 100
  • 101
  • Next
  • End


  1. You are here:  
  2. Home

Imprint

Privacy Policy

Privacy and Terms of Google

Sitemap