Solvemix

Suche Spickipedia

  • Home
  • Android Smartphones
  • iOS Smartphones
  • Blackberry Smartphones

Switch Samsung Galaxy S9 to GSM mode - Manual

Details
Manuel
Android Smartphones
Year 2018

The Samsung Galaxy S9 can be dialed into different mobile networks. Usually this is done automatically and the device automatically selects the best network. LTE, UMTS and GSM networks are available.

In the USA and Europe the networks are usually well developed, but it can happen that the reception or the voice quality suffers at certain places. Here it makes sense to switch the Samsung Galaxy S9 manually into GSM mode.

The GSM network is very well developed in most parts of the world and therefore you often have the best reception in this network. Below we describe how to manually switch the Samsung Galaxy S9 to GSM mode:

Set the network mode manually on the Samsung Galaxy S9 – Instruction

Samsung Galaxy S9 Hardware

1. Opens the app menu and there the Android system settings

2. From here it goes on to "Connections" and "Mobile Networks"

3. In this submenu you can now see "Network Mode". Selects the entry. A menu appears in which various options or connection modes can be selected.

4. Select "Only 2G" - done!

Please remember that your smartphone no longer switches between networks on its own! This means that although you now have very good reception via the GSM network, the mobile Internet is ultra-slow! 

You now know how to change the network mode in Android on the Samsung Galaxy S9.


Samsung Galaxy S9 Display your own IMEI number - Tip

Details
Manuel
Android Smartphones
Year 2018

If you bought a Samsung Galaxy S9, you should make a note of the IMEI right at the beginning. It's a number that only exists once in the world. A smartphone can be uniquely identified via this number.

This is useful, for example, if you have lost your smartphone or if your device has been stolen. If the smartphone reappears, you can use the IMEI to prove that it belongs to you. But where can you find the IMEI on the Samsung Galaxy S9?

That's what we want to show you here:

How to find out the IMEI of the Samsung Galaxy S9

Samsung Galaxy S9 Hardware

To find out IMEI in Android, please start from your home screen and then open the following submenu:  

  • Settings --> Device information --> Status --> IMEI information

Under "IMEI" you will now see the desired information. Alternatively, you can find out the SN using the following method:  

IMEI via code

Open the phone app and in it the number field. Then enter this code: 

  • *#06#

This code will now display a small window with your IMEI. 

IMEI on the packaging

On the packaging of the Samsung Galaxy S9 or S9 Plus you will also find a large sticker, on which the IMEI is visible upon closer inspection. You can also look them up here.

You now know three different ways to check out the IMEI of the Samsung Galaxy S9 or S9 Plus. Make a note of this number and keep it in a safe place so that it is quickly available in an emergency.

Samsung Galaxy S9 Notification LED stops flashing – Tip

Details
Manuel
Android Smartphones
Year 2018

The Samsung Galaxy S9 is equipped with a notification LED. This will notify you when a new notification, such as from WhatsApp, email, Facebook, etc. has been received. A very useful function as we find.

Now you might notice that it doesn't work anymore. Usually the cause is simple:

The corresponding setting has been deactivated. Therefore, first check if the notification LED was deactivated by mistake in the Android settings-

Samsung Galaxy S9 Activate Notification LED

Samsung Galaxy S9 Hardware

First open the App menu on your smartphone and then the settings. Continue to "Display". In the next submenu you will see the option: LED display Here the controller must be set to "active". If that's the case, it's not that attitude. Continue with the next possible cause:

Samsung Galaxy S9 does not blink - Disable Ultra power save mode

If your Samsung Galaxy S9 has the power save mode set to "MAX", the LED may stop blinking when new messages are received. Set the energy saving mode to "Medium" or "Off".

If that didn't help either, we recommend that you restart your smartphone first. If that didn't work, please do a wipe cache partition.

  • Samsung Galaxy S9 - Perform Wipe Cache Partition

 This will not delete any data from you! Only old temporary system files are cleared from the cache. However, they are often responsible for a software error in Android.

We hope that one of the tips has helped you solve the problem with the non-flashing notification LED on your smartphone. If you have found another solution, please let us know in the comments =)

Samsung Galaxy S9 Display Home Button always – Tip

Details
Manuel
Android Smartphones
Year 2018

Do You Miss the Physical Home Button on the New Samsung Galaxy S9 in Stand-By?  Then maybe there is something that helps you to miss them not quite so painfully. The Home button can be permanently shown on the display when the device is in standby mode.

We'd like to tell you how to show the home button all the time:

Show the Home button permanently on the Samsung Galaxy S9

Samsung Galaxy S9

1. Start from the home screen and then open the app menu and the Android settings

2. Tap on "Device Security" and then on "Always On Display"

3. Activate it now using the master controller

4. If your Samsung Galaxy S9 now switches to standby mode, you will see a button displayed where the home button used to be visible.

So this button is always visible for you.

Can the Home button burn into the screen of the Samsung Galaxy S9?

No! Because the home button moves very easily on the display. There are only a few pixels, but this helps so that the home button cannot burn in.

Samsung Galaxy S9 Save and Extend Battery Life – Tips

Details
Manuel
Android Smartphones
Year 2018

The Samsung Galaxy S9 is equipped with a battery that unfortunately doesn't have much capacity. This means that it is usually 80% empty at the end of the day and you need to charge the device overnight. But what if you don't have a charger?

Then the following tips and tricks should help you to save on the battery and thus extend the battery life of your device to a maximum.

Samsung Galaxy S9 - These battery tips will help you optimize the battery life
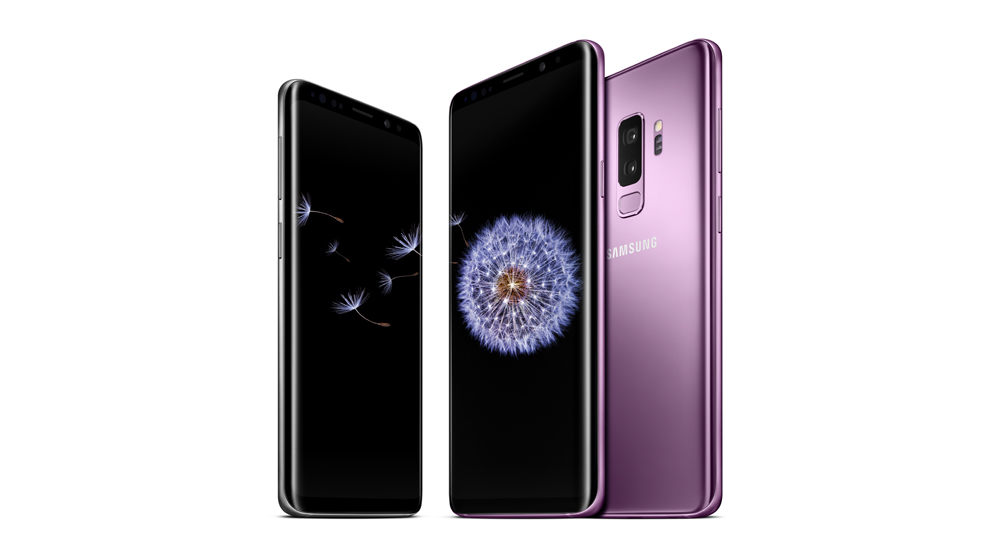
Samsung Galaxy S9

Activate energy saving mode in the settings - Highest level

The energy saving mode can be activated in different levels on the Samsung Galaxy S9. Simply drag the status bar into the screen from above with two fingers and then select the toggle with power save mode. By pressing on it for a long time, you get to the corresponding menu, in which further settings can then be made. The energy-saving mode should always be activated in order to optimize battery life in a few simple steps.

Activate aircraft mode

The aircraft mode deactivates all active connections. Since the Samsung Galaxy S9 requires a lot of power for the power supply, modem and W-Lan, this saves you a lot of battery power. It is important that you cannot receive any calls or messages during the night. To activate the aircraft mode on the S8 and S8 Plus, simply pull down the status bar and touch the aircraft icon.

Switch off unnecessary send and receive functions if not required

Bluetooth W-Lan NFC GPS Mobile Internet Pulls down the status bar and then turns off all functions you don't need at the moment. Enable power save mode One of the few easy ways to quickly save battery power on the Samsung Galaxy S9.

Activates the power save mode via the status bar

This generally extends the battery life between 15-25% depending on the type of performance selected. You can choose between "Medium" and "Max" as preconfigured settings. However, these can also be adjusted, so that more battery power can be saved in some cases.

Reduce display brightness

The brightness of the Samsung Galaxy S9 display is largely responsible for battery life. Here you can save on most batteries by setting the brightness as low as possible. The best way to do this is to drag the status bar of the Samsung Galaxy S9 from above into the screen with two fingers. You can now see the slider for the brightness. Sets the brightness control as low as possible. Additionally: Tap on the small arrow next to it, so that the menu for the brightness opens. Deactivates "Automatic brightness" here. This will keep your attitude.

Do not use Live backgrounds and disable Parallax effect

Live backgrounds require constant processor power. Even if they are nice to look at, they drain a lot of battery capacity. So use a JPEG wallpaper instead of live backgrounds. The Parallax effect requires additional power from your battery, similar to the Live Wallpaper, because the motion sensors are used non-stop. This is deactivated by redefining the background image. Open it up: Settings --> Backgrounds & Themes Select a photo and you will see the option "Motion effect". All you have to do here is remove the marking. Ready!

Reduce Display Time-Out

The display timeout determines the time after which the screen of the Samsung Galaxy S9 automatically switches off and sends the smartphone to standby. The shorter the timeout is set, the more battery is saved. The timeout on the Samsung Galaxy S9 can be adjusted as follows:

Deactivate Always On Display

Even if the Always-On display of the Samsung Galaxy S9 should only consume a small battery, it still consumes more than when it is completely switched off. That's why you should disable Always On Display on your Samsung Galaxy S9 to reduce battery consumption. Simply pull down the status bar and then deactivate the corresponding toggle. Ready!

The following tips are intended to maximize battery life and are therefore not necessarily suitable for everyday use. For the sake of completeness, however, we would like to comment on this:

Permanently activate GSM mode

The "GSM" network mode can be permanently set manually. This way your Samsung Galaxy S9 will always connect to the GSM mobile network. The advantage is that there is no need to switch between LTE, HSPA and GSM networks, saving battery power on your smartphone.
 

Samsung Galaxy S9 slow motion recording flickers - Super Slow Motion

Details
Manuel
Android Smartphones
Year 2018

The Samsung Galaxy S9 has a super cool feature integrated: The Super Slow Motion with a short sequence of up to 960 frames per second. If you have tried this function for the first time, you may notice that the recorded video flickers strongly.

Now you might ask yourself: Is the camera of my Samsung Galaxy S9 defective?

The answer is usually: No! Because flickering is caused by someone else. More on this in the following:

Samsung Galaxy S9 - Why slow motion pictures in rooms with light are flickering

Samsung Galaxy S9

Here we have to digress a little into the world of physics. In our homes in the USA, Europe or the rest of the world, electricity is used through the power outlet or the lamp connections on the ceilings. The current coming from the socket is alternating current and has 50 Hz for example in Europe.

This means that the current changes polarity 50 times per second. However, this also means that 50 times a zero point is passed through.

There is no current and the lamp is actually out. Our eyes do not notice this, as we only see at approx. 25 frames per second. A slow-motion camera, like the Samsung Galaxy S9 can! And that's why your picture flickers when you take a Super Slow Motion shot with your phone.

Depending on which light you use at home, the stronger the effect. LED lamps, which can nowadays be found in almost every household, intensify the effect. The only remedy here is real sunlight or a lamp that is operated with direct current.

Now you know why your Samsung Galaxy S9 produces flickering videos in super slow motion.


Samsung Galaxy S9 Setting up Intelligent Scan

Details
Manuel
Android Smartphones
Year 2018

The Samsung Galaxy S9 uses the integrated iris scanner and the front camera for intelligent scanning. By combining the two methods, this variant of the telephone lock should be even safer.

However, the Intelligent Scan may not work correctly on your Samsung Galaxy S9 because your face is not recognized correctly. So that you do not have to live with it, we have summarized a few tips for you here, which should help you to use the intelligent scan of the Samsung Galaxy S9 sensibly.

Therefore you have to restart the setup wizard of the Intelligent Scan again and pay attention to the following requirements:

Samsung Galaxy S9

1. Ambient light should be bright and your face well lit

2. If you wear glasses, take off your glasses (the same applies to contact lenses)

3. If you meet these requirements, your Samsung Galaxy S9 can scan you exactly, so that the unblocking by the Intelligent Scan works perfectly afterwards


Samsung Galaxy S9 No notification of calls - Tips

Details
Manuel
Android Smartphones
Year 2018

The Samsung Galaxy S9 is currently struggling with a bug that is as follows for the end user. You get a call, but your phone doesn't notify you. That means: You don't hear a ringing tone or vibration and you don't get a message about a missed call.

You can only check whether you have received such a call via the call log. If you also have such a bug on your Samsung Galaxy S9, there are several approaches that can fix it.

However, a final solution must come through an update from Samsung.

Tip 1: Deactivate call ID and spam protection

Samsung Galaxy S9

Open the phone app “Phone” on your device. Press the three-point symbol and then the "More" button. Then go to Settings and then Caller ID and Spam. Deactivate the option Caller ID and Spam.

Tip 2: Remove notifications from "Optimize battery consumption"

Open the settings and then "Device maintenance. Continue with "Battery" and then tap on "Battery consumption".

Tap on the three items at the top right -> Select "Optimize battery consumption" from Select "All apps" from Look for "Notification" --> Deactivate the optimization by using the slider.

Tip 3: Badge Provider option

For this, you must now navigate back to the settings Open the menu item "Apps" Tap on the three items at the top right and select "Show system applications" Search for "Badge Provider" and open the entry.

Select in the app info "Memory" and then touch the two buttons:

  • Clear data
  • Clear cache

These three tips will hopefully help you resolve the problem with incoming calls.

As soon as there's news about this bug, you'll get it here.


Samsung Galaxy S9 Disable Automatic App Updates

Details
Manuel
Android Smartphones
Year 2018

You can download Samsung Galaxy S9 apps and applications from the Google Play Store. It offers a large number of apps, which are also checked for malware by "Google Protect". If you have downloaded apps to your smartphone, you will notice that they are updated automatically.

This often makes sense, as improvements are automatically integrated, but some functions that have been removed in an app update, for example, can also be lost. That's why you probably want to know how to disable automatic app updates for the Google Play Store on the Samsung Galaxy S9.

That is exactly what we want to explain to you here:

No automatic app updates on the Samsung Galaxy S9

Samsung Galaxy S9

1. Open Google Play Store

2. Tap the icon with the three lines

3. In the now opened sidebar, select "Settings" from

4. In the "General" section, select "Automatic App Updates"

5. And activate the option "Do not allow automatic App Updates" in the drop-down menu (scroll up in the menu).

This means that you now have to update each app independently. To do this, go to the Google Play Store and then select the appropriate app. If you see an "Update" button, a newer app version is available.

Samsung Galaxy S9 Activate W-LAN calls - Tip

Details
Manuel
Android Smartphones
Year 2018

WLAN Calling and Wi-Fi Calling" are functions where the W-Lan network can be used for telephone calls at home. A useful option, especially if you have places in the house that do not have mobile phone reception. These often include basement apartments.

If you have booked such an option, you can use it with your Samsung Galaxy S9. However, you must first activate the function in the Android settings of the device.

You can find out how to do this here in our article:

Activate Wi-Fi telephony on the Samsung Galaxy S9 – Instructions

Samsung Galaxy S9

1. Open the phone app on the smartphone

2. Tap the three-point icon at the top right - a pop-up menu appears

3. Select in this "Settings"

4. Scroll down and activate the controller under "WLAN calls" This will give you the necessary settings on the Samsung Galaxy S8.

You should now be able to use Wi-Fi calling with the Samsung Galaxy S9. Now you should be reachable anytime and anywhere. Under certain circumstances, your mobile phone provider may have to activate additional settings.


More Articles ...

  1. Samsung Galaxy S9 moisture detected - Check the port
  2. Samsung Galaxy S9 Reset and optimize AGPS data
  3. Disable Samsung Galaxy S9 Mailbox – How it works the easy way
  4. Samsung Galaxy S9 Do not display navigation bar – Hide
  5. Samsung Galaxy S9 Use GPS only for location search – Solved
  6. Samsung Galaxy S9 How to import contacts from Sim card
  7. Samsung Galaxy S9 Show holidays in calendar app and widget
  8. Samsung Galaxy S9 Open with Standard App – Redefine
  9. Samsung Galaxy S9 VPN Connection Setup - How To
  10. Samsung Galaxy S9 Hide Sidebar for Edge Menu
Page 109 of 317
  • Start
  • Prev
  • 104
  • 105
  • 106
  • 107
  • 108
  • 109
  • 110
  • 111
  • 112
  • 113
  • Next
  • End


  1. You are here:  
  2. Home

Imprint

Privacy Policy

Privacy and Terms of Google

Sitemap