Solvemix

Suche Spickipedia

  • Home
  • Android Smartphones
  • iOS Smartphones
  • Blackberry Smartphones

HTC U11 Which Sim card do I need? Solved!

Details
Manuel
Solvemix
Android Smartphones

There are currently various Sim cards in circulation. This includes Standard, Micro and Nano Sim cards. Which of these must be used in the sim card slot of the HTC U11? This is what we want to clarify in this article and also how to get such a sim card.

The following Sim card format requires the HTC U11:

  • Nano Sim Card

If you do not have such a sim card, you can get it as follows for your HTC U11:

Sim card punch

Using a Sim card punch it is very easy to punch out the Nano Sim card from an existing standard or Micro Sim card. You can get a punch like this here.

Perforation

By means of a perforation, if available, you can very easily squeeze out your Sim card. Most modern Sim cards have such a perforation.

Request online

For an amount of 10 – 25$, you can also get a new Nano Sim card online from your mobile service provider, usually via the Online Service Center.

You now know the Sim card format for the HTC U11 and also how to get such a Nano Sim card if you still have a standard or Micro Sim card.

HTC U11 What is the SAR value?

Details
Manuel
Solvemix
Android Smartphones

Many smartphone users have the SAR value included in their purchase decision. Why? The SAR value corresponds to the specific absorption rate that is the value that the human body takes on radiation when the smartphone is used.

If you now want to buy the HTC U11 and want to know how high the SAR value of this smartphone is, then we would like to explain this here.

The HTC U11 has the following SAR value:

  • SAR value USA: 0.95W / Kg while telephoning and 0.52W / kg when wearing on the body
  • SAR value EU: Not yet known (coming soon)

You now know the specific absorption rate of the HTC U11 smartphone.

How did you decide? Is the value too high? Tell us in the comments.

Samsung Galaxy S8 Orange N Symbol - Meaning

Details
Manuel
Solvemix
Android Smartphones

Perhaps you noticed after a new firmware update, at several places an orange N symbol on your Samsung Galaxy S8.

This can appear, for example, in the app menu, in the settings, but also within apps such as the camera app. We would like to explain to you what this N symbol on the Samsung Galaxy S8 means.

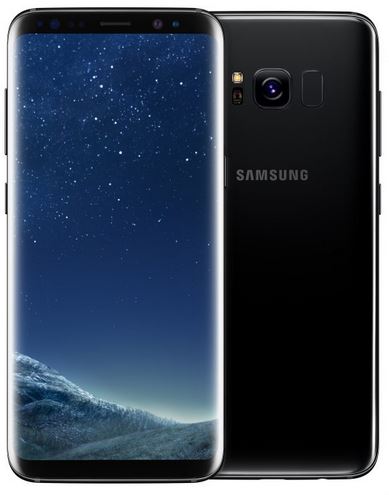
Samsung Galaxy S8

The orange N symbol stands for new functions, which were newly added and were not included before the firmware update. So you can see at a glance what is new.

Once you have tapped the new function, the orange N will disappear.

You now know the meaning of the orange N, which appears after a firmware update on the Samsung Galaxy S8.

Samsung Galaxy S8 three-point button in the browser

Details
Manuel
Solvemix
Android Smartphones

If you are using the Internet browser, which is installed on the Samsung Galaxy S8 from the factory, you may have discovered a new symbol, which is always displayed. This is a symbol with three vertical points in it. If you type this, you will see various options such as Send, New tab or Text size of the web page.

If you now ask yourself what this symbol is, we give the answer to this question:

Samsung Galaxy S8

This is the quick menu. This was integrated with one of the latest updates for the Internet browser and belongs to the category "extensions". If you want to disable the quick menu on the Samsung Galaxy S8, just tap the icon and there the gear icon.

This will now show options for the quick menu. Deactivate the switch from "On" to "Off". Finished!

You now know what the quick menu is and how to disable it.

How to add S Planner Widget - Home screen

Details
Manuel
Solvemix
Android Smartphones

If you take advantage of the App S Planner app, the Samsung calendar app on your smartphone, then you might also want to see an overview of your appointments on the home screen.

That's why there is the S Planner Widget. For example, this shows the content of a month on the start screen. Below we explain how to place this widget on the home screen:

  1. Press your finger long on a free area of ​​the home screen
  2. In the menu that appears, select "Widgets"
  3. Now search for "S Planner Calendar"
  4. Long press the widget to place it on the start screen

You now know how to place the S Planner Widget on the Android phone's home screen.

Authentication error have occurred - you now have these options

Details
Manuel
Solvemix
Android Smartphones

If you log in to the W-Lan network of your router with your Android smartphone, the following message may appear on the display.

  • "Authentication error occurred"

This error can now appear right on your smartphone and usually has to do with a faulty configuration of your router, a new router in the neighborhood or your Android smartphone.

In the case of the above error, "Saved and Secured" appears on the display.

If this error description also applies to your smartphone, then we would like to give you the opportunity to fix this error.

  1. Restart the smartphone

First of all, you should always try to restart the smartphone. This often solves the problem in a simple way.

  1. Remove the wireless network

To do this, open the settings and then "Connections". Continue to "WLAN". Touch the three-point icon in the upper-right corner and click "Advanced" in the pop-up menu. Alternatively, the upper right is also "Advanced" depending on which version of Android you use.

You will now see the "Manage Networks" list. Select the entry to list all the Wi-Fi network you have set up. Now look for your W-Lan network, which is causing problems. Tap the network, and then click Remove in the pop-up.

You must then re-establish the connection. Finished!

  1. Enter the fixed SSID

It may be that in your neighborhood a new W-Lan network was established, which runs under the same SSID as your own. You can assign a new SSID in the settings of your router.

A tutorial on setting up SSIDs and the problem in general can be found here.

  1. Determine fixed W-Lan channel

Often W-Lan channels are superimposed. As a result, the performance per channel decreases and leads to problems such as the authentication error. In your router, specify a channel that is not full. You can find it, for example, via the app "Wi-Fi Analyzer".

  1. Authorize the MAC address

Last but not least, you can authorize the MAC address of your smartphone in the router so that it has permission to access the wireless connection.

The MAC address can be set in the router configuration menu.

We hope that our tips have helped you solve the problem with the "authentication error".

ZTE Axon 7 How to enable automatic call answering by moving it to the ear

Details
Manuel
Solvemix
Android Smartphones

The ZTE Axon 7 offers you many different features, including the gestures. Here you can perform functions using special movements. Thus, for example, a call can be accepted by simply bringing the smartphone to the ear.

In the following, we will describe where you can find the setting for this on your device.

Automatically accept calls when the ZTE Axon 7 is routed to the ear:

  1. Open the Android system settings
  2. Select "Gestures & Movement"
  3. Activate the "Automatic answering" option

If you now receive a call, please lift the smartphone and lead it to the ear. The call is automatically accepted by the gesture.

ZTE Axon 7 Show the percentage of the battery

Details
Manuel
Solvemix
Android Smartphones

In the status bar of the ZTE Axon 7, you will see a battery symbol which shows you the current charge level of the battery. If you find this too inaccurate, then you can also have a percent display next to it.

We explain how this works.

Activate the percentage of the battery in the status bar of the ZTE Axon 7:

  1. Open the Android system settings
  2. Select the "Display" menu item
  3. Here you will find the switch to activate the battery display in percent for the status bar.

From now on, the percentage display will be displayed next to the battery symbol in the status bar of the ZTE Axon 7. Now you always know exactly when you should charge the smartphone.

ZTE Axon 7 How to open test menu - This code will work

Details
Manuel
Solvemix
Android Smartphones

Manufacturers such as ZTE integrate small test menus into their smartphones, which can be used to quickly check whether the device functions correctly. This menu is of course not available via the Android system, but only by using a special code.

We'll tell you how to get into the secret test menu with the ZTE Axon 7.

To do this, you must navigate as follows:

  1. Open the phone app
  2. Go to the number field, and then enter the following code:
  • *983*07#
  1. This will bring up the test menu, with which tests can be carried out. For example, the installed sensors and the screen can be checked.

You now know the procedure to open the ZTE Axon 7 test menu. Have fun with it!

ZTE Axon 7 Which Sim card is required - Info

Details
Manuel
Solvemix
Android Smartphones

If you want to buy the new ZTE Axon 7, please consider whether you have the right Sim card for the device. Because when changing from older models, you often still have a standard or Micro Sim card. Both formats do not fit the smartphone unfortunately.

Because the ZTE Axon 7 needs one:

  • Nano Sim card

If you already have an older sim model, we can tell you how to get a Nano Sim card for your ZTE Axon 7:

Option 1: perforation

 If your Sim card is perforated, you can simply push out the Nano Sim card

Option 2: Sim card punch

With a Sim card punch you can create a Nano sim card from a standard or Micro Sim card without much effort. Such a sim card cutter can be found on Amazon for little money.

Option 3: Order from mobile phone service provider 

If both possibilities are not comfortable enough, then you can of course also order with your mobile phone provider for a cost contribution of 10-25 $ a new Nano Sim card. Processing time is usually 3 working days.

Now you know which Sim card type the new ZTE Axon 7 needs and how to get such a Sim card, if you should use an older Sim card format.

More Articles ...

  1. ZTE Axon 7 screenshot - All methods at a glance
  2. Samsung Galaxy S8 How to stay unlocked and illuminated during car drive - Resolved
  3. Samsung Galaxy S8 How to disable notification Pop-Up - Resolved
  4. Samsung Galaxy S8 Safe mode cannot be finished - tip
  5. Samsung Galaxy S8 Pressure sensitive Home Button does not work - test
  6. Samsung Galaxy S8 moisture detected - charging not possible
  7. Samsung Galaxy S8 Disable Notification for individual App - Resolved!
  8. Samsung Galaxy S8 Always Show Home Button - Solution
  9. Phone visibility - meaning for the Samsung Galaxy S8
  10. Samsung Galaxy S8 How to use QR code reader - solved
Page 157 of 317
  • Start
  • Prev
  • 152
  • 153
  • 154
  • 155
  • 156
  • 157
  • 158
  • 159
  • 160
  • 161
  • Next
  • End


  1. You are here:  
  2. Home

Imprint

Privacy Policy

Privacy and Terms of Google

Sitemap