Solvemix

Suche Spickipedia

  • Home
  • Android Smartphones
  • iOS Smartphones
  • Blackberry Smartphones

Nintendo Switch Download screenshots to memory card

Details
Manuel
Solvemix
Multimedia and technology

If you have one or several screenshots on your Nintendo Switch, you might want to export them to the Micro SD memory card so that you can access them with your PC, for example.

Here we show you how you can transfer one or all screenshots to the memory card. Obviously, you have a micro SD memory card with up to 2 TB inserted into the Nintendo Switch.

If this is the case, please proceed as follows:

Transferring individual screenshots to the memory card:

  1. Return to the HOME screen of the console. Select "Album" from the bottom of the bar.
  2. Now select the screenshot you want to copy.
  3. Press the A button of the controller to open a small menu.
  4. Select "Copy" and "Memory card" - Finished

Now you have transferred a single screenshot. If you want to transfer more screenshots to the memory card, please proceed as follows:

Transfer several screenshots at once from the Nintendo Switch to the memory card:

  1. Start again from the HOME screen and then navigate to the "Settings" icon - Select this
  2. Navigate here to "Data Management" and then on:
  • "Storage Data / Screenshots" --> "Manage Screenshots"
  1. Select here System Memory
  2. Next you can then select the menu item "Copy All screenshots to the Memory Card"
  3. Confirm the process - Finish

All your Nintendo Switch screenshots are now transferred to the memory card of the console.

Then you can look at this for example on another device such as the computer or smartphone.

Nintendo Switch - Where can I find my screenshots – Resolved

Details
Manuel
Solvemix
Multimedia and technology

If you have made use of the screenshot function to save a great situation in the game, then you would like to watch this screenshot again, of course. If you are wondering where the screenshot on your Nintendo Switch is stored, then we would like to give you the answer here.

Proceed as follows to find your Nintendo Switch screenshots:

  1. First, return to the HOME screen.
  2. Select the album in the menu bar.
  3. Open it by pressing the A button - done!

You now know how to quickly and easily access your Nintendo Switch screen shots. If you want to save your screenshots from the Nintendo Switch to a Micro SD memory card, please proceed as follows:

  • Transfer screenshots to a memory card

Nintendo Switch Screenshot – How to do

Details
Manuel
Solvemix
Multimedia and technology

With a screenshot you can capture the gameplay on your Nintendo Switch in a photo. For example, funny moments or high scores can be specified in the screenshot, also known as screen picture.

You can have a screenshot on your console with either the Joy-Con Controller or the Pro Controller. We explain how this works:

  1. Capture the screenshot with the Joy-Con controller of the Nintendo Switch

The screenshot capture is really easy here. Just press the square button located on the left side of the controller. When you press the button, a screenshot sound is sounded and a notification is displayed in the upper left with "Screenshot taken".

  1. Take screenshot with the Pro Controller of the Nintendo Switch

Also with the Pro controller of the Nintendo Switch one can make a Screenhot. This is also easy going by using the square button, which is in the middle near the Nintendo Switch lettering.

Just press the button and the process is exactly the same as for the Joy-Con controller.

You now know how to take a screenshot with the Joy-Con and the Pro Controller of the Nintendo Switch.

Samsung Galaxy S7 How to delete pictures from the Samsung Cloud

Details
Manuel
Solvemix
Android Smartphones

You can upload on the Samsung Galaxy S7 up to 15 GB in the Samsung Cloud free of charge. For example, if you enable Gallery Cloud Sync, photos from your smartphone will automatically be uploaded to the cloud when the Internet connection is established.

If you want to delete photos that are in the Samsung Cloud again, follow these steps:

Delete photos on the Samsung Cloud using the Samsung Galaxy S7

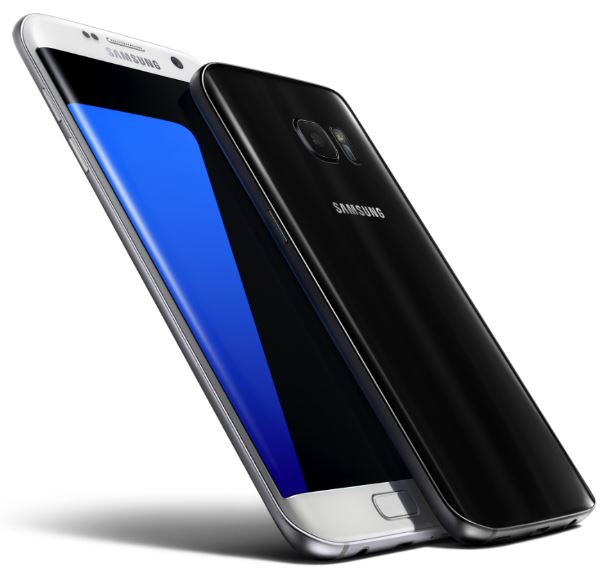
Samsung Galaxy S7

1. Start from your home screen and open:

  • Settings --> Cloud & Accounts

2. From here, please navigate as follows: Samsung Cloud --> Manage Cloud Storage

3. You will now see the storage space usage. Tap "Gallery"

4. Select "Remove from Samsung Cloud" and confirm the process by entering your password.

5. Now all gallery data from the Samsung Cloud will be deleted and the synchronization disabled.

You now know the procedure to delete the photos, which were synced with the Samsung Cloud, and the Samsung Galaxy S7.

Samsung Galaxy S8 - What colors will be offered?

Details
Manuel
Solvemix
Android Smartphones

The Samsung Galaxy S8 will be presented in March and will be available from mid-April. So enough time to think about the color or to ask the first question, what colors will be there for the smartphone.

Just here, we want to give you some information that comes from the last Leaks:

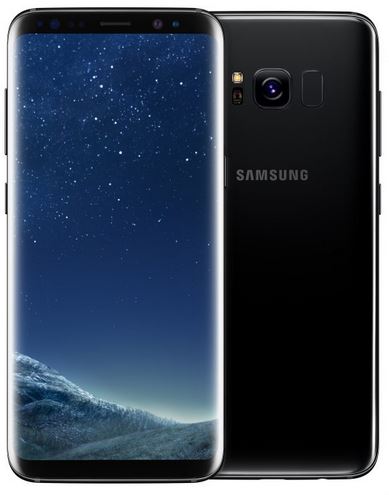
Samsung Galaxy S8

Here the Samsung Galaxy S8 will be offered in three different colors. These are as follows:

Colors of the Samsung Galaxy S8 for the market launch:

  1. Silver
  2. Black
  3. Violet

A quite good selection as we find, however, there are certainly some of you who would rather have had white instead of violet or silver. However, it may well be that Samsung for the Samsung Galaxy S8 brings even more colors to the market.

Thus, there will most likely be special series again. What color is best for the Samsung Galaxy S8? Tell us in the comments =)

Android Style Guide for your home screen – Tip

Details
Manuel
Solvemix
Android Smartphones

If you have a new Android smartphone, then you would like to set this up once. This may include the choice of a suitable background or a theme in which symbols etc. are integrated. If this is all too complicated, you can also simply ask the Android style guide:

This is an Android site, which categorizes you by asking questions or showing photos. This means that you always have to choose between two pictures.

An example: What do you like better: round or angular

Depending on the decisions you make, a theme package will be presented for you at the end, which can then also be downloaded. The Android Style guide is a very nice gimmick.

  • You can try the Style guide here.

Have fun with your Android Smartphone.

Samsung Galaxy S7 screen rotation in status bar not available – solved

Details
Manuel
Solvemix
Android Smartphones

If you do not have the function "screen rotation" on your Samsung Galaxy S7 after updating to Android Nougat in the status bar, this may be because the name of the function changes - Depending on what is currently set.

Let's explain this to you as follows:

Samsung Galaxy S7

1. If the screen of your Samsung Galaxy S7 turns automatically, you have to tap "Rotate screen" to fix the screen in the status bar.

2. Otherwise: If you see "portrait", then your screen is fixed. If you tap on "portrait" the screen automatically rotates when tilting the smartphone.

The quick start toggle in the status bar always shows the current status.

You now know how the screen rotation function in Android Nougat on the Samsung Galaxy S7 works and you can now use this hopefully as desired.

If the function still does not exist, you should rearrange the corresponding toggle.

Samsung Galaxy S7 Edge Upday disappeared on home screen

Details
Manuel
Solvemix
Android Smartphones

The Samsung Galaxy S7 Edge has the message application "Upday" on board, which notifies you, for example, about urgent messages. Upday can be opened by wiping left on the Samsung Galaxy S7 Edge's home screen.

If this is not the case with your Samsung Galaxy S7 Edge after the update to Android Nougat is no longer the case and this disappeared, then you can restore it as follows:

Add Upday on the home screen again - Android Nougat

Samsung Galaxy S7

1. If you are on the home screen then press your finger for a long time on a free space

2. A menu will appear where you can now see your home screen pages - Scroll to the left here - Upday appears

3. Activate Upday by using the slider bar above

Upday will then appear as usual on your Samsung Galaxy S7 Edge, if you scroll to the left on the home screen. You now know the menu, where the news app Upday can be activated in Android Nougat.

Android Nougat - Add New Widget

Details
Manuel
Solvemix
Android Smartphones

If you have installed the new Android nougat on your smartphone and want to know how to add a new widget to the home scree, then we would like to explain this to you.

Please proceed as follows: To add a new widget to the Home screen, tap and hold on a free area of ​​the start screen until it shrinks and a menu is displayed. In this menu you will find the button "Widgets".

Tap the button and you will see all the widgets available in Android Nougat on your smartphone. In addition to system widgets, the solutions of third-party apps like "WhatsApp" are displayed.

Now hold your finger on a widget for a long time, until it can be picked up and placed on the home screen. Finished!

You have just successfully placed a widget on the home screen in Android Nougat. You can now access information about this widget more quickly.

Google Pixel Reset to Factory Defaults - Tutorial

Details
Manuel
Solvemix
Android Smartphones

Sometimes it is necessary to reset your Google Pixel smartphone to factory settings. The term to reset to factory or factory reset or hard reset describes the process by which all data on the device is deleted and the Android operating system is re-installed.

After this procedure, the smartphone is in the state of delivery. We show you here today two different methods, how one can perform on the Google pixel such a Hard Reset:

  1. Perform reset to factory settings in Android

To do this on your Google pixel proceed as follows. Open:

  • App Menu --> Settings --> Security and Reset

Now select "Reset to Factory Defaults". The wizard will guide you through the workspace and the Google Pixel will restart.

  1. Reset the Google Pixel with a key combination

Sometimes you may not be able to enter the Android operating system in your smartphone, so that a so-called hard reset by using keys is necessary. This is done on the Google Pixel as follows:

Turn the smartphone off completely and then reactivate it with the following buttons (simultaneously press):

  • Volume – Less
  • Power On/Off

A menu appears on the display. Use the volume key to select "Recovery". With the Power On/ Off button, the restoration mode is now started on the Google Pixel.

Once an Android male who is repaired appears, press and hold the Power On/ Off button and press once the Volume button.

You are now in the recovery menu. Here you can now select the following entry by using the volume buttons:

  • Wipe Data / Factory Reset

With the Power On/ Off button the reset on the Google Pixel can be started. The smartphone then restarts. Finished! You now know two different variants to reset your Google Pixel to factory settings.

More Articles ...

  1. Samsung Galaxy S7 sensor buttons - no function - test
  2. Amazon Echo Dot Perform a factory reset – Step by Step
  3. Amazon Echo Dot update Firmware manually
  4. Humuhumunukunukuāpua'a - Pronunciation of Hawaii´s state fish
  5. Samsung Galaxy S7 No notifications on the Always On Display
  6. Samsung Galaxy S7 Energy saving mode - Customize settings
  7. Nintendo Switch does not respond - Perform soft reset
  8. Samsung Galaxy S7 Contacts - Frequently contacted
  9. Enable video optimization in Android Nougat - Samsung Galaxy S7
  10. Samsung Galaxy S7 Android Nougat - Gallery synchronized with Cloud
Page 178 of 317
  • Start
  • Prev
  • 173
  • 174
  • 175
  • 176
  • 177
  • 178
  • 179
  • 180
  • 181
  • 182
  • Next
  • End


  1. You are here:  
  2. Home

Imprint

Privacy Policy

Privacy and Terms of Google

Sitemap