Solvemix

Suche Spickipedia

  • Home
  • Android Smartphones
  • iOS Smartphones
  • Blackberry Smartphones

Samsung Galaxy S7 Edge Stick side panel to the left side of the display

Details
Manuel
Solvemix
Android Smartphones

The side panel, is arranged on the Samsung Galaxy S7 Edge as standard on the right side. Just when you are on the home screen and scroll through the pages, it can happen that you accidentally activate the sidebar.

If this interferes with you, there is the possibility to attach the side strip on the Samsung Galaxy S7 Edge to the left edge of the display. We'll explain how to place the sidebar on the left side of the screen on the Samsung Galaxy S7 Edge.

Samsung Galaxy S7

To do this, you must open the following submenu:

1. From the Samsung Galaxy S7 Edge's home screen, open the app menu and then go to settings

2. Tap the menu item "Display" and then "Side Panels".

3. In this sub-menu, you will see the "Panel Arrows" option at the bottom. Tap the entry.

4. You can now use "Position" to determine on which page the sidebar on the Samsung Galaxy S7 Edge should be displayed. Change to "Left Side"

Now the sidebar on the Samsung Galaxy S7 Edge is shown on the left side of the screen. So you should now have fewer problems when scrolling through the menus or home screen pages.

Samsung Galaxy S7 Set GPS Position accuracy to “high” - solved

Details
Manuel
Solvemix
Android Smartphones

For many apps a position determination via GPS is used. For example, within Pokémon GO the location determination is performed to navigate the map. On the Samsung Galaxy S7 there are three different methods for the location determination.

In order to ensure optimal location determination, the Option "GPS, W-Lan and mobile networks" should be activated. With our guide you can quickly check, if on your Samsung Galaxy S7 the above-mentioned search method of the GPS is activated.

Samsung Galaxy S7

To do this open the menu and then the settings of your Android operating system. Here you have to navigate to "Privacy and Security". You will then find the menu item "Location" within the submenu that opens.

Tap this menu item and then select "Search method". You have now the following three options:

  • GPS, WLAN and mobile networks
  • WLAN and mobile networks
  • GPS only

The setting for the location determination should be at least "GPS only", but best "GPS, WLAN and mobile networks". This increases the GPS position determination of your Samsung Galaxy S7. This significantly improves the accuracy of the site.

You should also activate at least the "W-Lan Scan" under the menu item "Improve accuracy". You now know how to increase the GPS position accuracy on the Samsung Galaxy S7.

Samsung Galaxy S7 Poor connection at home- Tip

Details
Manuel
Solvemix
Android Smartphones

The Samsung Galaxy S7 can have a bad network connection at certain places in the house or in the apartment, so that one may receive a bad quality within telephone calls. Unfortunately you can make little here, but we would like to show you a tip, which helps you to receive at home a better network connection.

 For this purpose, the "GPRS" or the 2G network must be selected as the mobile radio network. This works as follows in Android:

Samsung Galaxy S7

Open from the home screen of the Samsung Galaxy S7 the main menu and then the settings. Click on "Mobile networks" and then on "Network mode". A list of choices appears.

  • Now select the entry "Only 2G".

This setting is aimed at your Samsung Galaxy S7, to only connect to the 2G network of the mobile phone provider. Since the 2G or GPRS network is best developed in the USA, the probability is very high that you have the best connection.

Disadvantage with this method is that you now have a very good telephone connection, but the mobile Internet is of course very slow. (Transmission rate at GPRS is very low).

But maybe you have at home Wi-Fi available, then that would not be so bad. We hope that with this tip you could improve the connection for telephone calls on the Samsung Galaxy S7.

Pokémon Go Augmented Reality with camera does not work – Tip

Details
Manuel
Solvemix
Android Smartphones

If you are in the Pokémon Go app, it may be that you can see only a white background in front of the Pokémon despite the Augmented Reality function. The reason is usually that at the beginning of the game the app permissions have not been accepted.

Above all, the authorization for the "access to the camera" is absolutely necessary, if one wants to use in Pokémon Go the Augmented Reality over the camera. Our guide has been created for all Android smartphones running Android Marshmallow but may also works with Android Nougat. To change the permissions of an app in Android 6.0.1, follow these steps:

  1. From the Home screen, open the menu and then tap Settings
  2. Scroll down to Applications and tap the entry. Then go to "Application Manager".
  3. In the application manager, please look for "Pokémon Go" and tap the entry if you have found it.
  4. The application info is opened. Here, please type "App Permissions".
  5. Now make sure that the controller is set to active in "Camera".

The other permissions should also be active if you want to take full advantage of Pokémon Go. If you then start Pokémon Go on your smartphone and discover a Pokémon, you will be able to use Augmented Reality with the camera.

Pokémon Go Disable Vibrations – Solved

Details
Manuel
Solvemix
Android Smartphones

In Pokémon Go, you will be constantly informed with vibrations about Pokémon nearby. The Pokémon Go app will also notify you of events by means of vibration. If you do not want to use the vibrating function in Pokémon Go, you can turn it off in the game settings as follows:

  1. Open the Pokémon Go app on your device.
  2. From the Map view, tap the Pokeball to access additional option
  3. One of these options is the "Settings" entry. Tap the entry
  4. You can now clear the vibration in Pokémon Go in the next submenu by removing the checkbox in the "Vibrate" checkbox.

You now know how to turn off the vibration in the Pokémon Go game. Enjoy playing!

Samsung Galaxy S7 Camera - Record a Photo in 16:9 Format

Details
Manuel
Solvemix
Android Smartphones

On the Samsung Galaxy S7, the highest resolution is set within the camera settings from the factory. However, with this resolution, the picture format is 4:3. This means that if you want to view the photo on a TV, black bars are displayed on the right and left. Why?

Samsung Galaxy S7

Television usually have a 16:9 aspect ratio. If you now have a 4:3 aspect ratio on the Samsung Galaxy S7, which is automatically the case with 12 megapixel resolution, you will see these black bars on the TV. So if you have your photos on a TV or a computer screen, then it makes sense to set the picture format to 16:9.

Unfortunately, this is something at the expense of camera resolution. In the 16:9 format, only 9.1 megapixels are possible instead of the 12 megapixels. In this article, we will show you how to set the 16: 9 image format within the camera settings on the Samsung Galaxy S7.

Proceed as follows:

1. Open the camera app on the Samsung Galaxy S7

2. In the camera's Quick Settings bar, touch the icon with "4:3 12M"

3. A menu window opens. Please select "16:9 (9.1M)".

From now on, your Samsung Galaxy S7 will take pictures in 16: 9 format. These can then be viewed in full screen on the TV or computer screen.

Samsung Galaxy S7 What means LTE, H +, 3G, E and G? – Solved

Details
Manuel
Solvemix
Android Smartphones

In the status bar of the Samsung Galaxy S7 you will find one of the following symbols next to the network bars: LTE, H +, 3G, E and G. Possibly you do not know what these abbreviations stand for.

This is exactly what we want to explain to you in our article.

Meaning of the icons of the mobile data connection in the status bar of the Samsung Galaxy S7:

Samsung Galaxy S7

LTE or 4G

The name stands for "Long Term Evolution" and is currently the fastest mobile data connection method. 4G stands for fourth generation in this case. If this character is displayed in the status bar, you will be able to surf with the fastest mobile data speed that your mobile provider or your smartphone provides. Speeds of 21.6 Mbit / s in the download and up to 5.7 Mbit / s in the upload are theoretically possible.

H+ corresponds to HSPA (HSDPA / HSUPA)

This is the second fastest data speed you can reach with your Samsung Galaxy S7. The speed in the download is up to 7.5 Mbit/s, in the upload are about 1.35 Mbit/s managed.

3G corresponds to UMTS

UMTS is also one of the faster Internet connections, but is much slower than LTE and H +. Even so, you can also display Internet content on the Samsung Galaxy S7 quickly. The download with this type of connection comes at a speed of 380 Kbit / s and in the upload to about 180 Kbit/s.

E corresponds to Edge

Edge already belongs to the slower connections, but is almost available in almost all parts of the USA. This creates a download speed of approx. 218 kbit / s and an upload speed of 109 kbit / s. This does not allow you to watch videos, but only web pages, but this only with considerable time lag.

G corresponds to GPRS

The G stands for GPRS and represents the slowest speed possible on the Samsung Galaxy S7. In the download, a GPRS connection creates approx. 53.6 Kbit / s in the upload about 27 Kbit / s. So you can still write WhatsApp messages (without pictures), the connection speed is more than "dinosaurs".

You now know the meaning of the symbols of the mobile data connection on your Samsung Galaxy S7 status bar.

Samsung Galaxy S7 Calibrate Auto Brightness – Tip

Details
Manuel
Solvemix
Android Smartphones

The Samsung Galaxy S7 has integrated a function for the display called auto brightness. The ambient brightness is measured via a sensor next to the earpiece. If the environment is bright, then the Samsung Galaxy S7 regulates the screen brightness automatically upward.

Conversely: If the environment is dark, the light of the display is dimmed. This is to ensure that the display brightness is always optimally adapted to the eye and you can read the screen beautifully and effortlessly. However, it can now be that the auto brightness of the Samsung Galaxy S7 does not work properly.

Samsung Galaxy S7

This means, for example, that the display remains dimmed when changing from dark to light and you cannot read anything. If this is the case, then you must calibrate the brightness again. In our guide, we briefly explain how this works on the Samsung Galaxy S7:

1. Take the Samsung Galaxy S7 in your hand and cover the two sensors to the left of the earpiece completely. This simulates the unit to create a completely dark room.

2. Now deactivate the auto brightness via the status bar and move the control for the brightness completely to the left (Note: the sensors still have to be covered!)

3. Now briefly activate the auto brightness and deactivate it directly afterwards. (Note: the sensors still have to be covered!)

4. Go to a very bright room or to daylight or a bright desk lamp. Remove the hands from the light sensor.

5. Push the brightness control to "Maximum" and then activate the "Auto Brightness".

With this procedure, you have calibrated the light sensor or the auto brightness of your Samsung Galaxy S7 so that it should work again as desired.

Pokémon Go – How to reduce battery consumption

Details
Manuel
Solvemix
Android Smartphones

Pokémon Go is one of the most interesting and varied game apps currently available for your iOS smartphone or Android smartphone. On the hunt for Pokémon with the smartphone, however, it can happen that the battery of your device loses very quickly to battery power.

This is due to the Pokémon app, which requires a lot of resources. The increased resource consumption, like the use of the CPU, the RAM and the display draws a lot of power from the battery and therefore empty this very quickly. It may happen that while you are playing Pokémon Go, you may suddenly be sitting in front of a smartphone that does not work due to a lack of battery charging.

We have collected the most important tips for saving battery and Pokémon Go.

  1. Use the battery saver within the Pokémon Go App

Open the Pokémon Go app, tap on the Poke Ball and then select "Settings". In these you can see the Option "battery saver". Set the hook to the checkbox to activate the option.

  1. Reduce the Display Brightness of the Smartphone

One of the biggest energy consumers is the display of your smartphone or tablet, so you should minimize the display brightness as much as possible, usually via the status bar. Both Android and iOS, you can find a slider in the status bar, which allows you to adjust the brightness of the screen individually.

  1. Enable power-saving mode for Android and iOS smartphones

There are power modes that helps to reduce the CPU's power as far as it goes, even though Pokémon Go requires a lot of power, so the energy-saving mode will help you save a little bit of power, which will have a positive effect on battery consumption.

  1. Disabling Pokémon Go Augmented Reality

A very great feature in Pokémon Go is Augmented Reality. This means that a Pokémon is projected into the surrounding area around you. The live camera is used, in which the Pokémon are integrated. As nice as the function is, the more power it needs from your smartphone battery. Our recommendation is:

Disable the Augmented Reality in the Pokémon Go settings.

  1. Carry a portable battery pack

If you really cannot go without Pokémon Go, you will need a portable battery pack. We recommend you a battery pack with at least 22400 mAh. This makes playing Pokémon Go on the road very easy, as this capacity is sufficient for many hours of play.

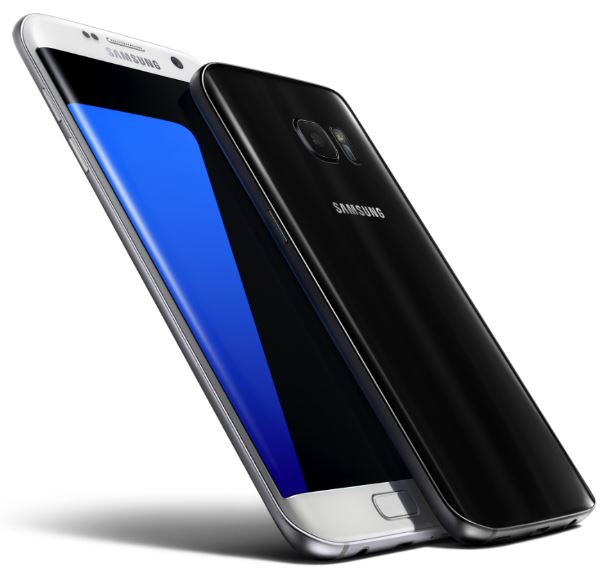
Samsung Galaxy S7 Watch the history of your purchases - Google Play Store

Details
Manuel
Solvemix
Android Smartphones

If you're going to download an app from the Google Play Store to the Samsung Galaxy S7 now and then, you might be interested in what apps have been around lately. Especially if the smartphone is used by several people, it is important to check which apps have been bought or ordered.

Google Play Store has the "Order History". In this order you will find all the apps you have purchased for your Samsung Galaxy S7. We'll now tell you how to track the order history within the Google Play Store app on the Samsung Galaxy S7.

Samsung Galaxy S7

To do this, follow these steps:

1. On the Samsung Galaxy S7, open the app menu and then go to Google Play Store

2. Tap the three bars icon in the upper-left corner to open the menu.

3. Tap on "Account" to enter the submenu of the same name

4. Here you see the entry "Order history". Tap it and you'll see all the purchases you've made through the Google Play Store in the past.

You now know how to use the Samsung Galaxy S7 to see what apps have been bought recently via the Google Play Store.

More Articles ...

  1. Samsung Galaxy S7 Recognizing Workouts - Tip
  2. Samsung Galaxy S7 Display week number in Calendar - Solved
  3. iPhone 6 Disable GPS location in photos - Resolved
  4. Samsung Galaxy S7 Edge Add new ringtones - Resolved
  5. Samsung Galaxy Xcover 3 Screenshot - Tip
  6. UFS memory card with Micro SD slot compatible - solved
  7. Samsung Galaxy S7 is sluggish and loads long time – Tip
  8. Samsung Galaxy S6 How to delete dictionary of keyboard - Android 6.0
  9. Alcatel IDOL 4 Which Sim card is required? Solved
  10. Samsung Galaxy S7 Edge How to modify screen mode
Page 182 of 317
  • Start
  • Prev
  • 177
  • 178
  • 179
  • 180
  • 181
  • 182
  • 183
  • 184
  • 185
  • 186
  • Next
  • End


  1. You are here:  
  2. Home

Imprint

Privacy Policy

Privacy and Terms of Google

Sitemap