Solvemix

Suche Spickipedia

  • Home
  • Android Smartphones
  • iOS Smartphones
  • Blackberry Smartphones

YI 4K Action Camera is not found over W-Lan - Solved

Details
Manuel
Android Smartphones
Year 2019

If you just bought your YI 4K Action Camera and want to connect it to your smartphone for the first time or just connect it to the Yi Action Camera App, you might have the problem that the camera can't be found via W-Lan.

The reason for this is usually easy to fix, because the camera or app lacks the following information:

The location. Yes, unfortunately one has to ask oneself for what the YI 4K Action Camera or the App needs to know your location in order to establish a connection between smartphone and camera. But it doesn't help.

The solution is to activate the location information on the smartphone. In Android you just have to drag down the status bar and activate the location information.

Afterwards a connection between your YI 4K Action Camera and your smartphone will be established via W-Lan and you can use the Yi App afterwards.

We hope that this guide has helped you to solve the problem with the YI 4K Action Camera and a connection to your smartphone.

Sony RX100 Underwater White Balance Settings - Tip

Details
Manuel
Android Smartphones
Year 2019

Photos taken with the Sony RX100 underwater with a suitable underwater housing often become bluish when Auto White Balance (AWB) is used. This is because the red colours are filtered out by the water. The deeper you dive, the more bluish the images become.

This is very nice to see in the following picture, which was taken with automatic white balance with the Sony RX100:

Sony RX100 Underwater Image with Auto White Balance

Due to the blue cast the colours of the turtle are not reproduced correctly and therefore one should try to reduce this blue cast effect by means of settings. There are several ways to do this:

1. Use red light filter - attachment for the underwater housing

2. Activate underwater mode --> Not available for Sony RX100 M1 and M2 (from M3 and firmware V2.00 available in white balance options)

3. Set white balance manually --> for Sony RX100 M1

4. Activate creative mode --> Sony RX100 M2

In the following we have described the different instructions for you:

Sony RX100 from M3 - Activate underwater mode

Opens the camera settings and then navigates to White Balance. In the settings for the white balance you will now find the appropriate option "Underwater". Set these.

This will automatically set presets to make the underwater colors look more natural.

Sony RX100 M2 - Set "Low" Creative Mode

With the Sony RX100 M2 you can set the settings to "Creative mode". Here you will find the setting "Low". Activate them to get more beautiful underwater colors that are not so bluish.

Sony RX100 M1 - Adjust White Balance Manually

The Sony RX100 M1 has neither an underwater mode nor a "low" creative mode. Now proceed as follows to adjust the underwater settings. Opens the menu and then the white balance options.

Scrolls all the way down to "Color temperature / Filter

Now sets the following settings:

  • Colour temperature: 9000 K
  • Filter: A-B: B5 and G-M: M7

We hope that these settings will help you to take beautiful underwater photos with the Sony RX100. Please keep in mind, however, that you should always do a test before a dive to make sure that this setting really delivers satisfactory results for you.

This is because influences such as particles in the water, the position of the sun, etc. have a not inconsiderable influence on the white balance settings!

Have fun photographing underwater!

Sony RX100 Activate back button for menu - Tip

Details
Manuel
Android Smartphones
Year 2019

With the Sony RX100 you can of course make various settings. For this purpose, one calls up the camera settings by means of the menu button and afterwards one can change the options for photos and videos.

If you have now made a change, there is no Extra Back button to go one menu level higher again. The result is that you press the menu button again.

However, this has the consequence that you only jump back to the live screen. Annoying, because you have to navigate back through the complete menu.

Fortunately, Sony is aware of this and has therefore integrated a setting with which the menu button of the Sony RX100 can be converted into a back button. Here's how it works:

Sony RX100 Menu Change Button to Back Button

1. Use the menu button to open the settings for the camera

2. Jump to the wrench on the far right and there to the options screen 1 as shown in our photo:

3. Here you can now select "start of menu

4. Set the marker from "Start" to "Back" - Done!

5. Now the menu button will work as a back button within the camera settings, which makes the operation of the Sony RX100 much easier.

We wish you many more beautiful photos with the Sony RX100!

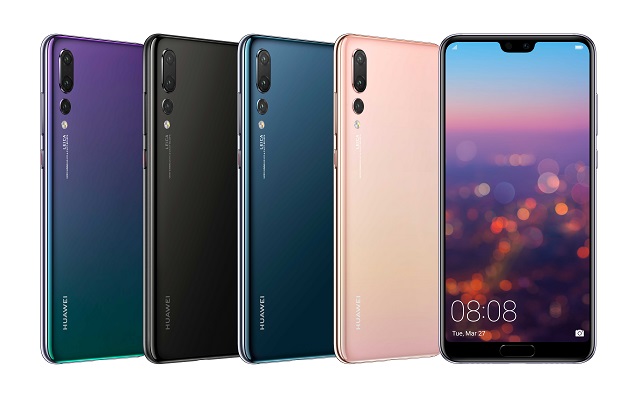
Huawei P20 Pro Smart Lock no function - White display

Details
Manuel
Android Smartphones
Year 2019

On the Huawei P20 Pro there is the option "Smart Unlock" under the device settings, behind which the Google function "Smart Lock" is hidden. This is a useful feature because you can have places, connections or wearing your smartphone rated as safe so that the device is not automatically locked. However, you may suddenly see only a white screen when you open the Smart Lock options.

So of course you can't add new devices or change settings.

So what can you do if Smart Unlock or Smart Lock no longer works on the Huawei P20 Pro? Here is a quick workaround that usually fixes the problem:

Smart Unlock Does Not Work - How To Fix The Error!

Huawei P20 Pro

1. Open the Android settings on the Huawei P20 Pro.

2. Navigate to "Security and Privacy" and then to "More".

3. Now select "Trusted Agents".

4. Deactivate it here with the slider "Smart Lock (Google)”.

  • Deactivate Smart Lock

5. Restart the Huawei P20 Pro.

6. Navigate to the Trusted Agents menu again and activate Smart Lock again.

You can then use and use Smart Lock again.

We hope that this workaround has also helped your Huawei P20 Pro to make the Smart Lock options visible again.

Samsung Galaxy S9 battery runs down very quickly - Help

Details
Manuel
Android Smartphones
Year 2019

If you notice that the battery of the Samsung Galaxy S9 runs out very quickly and the phone gets disproportionately warm or even hot, there is a fault within the Android system.

As a rule, however, this error can be rectified quickly and easily. This is because the files that cause the problem are usually located in the system cache of the smartphone. And you can easily delete it without losing private data like pictures or videos.

You can empty the system cache using a Wipe Cache partition, which means that the battery is not used as much and the battery life increases.

  • The Wipe Cache partition is performed as follows on the Samsung Galaxy S9 - instruction

Then the battery should no longer run out so quickly, but should have a normal endurance time again.

You can read out the condition of the battery if this promises no improvement. Here's how it works:

Read and check battery capacity of Samsung Galaxy S9

Samsung Galaxy S9

1. First download the app "Phone info" from the Google Play Store

  •     Download Phone Info

2. If the app is installed, please open it

3. Switch to the "Personal" tab and you will see the following information at the end:

  • Battery Discharge Cycle (number of deep discharges - where the unit switched itself off automatically)
  • Battery Health (available capacity of the battery - with the S9 should be possible in the new condition nearly 3000 mAh)

Now check at "Battery Health" what the condition of your battery is. This should be nearly 100% when the device is new. After one year the value can be already at 95%. This is quite normal and has little effect in everyday use.

If lower values are displayed, the battery may already be defective. You should then make use of the warranty or have a new battery installed.

You now know two options that you can use when the battery of the Samsung Galaxy S9 runs out very quickly.

Huawei Mate 20 Pro Face Unlock Set up and activate - Tip

Details
Manuel
Android Smartphones
Year 2019

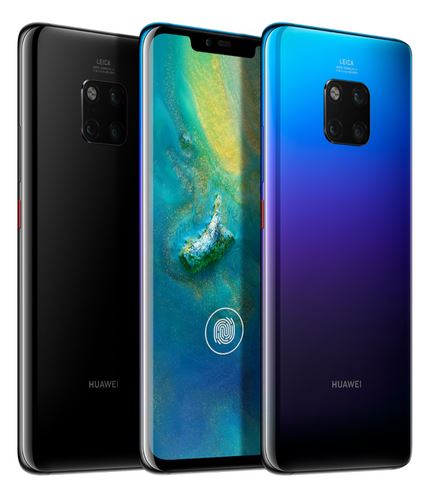
The Huawei Mate 20 Pro offers several options to unlock your smartphone. In addition to fingerprints, pins, passwords and patterns, there is also the so-called "Face Unlock".

With this unlock method, you can unlock the device or the unlock screen by recognizing your face and then use your smartphone.

In this step-by-step guide, we will briefly explain how to set up and use Face Unlock on the Huawei Mate 20 Pro.

Please start as follows:

Set up Face Unlock with wizards

Huawei Mate 20 Pro

1. Open the system settings of Android on the Huawei Mate 20 Pro

2. Now navigate to "Security & Privacy" and then to "Face Unlock

3. Huawei Mate 20 Pro Face Unlock Furniture Wizard

4. The setup wizard for Face Unlock on the Huawei Mate 20 Pro now starts.

5. Make sure that there is enough ambient light when you take a picture of your face in the next steps.

6. Only in this way can Face Unlock be optimally set up and the capture of one's own face optimised.

7. Finish the wizard successfully to use Face Unlock

Face Unlock is now installed on the Huawei Mate 20 Pro and can now be used to unlock the smartphone's lock screen.

The function works very quickly. It is important that the front camera used for Face Unlock is clean. This ensures optimum detection.

Huawei P20 Pro How to Activate Face Unlock - Solved

Details
Manuel
Android Smartphones
Year 2019

The Huawei P20 Pro offers several ways to unlock your smartphone. One of them is Face Unlock. With this unlock method you can unlock the device or the unlock screen by facial recognition of your own person and then use the device.

Activate Face Unlock - Huawei

Huawei P20 Pro

In this guide, we'd like to explain how to set up and use Face Unlock on the Huawei P20 Pro. Please proceed as follows:

1. Open the settings of Android on your Huawei P20 Pro

2. Now navigate to "Security & Privacy" and then to "Face Unlock

3. The setup wizard for Face Unlock on the Huawei P20 Pro now starts.

4. Make sure that there is enough light in the next steps when taking a picture of your face. Only in this way can Face Unlock be optimally set up and the capture optimized.

5. Finish the wizard

Face Unlock is now installed on the Huawei P20 Pro and can now be used to unlock the smartphone's lock screen.

The function works very fast. It is important that the front camera used for Face Unlock is clean. This ensures optimum detection.

Amazon Echo Show Resetting to factory defaults - Instructions

Details
Manuel
Android Smartphones
Year 2019

The Amazon Echo Show should be reset to factory defaults in case of connection or display problems and other serious errors.

In this way, system files are reinstalled and errors that are related to or occur with the operating system are corrected.

But first you should always restart the Amazon Echo Show if you have any problems. As a rule, this already helps to correct the error. Simply remove the cable from the socket, wait approx. 30 seconds, then reconnect the cable.

If there is no improvement, please proceed as follows to reset the Amazon Echo Show to factory settings.

Carry out factory reset - Instructions

1. Speak the voice command "Go to Settings" or wipe the display from top to bottom with your finger, then select "Settings".

2. Speak or select "Device Options

3. Speak or now select "Reset to factory settings".

This will now reset the Amazon Echo Show to factory defaults. You can then set it up again, just as you did the first time after you purchased it.

You now know how to perform a factory reset on the Amazon Echo Show.

Huawei Y5 & Y6 Wipe Cache Partition Perform - Solution

Details
Manuel
Solvemix

Sometimes over time, your Huawei Y5 & Y6 may not run as fast and smoothly as it did at the beginning. The battery may also become hot and quickly empty.

The Wipe Cache Partition usually offers a quick solution here. We will show you step by step how to perform a Wipe Cache partition on the Huawei Y5 & Y6:

Tutorial Wipe Cache Partition

1. Turn off the Huawei Y5 & Y6 completely

2. Then switch on the Huawei Y5 & Y6 again and keep the following key combination pressed simultaneously:

  • Power button
  • Volume Loud Button

3. Press and hold the buttons until the Huawei logo is no longer displayed on the screen and the screen is only black.

4. You can now release the buttons. This will now display the boot menu on your screen after a moment.

5. Now mark the entry "Wipe Cache Partition" with the volume keys of the Huawei Y5 & Y6.

Important!!! Do not accidentally go to "Wipe Cache Factory Reset" <-- This will erase all data on the internal memory.

6. The Wipe Cache partition, on the other hand, will not delete any private data from you.

7. If you have selected the correct entry, confirm this by pressing the Power key. The process will now be performed on your smartphone, which usually only takes about 1-2 seconds.

8. Then the boot menu appears again.

Select "Reboot system now" and confirm by pressing the Power key.

You have successfully run a Wipe Cache partition on the Huawei Y5 & Y6 and hopefully this will speed up the operating system and improve performance.

Huawei Y5 & Y6 screen black and shows no response anymore

Details
Manuel
Android Smartphones
Year 2019

Sometimes it can happen on the Huawei Y5 & Y6 that the screen only shows black, the smartphone shows no reaction and the battery or the back of the case gets hot.

This is rather unfavorable, because the smartphone is on, but can no longer be operated to correct such misconduct. So what remains to make the Huawei Y5 & Y6 work again? We would like to describe this to you in more detail here:

Screen black - The Soft Reset helps

Simply press and hold the following button for at least 15 seconds:

  • Power On/ Off

After the time has elapsed, the display of the smartphone will switch off immediately. Then the device will be restarted and should work exactly as you are used to.

You now know how to wake up the Huawei Y5 & Y6 when it only shows a black display, does not react to inputs and gets hot.

More Articles ...

  1. Huawei Y5 & Y6 How to open Android Easter Egg - Tip
  2. Huawei Y5 & Y6 MMS are not received - Tip
  3. Huawei Y5 & Y6 Reset to factory settings - Guide
  4. Huawei Y5 & Y6 Create Screenshot - Instructions
  5. Huawei Mate 20 Pro Camera Take Photos in RAW - Tip
  6. Show Huawei P20 Pro battery in percent - Solved
  7. Huawei Mate 20 Pro Enable battery in percent in the status bar
  8. Huawei Mate 20 Pro Safe Mode cannot be terminated - Tip
  9. Huawei Mate 20 Pro Master AI for Disable Camera - Solved
  10. Huawei Mate 20 Pro How to Show IMEI - Tip
Page 19 of 317
  • Start
  • Prev
  • 14
  • 15
  • 16
  • 17
  • 18
  • 19
  • 20
  • 21
  • 22
  • 23
  • Next
  • End


  1. You are here:  
  2. Home

Imprint

Privacy Policy

Privacy and Terms of Google

Sitemap