Solvemix

Suche Spickipedia

  • Home
  • Android Smartphones
  • iOS Smartphones
  • Blackberry Smartphones

Samsung Galaxy S7 Hide images in gallery

Details
Manuel
Solvemix
Android Smartphones

Not all the pictures that you have stored on the Samsung Galaxy S7, should be visible or be detectable to everyone. That's why it makes sense to hide those pictures on the Samsung Galaxy S7, so they will not appear in the gallery.

If you do not know how to hide photos on Android on the Samsung Galaxy S7 in the gallery, then we want to explain this in our guide:

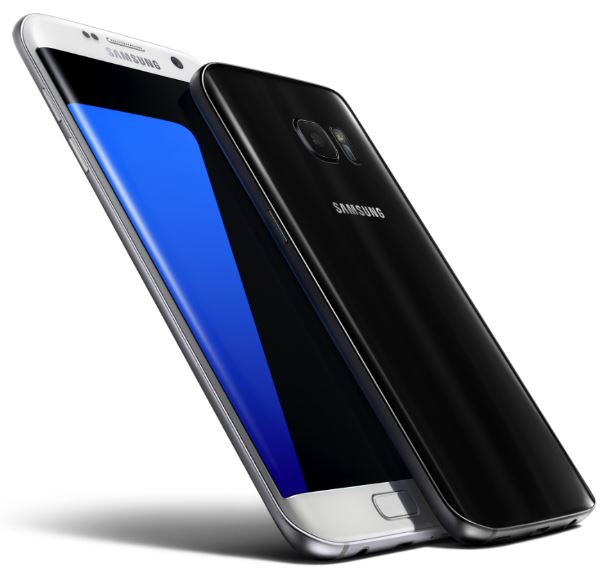
Samsung Galaxy S7

In order to hide pictures on the Samsung Galaxy S7, you must first create a separate folder, for example, the folder "secret”. Then, this folder is made invisible by using a ".nomedia" File.

To perform this operation on the Samsung Galaxy S7 proceed as follows:

1. Open the App "My Documents" and then the folder in which you wish to create the new secret folder

2. Tap now in the top right at "More" and then "Create folder".

3. Move now all the pictures that should be hidden in the gallery in this folder.

4. Download now the "ES File Explorer" on your Samsung Galaxy S7. Download

5. Now open the ES file explorer on the App menu and then navigate to the folder created earlier.

6. Now creates the ".nomedia file" by typing right at the symbol with the three points. Choose "New" -> "file".

7. The new file is: .nomedia

After you have created the file within the folder, the images and videos in it it will no longer appear in the gallery of your Samsung Galaxy S7.

They are now successfully hidden. You know now how to hide images on the Samsung Galaxy S7 in the gallery.

iPhone 6 How to ​​display EXIF data of images

Details
Manuel
Solvemix
Android Smartphones

Every time you take a photo with the iPhone 6 then various data is stored. In the so-called EXIF ​​data of the image information is stored, for example, recording date, recording time, GPS data, ISO, aperture, shutter speed and so on.

Sometimes it can be useful if you can access the EXIF data directly on the iPhone 6. This is not possible with the iOS software. That is why we show you here how to read the EXIF ​​data from images on the iPhone 6:

1. For this please download the app "Photo Investigator" on your iPhone 6 via the iTunes App Store

2. Open then the app, allowing the access to your photos and videos

3. Select a picture you want to view the EXIF ​​data. The EXIF ​​data of the photo is now displayed to you.

You know now which settings have been used on your iPhone 6 to take this picture

Samsung Galaxy S7 How to add Owner information - Solved

Details
Manuel
Solvemix
Android Smartphones

Unfortunately it can happen from time to time that the own smartphone, such as the Samsung Galaxy S7 gets lost.

Therefore it is always advisable to prepare your own device so that it is easier to locate the owner.

Samsung Galaxy S7

For the Samsung Galaxy S7 there is the option to display text on the lock screen. We explain here how to add the „Info about the owner" on the Samsung Galaxy S7.

1. Open from the Home screen the menu and then the Settings

2. Select here the menu item "Device Security" and then "Information and App Shortcut”

3. Tap now on "About owner" and then type in the opening text box your text

4. We recommend the following text: "If found, please call: „YOUR NUMBER alternative" Thanks =)"

5. Save your info

From now on the Info is displayed on the lock screen of the Samsung Galaxy S7. If someone finds your Samsung Galaxy S7, then he can of course don´t unlock the Lock screen, but with the information message about the owner he has now at least one number with which he might reach you.

We hope that this info helps to get your Samsung Galaxy S7 back again when it is lost.

How to uninstall Snapchat in Android – Solved

Details
Manuel
Solvemix
Android Smartphones

If the chat app "Snapchat" is installed on your Android smartphone, but you do not use it, then you want to uninstall this probably after a very short time from your smartphone.

Should you not you know how to uninstall an app on Android, then we would like to explain it here with the Snapchat example.

Delete Snapchat on your Android smartphone:

Snapchat

1. For this, please open the Google Play Store on your Android phone

2. In the Google Play Store, tap in the top left at the bar icon to display the menu

3. In this choose "My apps and games"

4. Search through the list for" Snapchat ". Did you install many apps, you can use the search with the magnifying glass icon. Tap on the corresponding entry.

5. Now select "Uninstall" in the Snapchat info.

Snapchat is now completely removed from your Android smartphone. Then you have the space used by the app again freely available.

Snapchat stopped - Tips for error in Android

Details
Manuel
Solvemix
Android Smartphones

If you have downloaded and installed the app Snapchat on your Android phone, it may happen that the following error message appears on the display, if you want to open the app.

"Snapchat stopped". This error message means that you can no longer open Snapchat and of course also send receive any messages. Should this error appear on your Android smartphone, then usually the following procedure helps:

Open on your Android smartphone the following submenu:

Snapchat

Home Screen --> apps menu --> Settings --> Applications --> Application Manager

Depending on which Android smartphone you possess the above-mentioned path may be slightly different. It is important that you are in the application manager at the end.

Search now for the app "Snapchat". Have you found the entry, open it to show further app information. Now proceed as follows:

Warning !!! This method can delete your Snapchat conversations, unless they are stored in a cloud service or have been secured in a backup manually. Please check first!

Android Lollipop or minor version number:

Tap the following buttons:

  • Force Stop
  • Delete Cache
  • Clear data

Android Marshmallow:

Tap first "Force stop" and then select the menu item "memory". Tap here now:

  • Delete cache
  • Clear data

Now restart your Android smartphone. If you open Snapchat on your phone, then the app should be opened as usual.

Samsung Galaxy photos are blurred and cloudy - Resolved

Details
Manuel
Solvemix
Android Smartphones

When you take with the camera of your Samsung Galaxy smartphone, for example, the S4, S5, S6 or S7 photos, then it may be that these are blurred and indistinct.

Mostly the picture is covered with streaks that rectilinear stretch from one side to another. In general, the cause of such a blurred photo but is not the camera sensor or a technical problem, but rather the lens.

If you hold the smartphone in your hand, it may happen that the camera lens becomes dirty. Usually you notice that too and then wipes only briefly with a finger over it to clean it.

So you see that a dirty camera lens of your Samsung Galaxy can lead to really bad photo results and even more if you try to clean it with a quick wipe. A dirty lens of your smartphone can also be felt by milky photos. So before you think about a hardware defect, please always checks whether the lens of your camera is clean and is not clogged.

We recommend you here a smartphone case, with that the above-mentioned effect cannot occur, because it has a cleansing effect. It is the FITBAG Case. This bag can be seen and bought on Amazon.

  • FitBag Smartphone Case

You know now why the photos you taken with the camera of the Samsung Galaxy smartphone are milky and blurred.

Samsung Galaxy Compass Error 3 – Solved

Details
Manuel
Solvemix
Android Smartphones

If you have installed on your Samsung Galaxy smartphone a compass app, then it can happen at different models that the following error appear when you run the app:

  • Compass Error 3

If an error message appears on your Samsung Galaxy smartphone, then is the cause of the following case:

Your smartphone has unfortunately not the appropriate sensor. Thus a compass app can be used, a magnetic sensor in the device must be installed of course. If this is not the case, then the app can of course not access the data and that's why we issued the above-mentioned error.

Unfortunately, especially cheaper smartphones have no magnetic sensor. Little can be done except to buy a new smartphone, which has installed a magnetic sensor.

We hope you are not too disappointed and still have fun with your Smartphone. At least you know now why the error "Compass Error 3" appears when you open a compass app on your Samsung Galaxy smartphone.

Samsung Galaxy J3 Automatic brightness missing – Resolved

Details
Manuel
Solvemix
Android Smartphones

Who has bought the Samsung Galaxy J3 smartphone will as first thing have a look into the settings of the device.

Here you now may notice that the Samsung Galaxy J3 has not integrated an option for the Automatic Brightness on the status bar and in the display settings. The Auto Brightness is a useful feature, because the smart phone is using a sensor to adjust the brightness of the display automatically to the lighting conditions.

But unfortunately that is the problem. Because the Samsung Galaxy J3 has unfortunately not integrated such a sensor which measures the ambient light intensity.

Thus, it is of course not possible that the brightness is automatically controlled and what is the explanation for the absence of the option in the Android settings in reverse.

You know now why the Samsung Galaxy J3 has integrated not an option for automatic brightness in the settings.

Samsung Galaxy J3 Which Sim card do I need – Resolved

Details
Manuel
Solvemix
Android Smartphones

The Samsung Galaxy J3 stands out from the mass of smartphones with its dual SIM feature out. This means that in the smartphone two different Sim cards can be used at the same time.

Just when you are often abroad or lives on the border of a country, then a dual SIM smartphone like the Samsung Galaxy J3 is ideal to save costs. Have you decided for the Samsung Galaxy J3, but don´t know what Sim card is required for the device, then we want to tell you that here:

The Samsung Galaxy J3 requires for both Sim cards slots the Micro Sim format.

Should you currently own another Sim card format, then you have now the following options to obtain a Micro Sim card for the Samsung Galaxy J3:

1. If your Sim card is too large (Standard Sim):

For this purpose there are so called "Sim card punching" available. A Sim Card punch cutter is similar to a punch and cuts out the correct format from your Sim card. S

Such Sim Card Punching are for small money avalaible on Amazon:

  • Good Sim Card Punching

2. If your Sim card is too small (Nano Sim):

With a Sim card adapter, you can convert your Sim Card to a larger format and therefore use it without problems. Such Sim card adapter sets are also avalaible for example on Amazon:

  • Cheap Sim Card Adapter

3. Alternatively, you can even request from your mobile carrier a new Sim card for the Samsung Galaxy J3, which may be associated with costs.

You know now what Sim card size the Samsung Galaxy J3 needs and how you gain such a format, if you have a non-matching Sim card.

Samsung Galaxy J3 How to create screenshot easily

Details
Manuel
Solvemix
Android Smartphones

The Samsung Galaxy J3 is a very affordable smartphone from Samsung and provides several useful features such as a dual SIM function.

Should you have bought the phone, then you might would like to know how one can create a screenshot. The screenshot is triggered on the Samsung Galaxy J3 easiest as follows:

Trigger screenshot via key combination:

First let you view the content on the Samsung Galaxy J3, which you want to save in the screenshot. Then press the following keys simultaneously and keep them pressed for about 2 seconds:

  • Power On / Off button
  • Home button

If you hold down the right key combination, then the screenshot on your Samsung Galaxy J3 is triggered. This is then stored on the internal memory and will appear in the Gallery app under the folder "screenshots".

You know now how you can easily take a screenshot on the Samsung Galaxy J3.

More Articles ...

  1. Samsung Galaxy S7 WiFi Hot Spot No connection with PC – Solved
  2. Samsung Galaxy S7 Edge How to activate Flash Alert for notifications
  3. Samsung Galaxy S7 display scaling - See more content
  4. Samsung Galaxy S7 Display is in gray color – Solved
  5. Samsung Galaxy S7 Increase contrast font
  6. Samsung Galaxy S7 Heart Rate Monitor - Tips for accurate results
  7. Samsung Galaxy S7 Update offline maps automatically
  8. Samsung Galaxy S7 How to manage Offline Maps in Google maps
  9. Samsung Galaxy S7 How to create collage of your photos - Solved
  10. Pokémon Go GPS signal not found - solution
Page 199 of 317
  • Start
  • Prev
  • 194
  • 195
  • 196
  • 197
  • 198
  • 199
  • 200
  • 201
  • 202
  • 203
  • Next
  • End


  1. You are here:  
  2. Home

Imprint

Privacy Policy

Privacy and Terms of Google

Sitemap