Solvemix

Suche Spickipedia

  • Home
  • Android Smartphones
  • iOS Smartphones
  • Blackberry Smartphones

Sony Xperia XZ3 Compass Calibration – Instructions

Details
Manuel
Android Smartphones
Year 2019

If the compass of the Sony Xperia XZ3 does not work properly anymore, this is usually due to an incorrect calibration of the magnetic sensor.

This can happen over time, as the magnetic sensor is influenced by electromagnetic external influences. The magnetic sensor or compass can be calibrated on the Sony Xperia XZ3 as follows:

Compass Calibration - Instructions

1. Please open the previously installed Compass App on the Sony Xperia XZ3.

2. Swivels the smartphone in front of you in the shape of a lying "8"

3. Then turns the Sony Xperia XZ3 completely around each of its three axes once.

Afterwards the calibration should be finished and the compass should show the correct direction.

If this is not the case, please repeat the above two steps on your Sony Xperia XZ3.

Now the compass app on the Sony Xperia XZ3 should show the right direction again and show you the right direction in Google Maps for example.

Samsung Galaxy S8 Using Home screen in Landscape Mode - Horizontal

Details
Manuel
Android Smartphones
Year 2019

The Samsung Galaxy S8 Home screen can also be used in landscape mode. This means that the home screen is displayed in landscape mode.

So if you hold your phone horizontally, content will be displayed horizontally on the home screen.

This option was not available until now, but was integrated with one of the latest firmware updates on the smartphone. The landscape mode of the Home screen will then look like this:

To be able to display the start screen in landscape mode, you must change the following option in the settings of the Android system or the Samsung Experience interface:

Switch off portrait mode only - Samsung Galaxy S8

Samsung Galaxy S8

1. Press and hold a free space on the start screen

2. The start screen will now shrink and a menu will open at the bottom of the screen- Select here: Home Page Settings

3. Scroll down the menu to "Portrait Mode Only"

4. Deactivate the option by setting the slider to "Off" - this will activate the Home Screen Landscape Mode

You can now display content in landscape format on the home screen of the Samsung Galaxy S8.

Using the Samsung Galaxy S9 Home Screen Horizontally - Landscape Mode

Details
Manuel
Android Smartphones
Year 2019

You can use your Samsung Galaxy S9 in such a way that the Home Screen is also displayed in the so-called Landscape Mode.

This means that if you hold your phone horizontally, the content on the home screen will also be displayed horizontally.

To be able to display the Home screen in Landscape mode, you must change the following option in the Settings:

Deactivate portrait mode only - Samsung Galaxy S9

Samsung Galaxy S9

1. Press and hold a free space on the Home screen

2. The Home screen will now shrink and a menu will open at the bottom of the screen: Home page settings

3. Scroll down the menu to "Portrait mode only"

4. Disable the option - this will activate the home screen landscape mode

5. You can now display landscape content on the home screen of the Samsung Galaxy S9.

Samsung Galaxy S9 Check microphone for defect - Solved

Details
Manuel
Android Smartphones
Year 2019

If you have the feeling that the microphone of your Samsung Galaxy S9 no longer works correctly or does not work at all, you can check this with a special test.

This is usually the case when the person you are calling cannot understand you. The test described below allows the microphone to be checked without interference due to the reduced driver.

The special thing about this microphone test is that it cannot be influenced by apps. However, the test cannot be called via the Android menu, but only via a special menu that is opened by a Samsung service code.

How to open the microphone test on the Samsung Galaxy S9 is explained here:

Perform the Samsung Galaxy S9 microphone test

Samsung Galaxy S9 Hardware

First open the phone app on your smartphone.

Then enter the following code using the numeric keypad:

  • *#0283#

The test window will now open. Mark one of the first two microphone tests.

Then speak something and wait briefly. With a little delay, the speech will then be immediately played back via the Samsung Galaxy S9 loudspeaker.

If you listen to your recording, the microphone of the Samsung Galaxy S9 will work perfectly. If you don't hear anything, there is probably a technical defect.

You should then visit a service shop that is covered by the warranty. You now know how to quickly and easily check the function of the Samsung Galaxy S9 microphone.

Samsung Galaxy S8 microphone no longer works – Test

Details
Manuel
Android Smartphones
Year 2019

If you have the feeling that the microphone of your Samsung Galaxy S8 no longer works correctly or does not work at all, you can check this with a special test.

The special thing about this test is that it cannot be influenced by apps. So only the standard drivers are loaded, which are not overlaid by other apps and applications.

The test cannot be called via the Android menu, but only via a special menu, which is opened by a service code. How to open the microphone test on the Samsung Galaxy S8 is explained step by step:

Open the Samsung Galaxy S8 Microphone Test Menu

Samsung Galaxy S8

1. First open the phone app

2. On your smartphone and enter the following code using the numeric keypad:

  • *#0283#

A test window will now open. Select one of the first two microphone tests.

Then speak something and wait briefly. With a little delay, the speech will immediately be played back over the loudspeaker.

If you hear your recording, the microphone of the device will work. If you don't hear anything, there is probably a technical defect. You should then visit a service shop that is covered by the warranty.

You now know how to check the function of the Samsung Galaxy S8 microphone.

iPhone & iPad Change Apple Pay billing and shipping address

Details
Manuel
Android Smartphones
Year 2019

More and more retailers are accepting Apple Pay. To ensure that your purchase runs as smoothly as possible, it is advisable to enter your address data correctly, such as billing address or different delivery address.

Follow our step-by-step instructions to change your billing and shipping address for Apple Pay.

iPhone & iPad: Change Apple Pay Billing Address

1. Open the settings, then select "Wallet & Apple Pay"

2. Select the card for which you want to change your billing address

3. Near the bottom, tap Billing Address.

4. Select Edit in the upper right corner and tap the address you want to change. Alternatively, tap "Enter new billing address".

iPhone & iPad: Apple Pay Change shipping address

1. Open the settings, then select "Wallet & Apple Pay"

2. Select the card for which you want to change your shipping address

3. Near the bottom, tap Billing address.

4. Select Edit in the upper right corner and tap the address you want to change.

You now know how to change the billing address and shipping address on Apple Pay.

Huawei P20 Pro Leave the display permanently illuminated - Solved

Details
Manuel
Android Smartphones
Year 2019

There are situations in which you would like to leave the display of the Huawei P20 Pro illuminated for a longer time or always.

This is the case when something specific is to be displayed on the screen.

The screen timeout in the Android settings only allows the display to be illuminated for up to 10 minutes. If this is too short for you, then we have a suitable alternative for you here:

Always light up the screen - Huawei P20 Pro

Huawei P20 Pro

1. To do this you must first activate the developer options Instructions to activate the developer mode in Android

2. Open the developer options below: Settings --> System

3. Scroll down the list until you see the following entry: "Leave active"

4. Activate the option with the slider. This means that the display will never go to sleep when charging when your phone is connected to the charger.

This is therefore constantly illuminated.

Samsung Galaxy Note 9 Capture Photosphere – Solved

Details
Manuel
Android Smartphones
Year 2019

If you have used the "Photosphere" or "Little Planet" function on your smartphone in the past, you may miss it on the Samsung Galaxy Note 9.

It's no longer available. But so that you don't have to do without this great function, we have chosen an alternative for you, with which you can take such 360° panorama pictures with the Samsung Galaxy Note 9.

The following apps are perfectly suited for photospheres with the Samsung Galaxy Note 9 and can be recommended:

  • Panorama 360
  • THETA+

These two camera applications can be used to record photospheres with the Samsung Galaxy Note 9.

The captured spheres can then be published on Facebook, Twitter or Instagram. It is also possible to create so called "Little Planets".

Samsung Galaxy S9 display burnt in - test and tips

Details
Manuel
Android Smartphones
Year 2019

Many users are worried that the display of the Samsung Galaxy S9 burns in, so individual pixels no longer shine as intensely as you should normally do.

The reason for this is the OLED display and its special features. So that the display or the individual pixels do not burn into your Samsung Galaxy S9, you should consider a few settings.

These are the following:

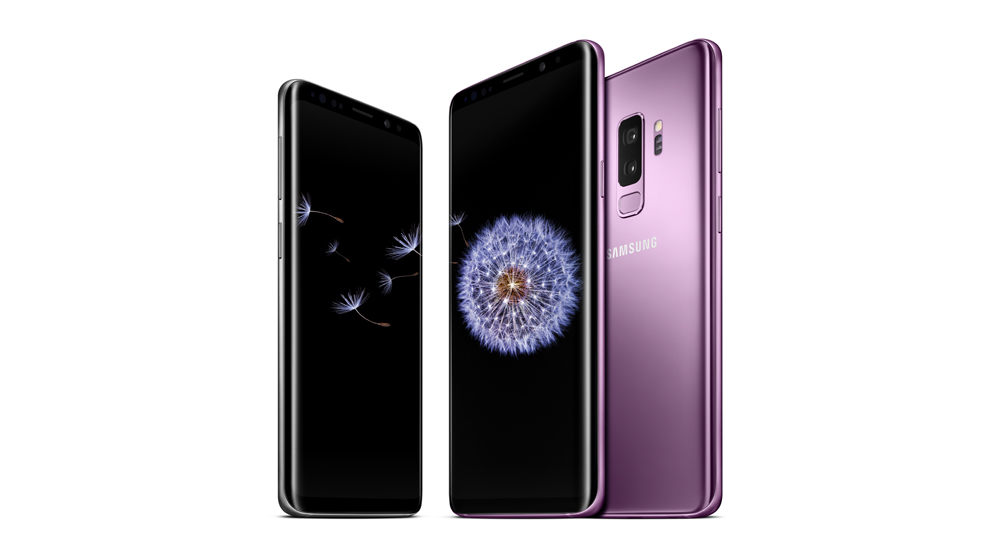
Precautions against the display Burn-in on the Samsung Galaxy S9
Samsung Galaxy S9

1. Do not permanently set the screen brightness to maximum - It is better to activate auto brightness

2. Keep the screen timeout as short as possible - We recommend a maximum of 2 minutes

3. Use dark colors, especially for the background images. This also prevents the background image from burning

4. With apps, such as navigation apps, you should make sure that they do without bright static control elements.

5. This is the case with Google Maps, for example!

If you are concerned that your Samsung Galaxy S9 may already be affected, you can use the following test to check whether individual pixels of the display are already affected:

Check the display for burnt-in areas and pixels - Samsung Galaxy S9

1. Open the phone app from the Home screen.

2. Switch to the keypad. Now enter the following code to access the service menu of the Samsung Galaxy S9:

  • *#0*#

After entering the code, you will see a menu consisting of tiles. In the row at the top you see: Red Green Blue 4. By touching the individual tiles you will see this color on the display.

Since a pixel always consists of "red, green, blue", you can use this test to check whether each color can still be displayed in full color.

If you see discolorations or matt areas on the screen, these are already burnt-in pixels on the screen.

You now know how you can test whether pixels in the display of the Samsung Galaxy S9 are affected by "burn-in" and also what you can set preventively so that your device is not affected.

How to test whether pixels in the display of the Samsung Galaxy S9 are affected by "burn-in"? and also what you can set preventively so that your device is not affected.

Huawei Mate 20 Lite Setting up W-Lan Hot Spot – Manual

Details
Manuel
Android Smartphones
Year 2019

The Huawei Mate 20 Lite has a convenient integrated option that allows you to set up the smartphone as a hot spot.

The Huawei Mate 20 Lite's mobile Internet connection is available via Wi-Fi to other W-Lan-enabled devices, such as laptops, smartphones, etc.

The Wi-Fi connection can be set up as a hotspot for the Huawei Mate 20 Lite. Find out how this works with the Huawei Mate 20 Lite and what settings you need to make in Android to set up the HotSpot here:

Activate Wi-Fi Hotspot - Use Tethering

1. Open Android's settings on the Huawei Mate 20 Lite

2. Navigate to "Tethering & mobile HotSpot"

3. Next, select "Mobile WLAN Hotspot"

4. Activate it by setting the switch to "active"

5. Under "Configure W-Lan HotSpot" you can now change the network name and set a password.

You can also activate the "WPA2 PSK" security method. You can then access the mobile data connection of the Huawei Mate 20 Lite with another W-Lan-enabled device and surf the Internet via it.

Now you know how to activate and configure a W-Lan hotspot on the Huawei Mate 20 Lite and how to surf with other devices.

More Articles ...

  1. DJI Spark switch to 2.4 Ghz mode - increase range
  2. Android Auto - Reply to Messages – How it works
  3. Set Instagram to Private - Instructions
  4. Sony Xperia XZ3 How do I take a screenshot? Solved!
  5. Xiaomi Pocophone Which Sim card do I need? Solution
  6. Sony Xperia XZ3 Which Sim Card Do I Need – Solved
  7. Samsung Galaxy S9 Disable Pin of Sim Card – Disabled
  8. Huawei P20 Pro Disable Sim Card Pin - Tip
  9. Samsung Galaxy S9 Error "Sim card not allowed" – Tip
  10. Huawei Mate 20 Lite Camera Self-timer – Tip
Page 45 of 317
  • Start
  • Prev
  • 40
  • 41
  • 42
  • 43
  • 44
  • 45
  • 46
  • 47
  • 48
  • 49
  • Next
  • End


  1. You are here:  
  2. Home

Imprint

Privacy Policy

Privacy and Terms of Google

Sitemap