Solvemix

Suche Spickipedia

  • Home
  • Android Smartphones
  • iOS Smartphones
  • Blackberry Smartphones

Samsung Galaxy S5 Possible to uninstall Peel Smart Remote? Solved!

Details
Manuel
Solvemix
Android Smartphones

On the Samsung Galaxy S5, the app "Peel Smart Remote" is installed at the factory. Since one of the last updates, it may happen that this app causes increased battery consumption, so you want to uninstall them now from your Samsung Galaxy S5 or delete it.

Unfortunately, this is not possible without root privileges and therefore we would like to introduce the following alternative to you:

Disable Peel Smart Remote App on the Samsung Galaxy S5:

  1. From the home screen, open the App menu and then the settings
  2. Search for Application Manager and open the Entry "Peel Smart Remote"
  3. Now select the button "Disable"! As a result, Peel Smart Remote is no longer active on your smartphone and therefore no longer requires battery power.

You now know that you cannot uninstall Peel Smart Remote on the Samsung Galaxy S5, but how to disable the app.

Samsung Galaxy Note 8 How to Reset to factory settings

Details
Manuel
Solvemix
Android Smartphones

Sometimes it is necessary that you reset the Samsung Galaxy Note 8 to factory settings. This happens with a so-called factory reset. The entire system of the smartphone will be reset to the settings that were available at the time of delivery.

You should reset your Samsung Galaxy Note 8 to factory settings if you notice serious errors and problems in the Android operating system, such as high battery consumption, strong Heat development, crashes or sudden reboots of the device.

But even if you sell the Samsung Galaxy Note 8, you should definitely reset the device to factory settings, as this is the only way your entire data is completely deleted. A factory reset, also called a hard reset, can be carried out as follows via the Android operating system of the Samsung Galaxy Note 8:

Back up all the data you need later - ATTENTION - all data will be deleted by a factory reset on the smartphone.

  1. Now open from the home screen the App menu and then the settings
  2. Now open "General Administration" -> "Reset"
  3. Now tap on "Reset factory settings" - Done!

The assistant will now appear, guiding you through the factory reset process on the Samsung Galaxy Note 8. The smartphone will restart and the Android Setup Wizard will appear.

You now know how to reset the device to factory settings and delete all data within the Android operating system on the Samsung Galaxy Note 8.

Get the Samsung Galaxy Note 8 IMEI - Tip

Details
Manuel
Solvemix
Android Smartphones

Every smartphone, including the Samsung Galaxy Note 8, has its own IMEI number. This number can be compared to a serial number, because it is awarded worldwide only once per device. If you would like to know what the IMEI is for your Samsung Galaxy Note 8, read this article to find out.

Find out IMEI of the Samsung Galaxy Note 8 in Android

To do this, please start from your start screen and then open the following submenu:

Settings -> Device Information -> Status -> IMEI Information

Under "IMEI" you will now see the information you require.

Alternatively, you can also find the SN using the following method:

Find the IMEI of the Samsung Galaxy Note 8 via code

Open the phone app and in this the numeric field. Then enter this code: *#06#

This code will now show a small window with your IMEI.

Look at the IMEI of the Samsung Galaxy Note 8 on the packaging

On the packaging of the Samsung Galaxy Note 8 you will also find a large sticker on there the IMEI is visible on closer inspection. Again, you can easily look it up.

Samsung Galaxy S8 Rename Album within Gallery - Solved

Details
Manuel
Solvemix
Android Smartphones

Once you've sorted your photos and videos on the Samsung Galaxy S8 in the Gallery app into albums, then of course you may want to rename an already created album because the folder name might not be so up to date.

How exactly does this work on the Samsung Galaxy S8 in the gallery app, we would like to explain in more detail below:

Rename albums in the gallery of the Samsung Galaxy S8

Samsung Galaxy S8

1. Open the Gallery app on the Samsung Galaxy S8

2. Press and hold your finger for a long time on the album you want to rename - this should now be highlighted

3. Tap the three-dot icon in the top right corner and then select "Rename" - enter a new album name

That's it already. You now know how to rename an album in the Gallery app on the Samsung Galaxy S8.

Please note that folders like "Camera" or "Download" cannot be renamed.

Samsung Galaxy Note 8 Uninstall App - Instructions

Details
Manuel
Solvemix
Android Smartphones

You can install new apps on the Samsung Galaxy Note 8 via the Google Play Store or the Amazon App Market. Some of these newly installed apps will most likely be removed from the device at some point or deleted.

If you do not know how exactly this works on the Samsung Galaxy Note 8, we would like to explain this to you in more detail.

Uninstall applications on the Samsung Galaxy Note 8:

Delete App on the Samsung Galaxy Note 8 via the App menu

Simply open the App menu from the start screen and tap on the app for a long time, which you would like to delete. A pop-up menu appears. Tap "Uninstall".

Remove App from the Google Play Store

To do so, open the Google Play Store and then navigate to the top left corner of the three-line icon (Hamburger Menu) in the menu. Select "My Apps and Games" here. Under "Installed" you will find all the apps that are currently installed on the Samsung Galaxy Note 8. Tap on an app and then select the "Uninstall" button.

Uninstall App from the Application Manager

Open the App menu and then: Settings -> Apps

You will now see all applications installed on your Samsung Galaxy Note 8. Tap an application and then go to "Uninstall". Finished!

You've come to know three different methods on the Samsung Galaxy Note 8 to uninstall an app or application. Have fun with your Samsung Galaxy Note 8.

Samsung Galaxy Note 8 Perform soft reset when display is black

Details
Manuel
Solvemix
Android Smartphones

There are various errors on the Samsung Galaxy Note 8. One of them is that the smartphone only displays a black screen and no longer responds to inputs via the touch display, or via the buttons.

The solution to this problem is: Soft Reset

Soft Reset is a reboot that has the same effect as removing the battery from the smartphone for a short time, thus interrupting the power supply. Since you cannot remove the battery in the Samsung Galaxy Note 8, this means that the soft reset is the only solution to fix a mistake like the black screen.

And this is how the Soft Reset on the Samsung Galaxy Note 8 is made:

  • Press and hold the power on / off button on the Samsung Galaxy Note 8 for about 12 seconds

After the time expires, the smartphone will automatically restart.

This tip always helps, even if the Samsung Galaxy Note 8 does not respond to input otherwise.

You now know what to do if the Samsung Galaxy Note 8 stops responding to input and the screen shows only a black image.


Samsung Galaxy Note 8 How to calibrate Compass – Instructions

Details
Manuel
Solvemix
Android Smartphones

The Samsung Galaxy Note 8 has many different sensors integrated, including the magnetic sensor, which is important for the compass function. Now you may find that the compass app, which is located in the sidebar in the "Quick Tools" for example, shows you the wrong direction.

If that is the case with you, then you should definitely calibrate the compass. This works on the Samsung Galaxy Note 8 as follows:

We recommend calibrating using Samsung's secret service menu. Here's the best way to see if the calibration works because there is an indicator:

From the Home screen, open the Phone app and the keypad.

Now enter the following code: *#0*#

This will now open the test menu of the Samsung Galaxy Note 8. Click here on the tile with "Sensor" and then scroll down in the next menu. You now see an entry with "Magnetic Sensor" and below it a circle with a line and a number behind it. This has the following meaning:

  • Red line with a 0 = The compass sensor must be calibrated
  • Blue line with a 3 = The magnetic sensor is calibrated.

Now to calibrate the compass, rotate the Samsung Galaxy Note 8 once around all its three axes. Do this until the circle shows a blue line and a 3.

Only then your compass is calibrated. Any compass app that now accesses the magnetic sensor on the Samsung Galaxy Note 8 should now show the correct direction. So you have successfully performed the calibration of the magnetic compass on the Samsung Galaxy Note 8.

If it does not work, the calibration will be done outdoors in the open air, where the least amount of disturbances will may influence the calibration.

Samsung Galaxy S8 How to Copy App with data and settings from other Android device

Details
Manuel
Solvemix
Android Smartphones

If you have bought the Samsung Galaxy S8 and now want to make a backup of a special app from your old Android smartphone, then of course, the content that you have stored in it should also be transferred.

However, this does not work with the conventional method. That would mean apps with scores or other data you maintained would simply reset to zero and your data would be lost. So that does not happen, we have here a fitting tip for you, how to save the app data also and transfer from an old Android smartphone to the Samsung Galaxy S8.

Importing your data from apps works with the free Google Play Store app "Helium Backup"
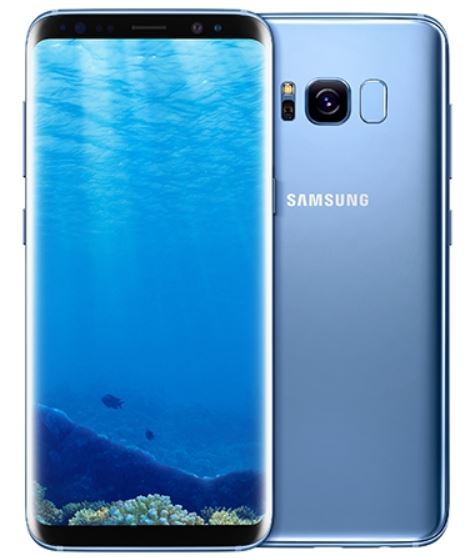
Samsung Galaxy S8

You have to download this app first. Here is the official link to the Google Play Store:

  • Helium Backup

In addition to this app, you still need the software on the PC, where the data is cached. These are available from the official "Github" homepage.

Saving the App Settings and Data with Helium Backup

Now you can start:

If you have both programs installed, connect your old Android smartphone to the computer. Launch helium on the old Android smartphone and the helium software on the PC. Now navigate to Menu -> Helium on your Android smartphone and open the app.

This will prompt you to enable the USB debugging mode. Activate the USB debugging mode. You will now be connected to the computer, confirm the query of your computer with "ok". Now you're connected to your PC and you can start backing up your apps data.

You can now use the "Backup" tab in Helium on your Android smartphone to select the apps whose data or scores, entries, etc. are to be saved. Put a check in the checkbox behind every app to be backed up, such as Clever-Fueling. Once you have made your selection, select "Save".

A query for the location appears. Select "Internal memory" here! Tap "Ok" and the backup starts. A message with "Apps fully backed up" will appear on the display of your old Android smartphone. Finished!

You have now successfully backed up all app data from your old Android smartphone. Now open the internal memory of your smartphone via your PC and copy the folder "Carbon" to the desktop of your PC. Now connect your Samsung Galaxy S8 to the PC and then copy the file "Carbon" (your newly created backup of the game data) to the top level of your internal memory.

Now open again helium backup on the PC and then on the Samsung Galaxy S8. Again, USB debugging must be enabled! You can now tap "Restore" and select the apps that you want to transfer to the Samsung Galaxy S8. Done!

Now you have successfully transferred all of your app data from an old smartphone to the new Samsung Galaxy S8.

Android - Does my smartphone support OTG? Test it

Details
Manuel
Solvemix
Android Smartphones

If you would like to use an adapter for USB devices on your Android smartphone via the Micro USB or the USB Type C port in order to access USB sticks, external USB cameras, memory etc., then you will need OTG for this.

OTG stands for "On the Go" and is a standard for plugging in and using USB devices on micro USB ports.

Unfortunately, not all Android smartphones support USB OTG and therefore you should check whether your smartphone supports this:

There are the following useful app in the Google Play Store:

  • USB OTG Check

If you have this installed on your Android smartphone, then this opens and leads you through the OTG test. If this is positive and your device is compatible, then you can connect USB sticks etc. to the Micro USB port of your Android smartphone.

If OTG is not supported, then this nice option is unfortunately denied you.

You now know how to check if OTG devices can be connected to the Android smartphone.

What is the safe mode of my Samsung Galaxy smartphone?

Details
Manuel
Solvemix
Android Smartphones

You may have heard of the so-called secure mode in connection with your Android smartphone from the Samsung Galaxy series, but you cannot imagine anything specific about it.

This is not a problem, because we would like to briefly explain to you here what the safe mode of a Samsung Galaxy smartphone with Android is all about.

Explanation:

If the safe mode is activated, then at system startup only the Android system itself is loaded with the apps, which are factory-integrated in the firmware. This means that third-party apps and widgets from the Google Play Store cannot be loaded into the interface and will not run.

Advantage:

The advantage is that possible errors that originate from a third-party app can be bypassed in this way. So it creates a test environment, which loads only the most necessary data of the Android system.

If the system is running fine in Safe Mode, but not in Normal Mode, then it is most likely due to an app or third-party widget. You must now locate this app. It helps to think about which app has been installed in the past.

A wipe cache partition can also help here.

Activate Safe Mode:

Switch off the Samsung Galaxy completely. Press and hold the following keys:

  • Power Button
  • Volume Down

The volume down key must be pressed until the Galaxy smartphone has completely booted the Android OS. The power button can be released after the start. Once Android is loaded, you will see a note in the bottom left corner:

"Safe Mode" - This means that it is now active. You now know what the Safe Mode is for on a Samsung Galaxy smartphone, what advantages it offers and how to activate it in Android.

More Articles ...

  1. Samsung Galaxy Note 8 Add new page to your home screen
  2. Samsung Galaxy Note 8 How to Insert the Sim Card - Instructions
  3. Samsung Galaxy Note 8 Delete Widget from home screen – Solved
  4. Samsung Galaxy Note 8 How to add Widget to Home screen
  5. Samsung Galaxy Note 8 How to save photos directly to the memory card
  6. Samsung Galaxy Note 8 display black and no response - first aid
  7. Samsung Galaxy S8 Recover Deleted Pictures – Tip
  8. Samsung Galaxy Note 8 Unlock Developer Options - Solved
  9. Samsung Galaxy Note 8 What Sim Card is needed - Solution
  10. Netflix error code list - Whoops, something went wrong
Page 135 of 317
  • Start
  • Prev
  • 130
  • 131
  • 132
  • 133
  • 134
  • 135
  • 136
  • 137
  • 138
  • 139
  • Next
  • End


  1. You are here:  
  2. Home

Imprint

Privacy Policy

Privacy and Terms of Google

Sitemap